저장 장치 추가하기
생성된 EC2 인스턴스에는 운영 체제를 지원하기에 충분한 저장 용량을 갖춘 루트 볼륨과 분석을 지원하는 데 필요한 몇 가지 추가 애플리케이션이 있습니다. 이제 다운로드하려는 대용량 데이터 세트(예: Raw reads, aligned sequences 등)를 수용하기 위해 추가 스토리지가 필요합니다. 따라서 추가 스토리지를 연결해야 합니다.
In이 this섹션에서는 section다음과 we같이 will:설명합니다:
a. Create an EBS(Elastic Block StoreStore) (EBS)볼륨을 volume.생성합니다.
b. Attach새 the new volume to an볼륨을 EC2 instance.인스턴스에 연결합니다.
c. Format새 and볼륨을 mount포맷하고 the new volume.마운트합니다.
1. Format파일 the시스템으로 new새 volume볼륨을 with a filesystem.포맷합니다.
2. Mount볼륨을 the마운트하고 volume일부 and데이터를 copy some data into it.복사합니다.
CREATE AN EBS VOLUME볼륨 만들기
-
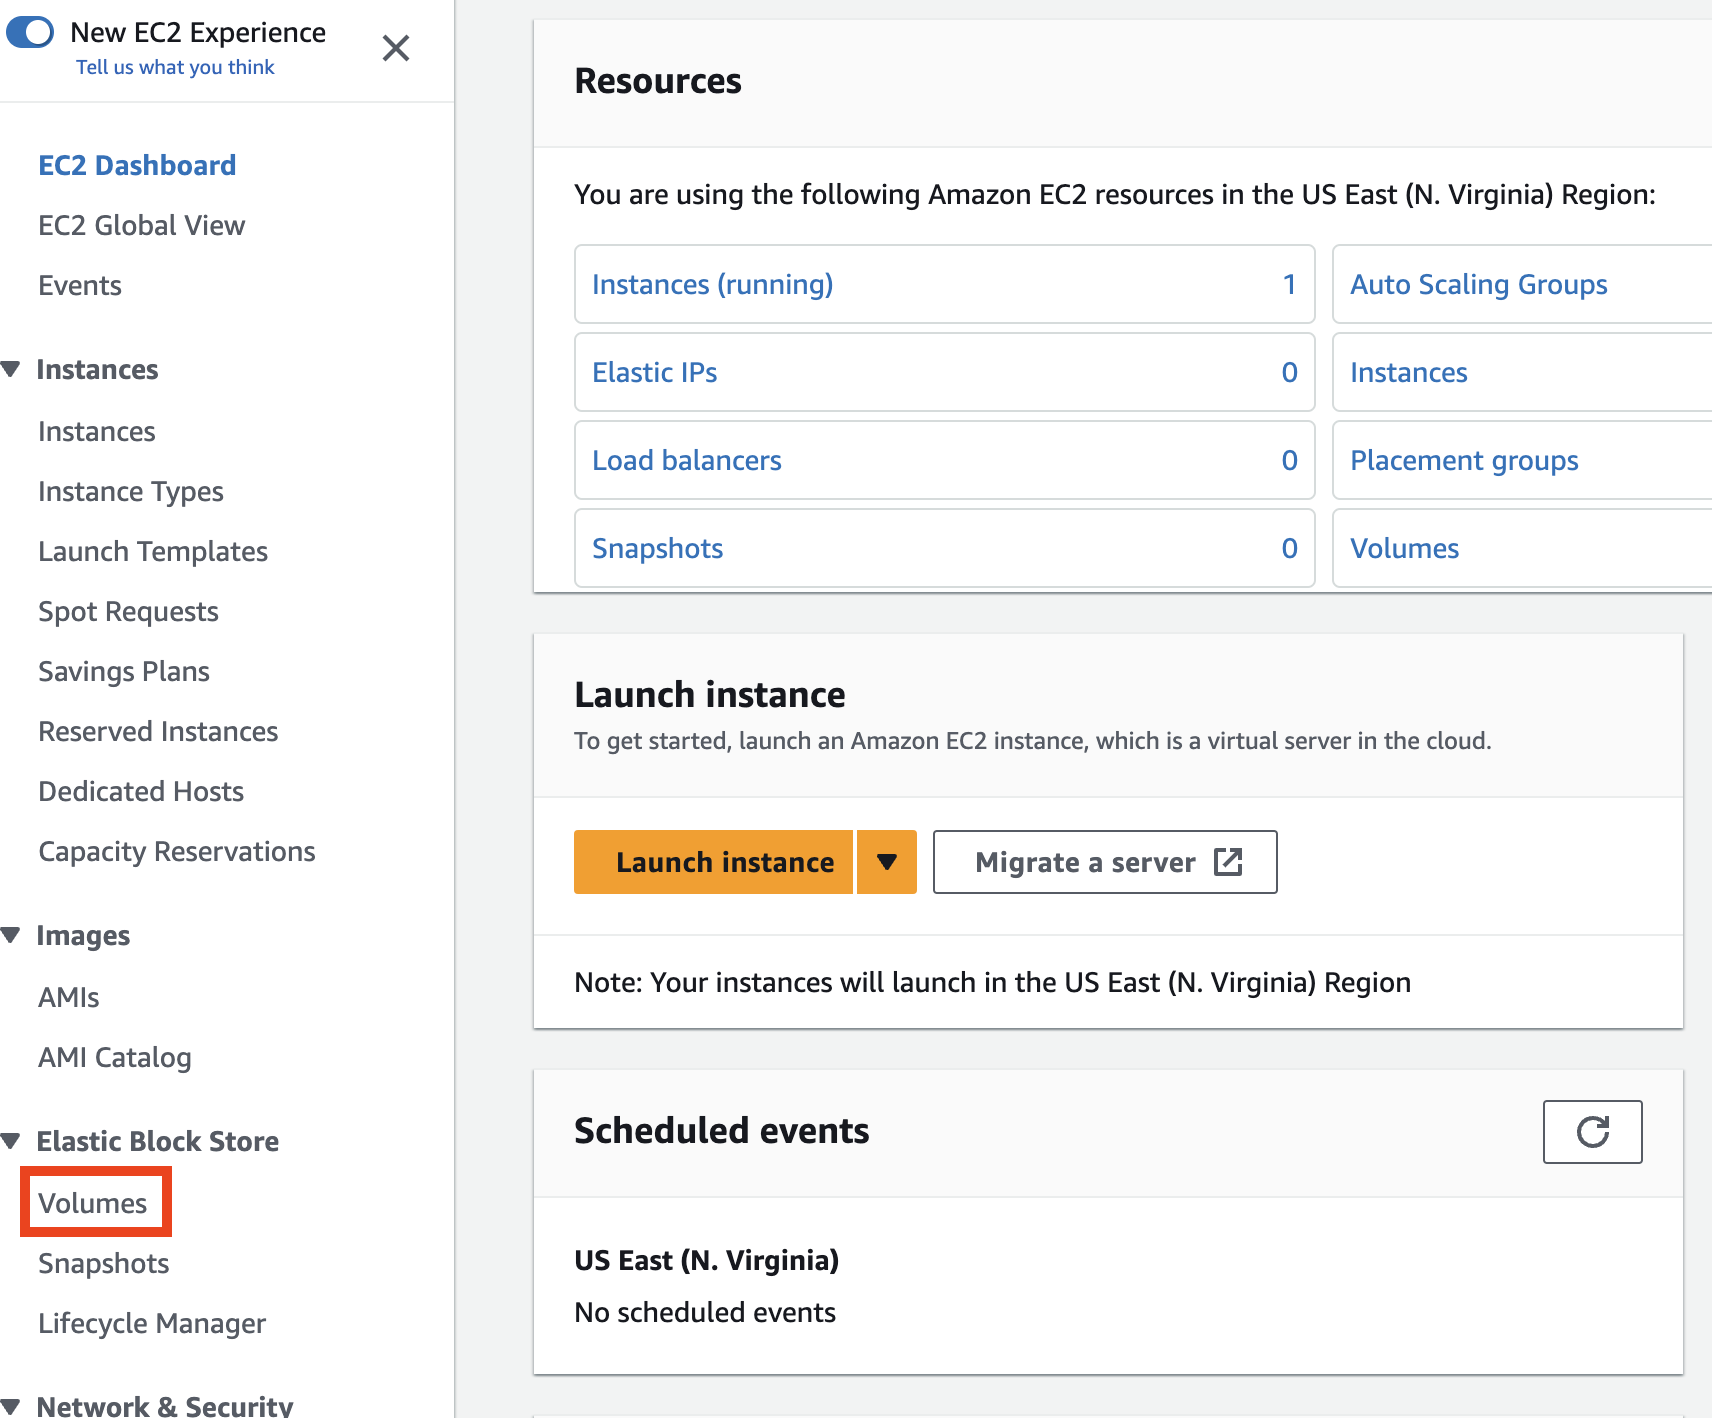
In theAWSManagement관리Console콘솔search검색bar,창에typeEC2를 입력하여 EC2to서비스로navigate이동합니다.tothe EC2 Service. -
On왼쪽the탐색Left Navigation Bar click onVolumesunder표시줄에서 Elastic Block Store
아래의 Volumes을 클릭합니다.
-
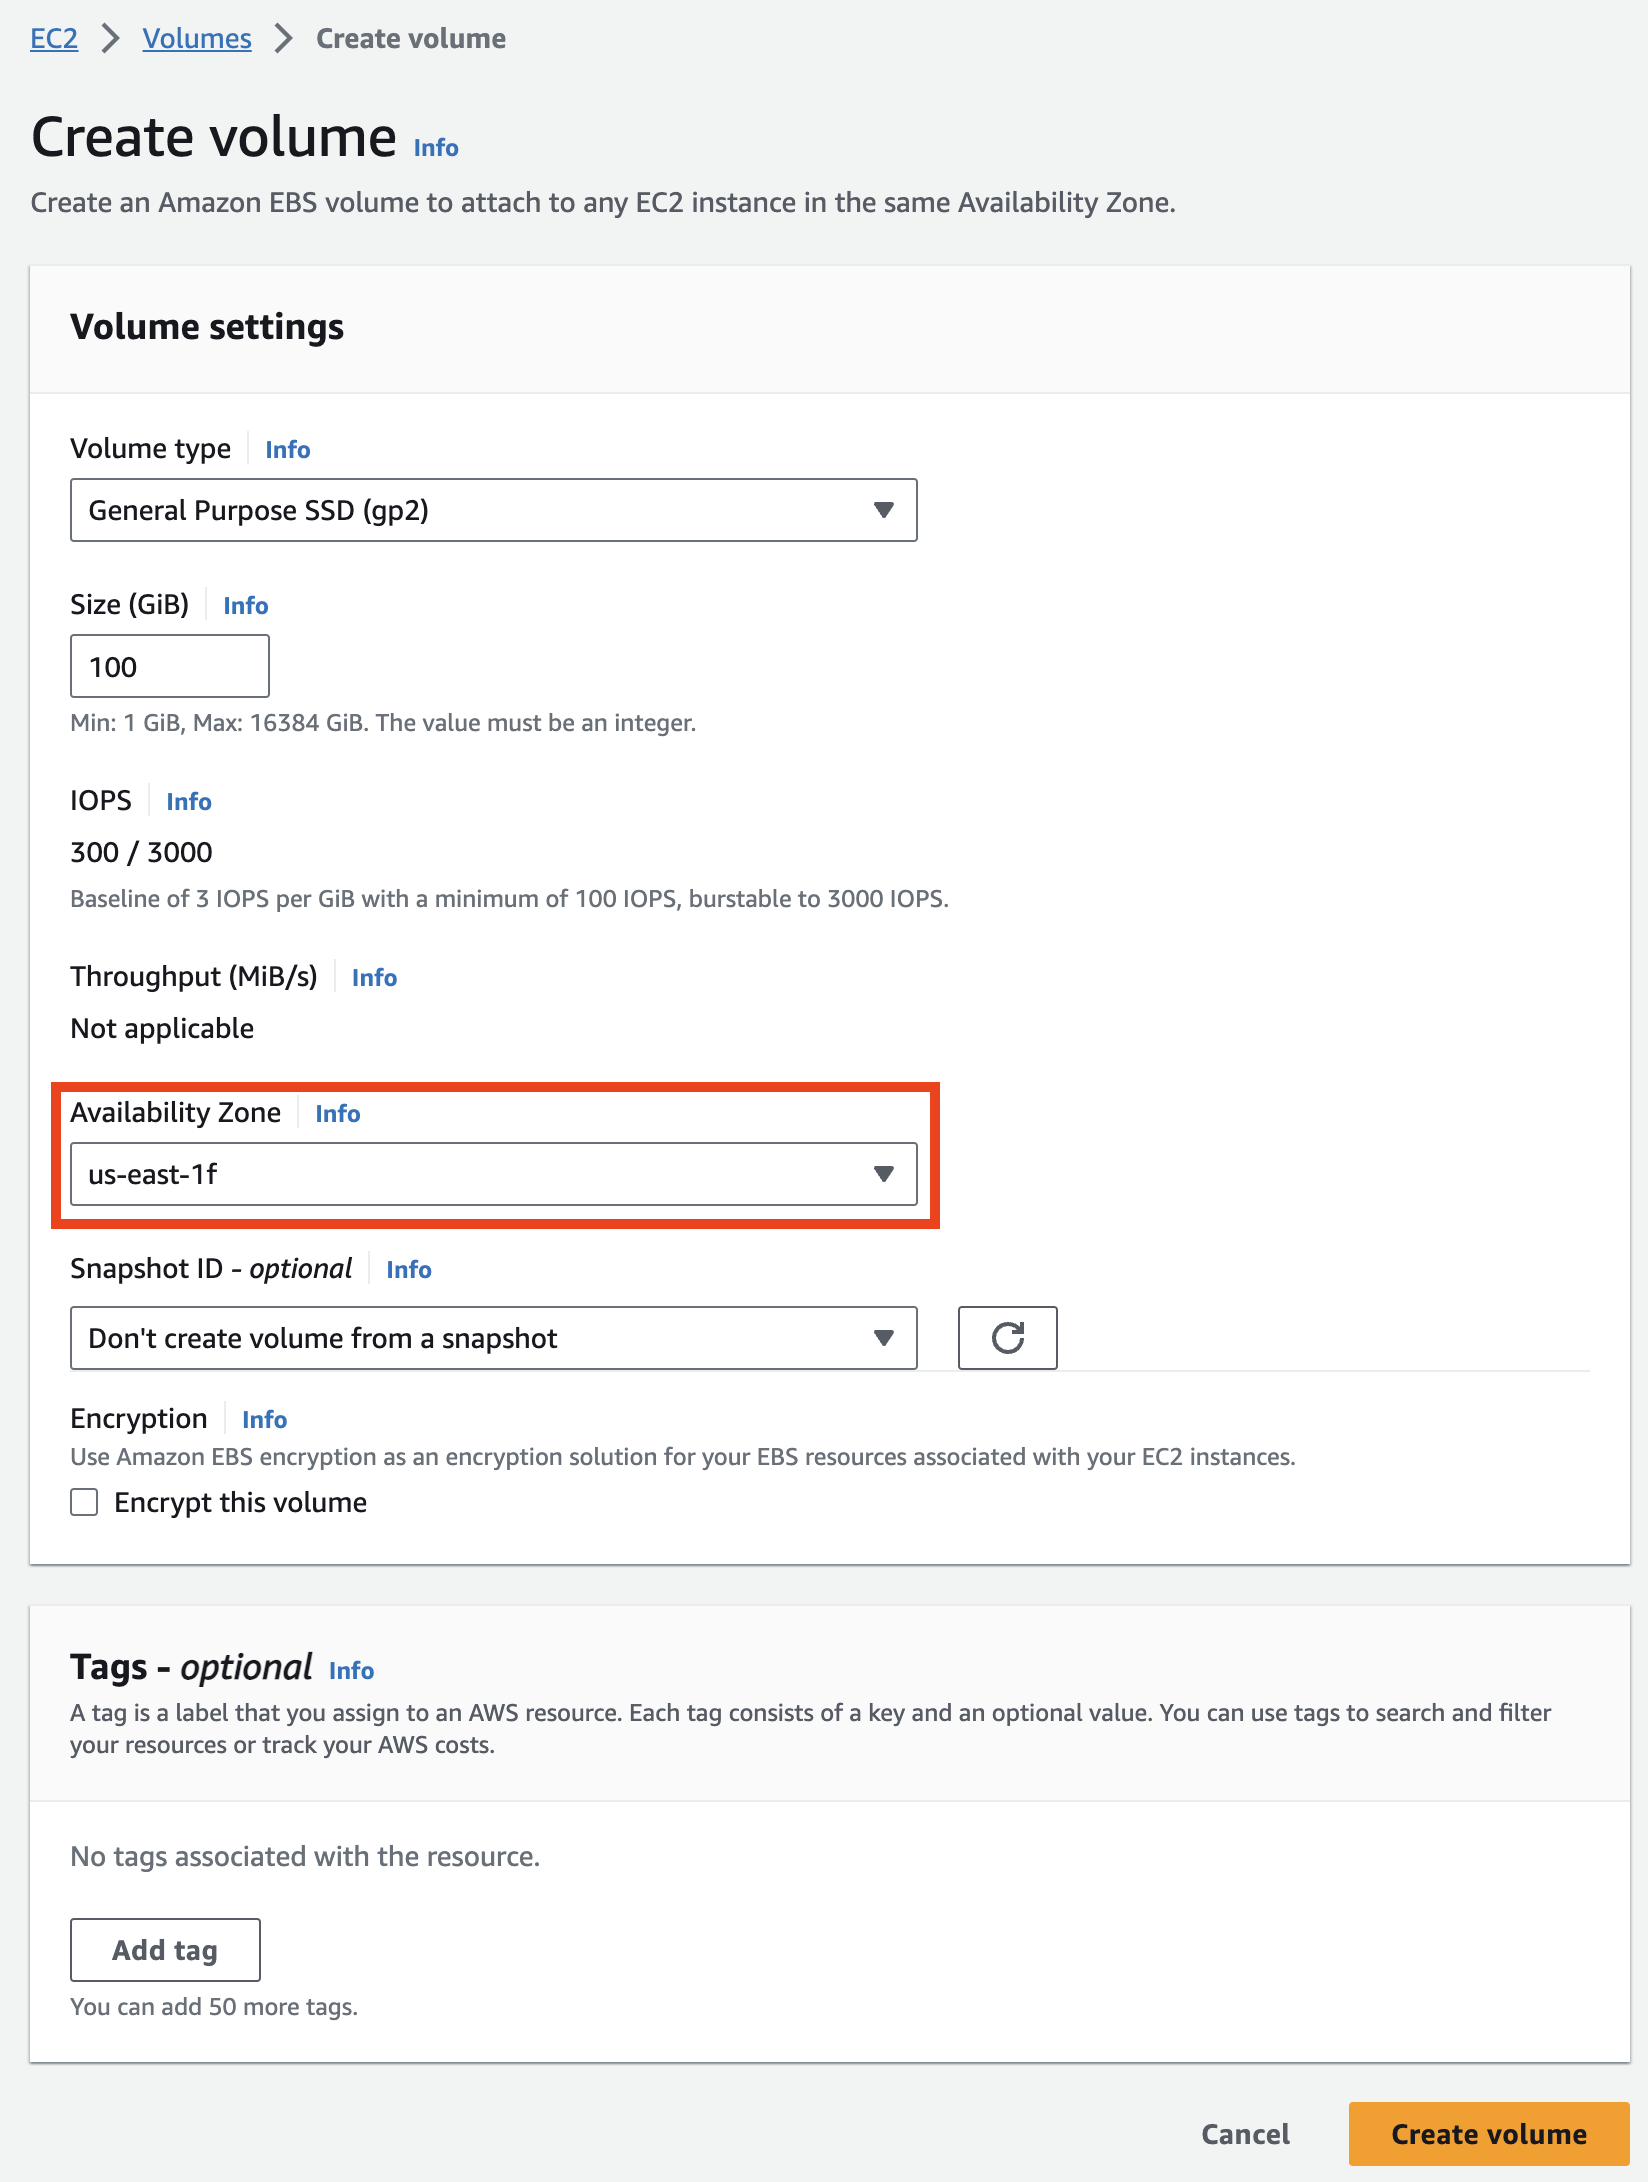
Click onCreate Volume (on오른쪽the상단top모서리)를right클릭하여corner)새to볼륨을create만듭니다.anew volume -
In theCreate Volumepage페이지에서fill볼륨의out필요한the크기(예:required데이터size세트of크기에the따라volume10GBin GB, e.g. 10이상)를 GBor단위로more depending on the data set size.입력합니다.
NOTE:이For실습에서는the10GB면purposes of this lab 10 GB will suffice.충분합니다.Important중요:: Make sure theAvailability Zoneis이the볼륨을same as the연결할 EC2instance인스턴스와you동일한지are going to attach the volume to.확인하세요.

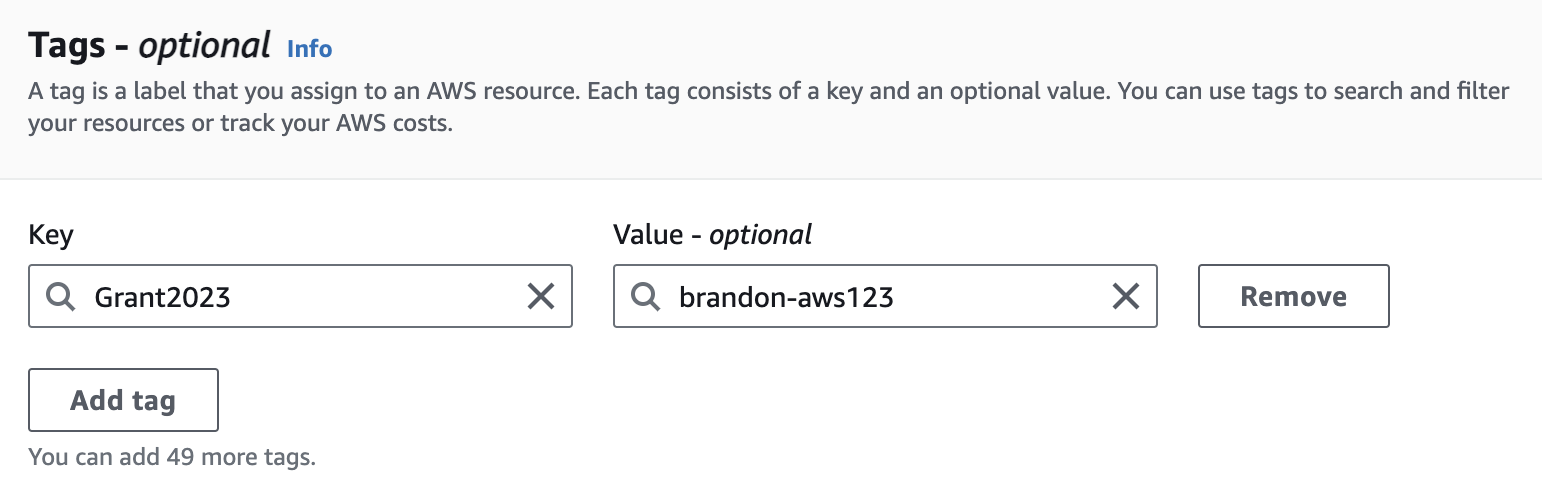
Click onAdd Tag를to클릭하여uniquely리소스에tag고유한the태그를resource.지정합니다.Provide키에“Name”'이름'을for입력하고the값에Keyand “'[your initials]-EBS”EBS'를for the value.입력합니다.
Attach실행 an중인 인스턴스에 EBS Volume볼륨 to a running Instance연결하기
-
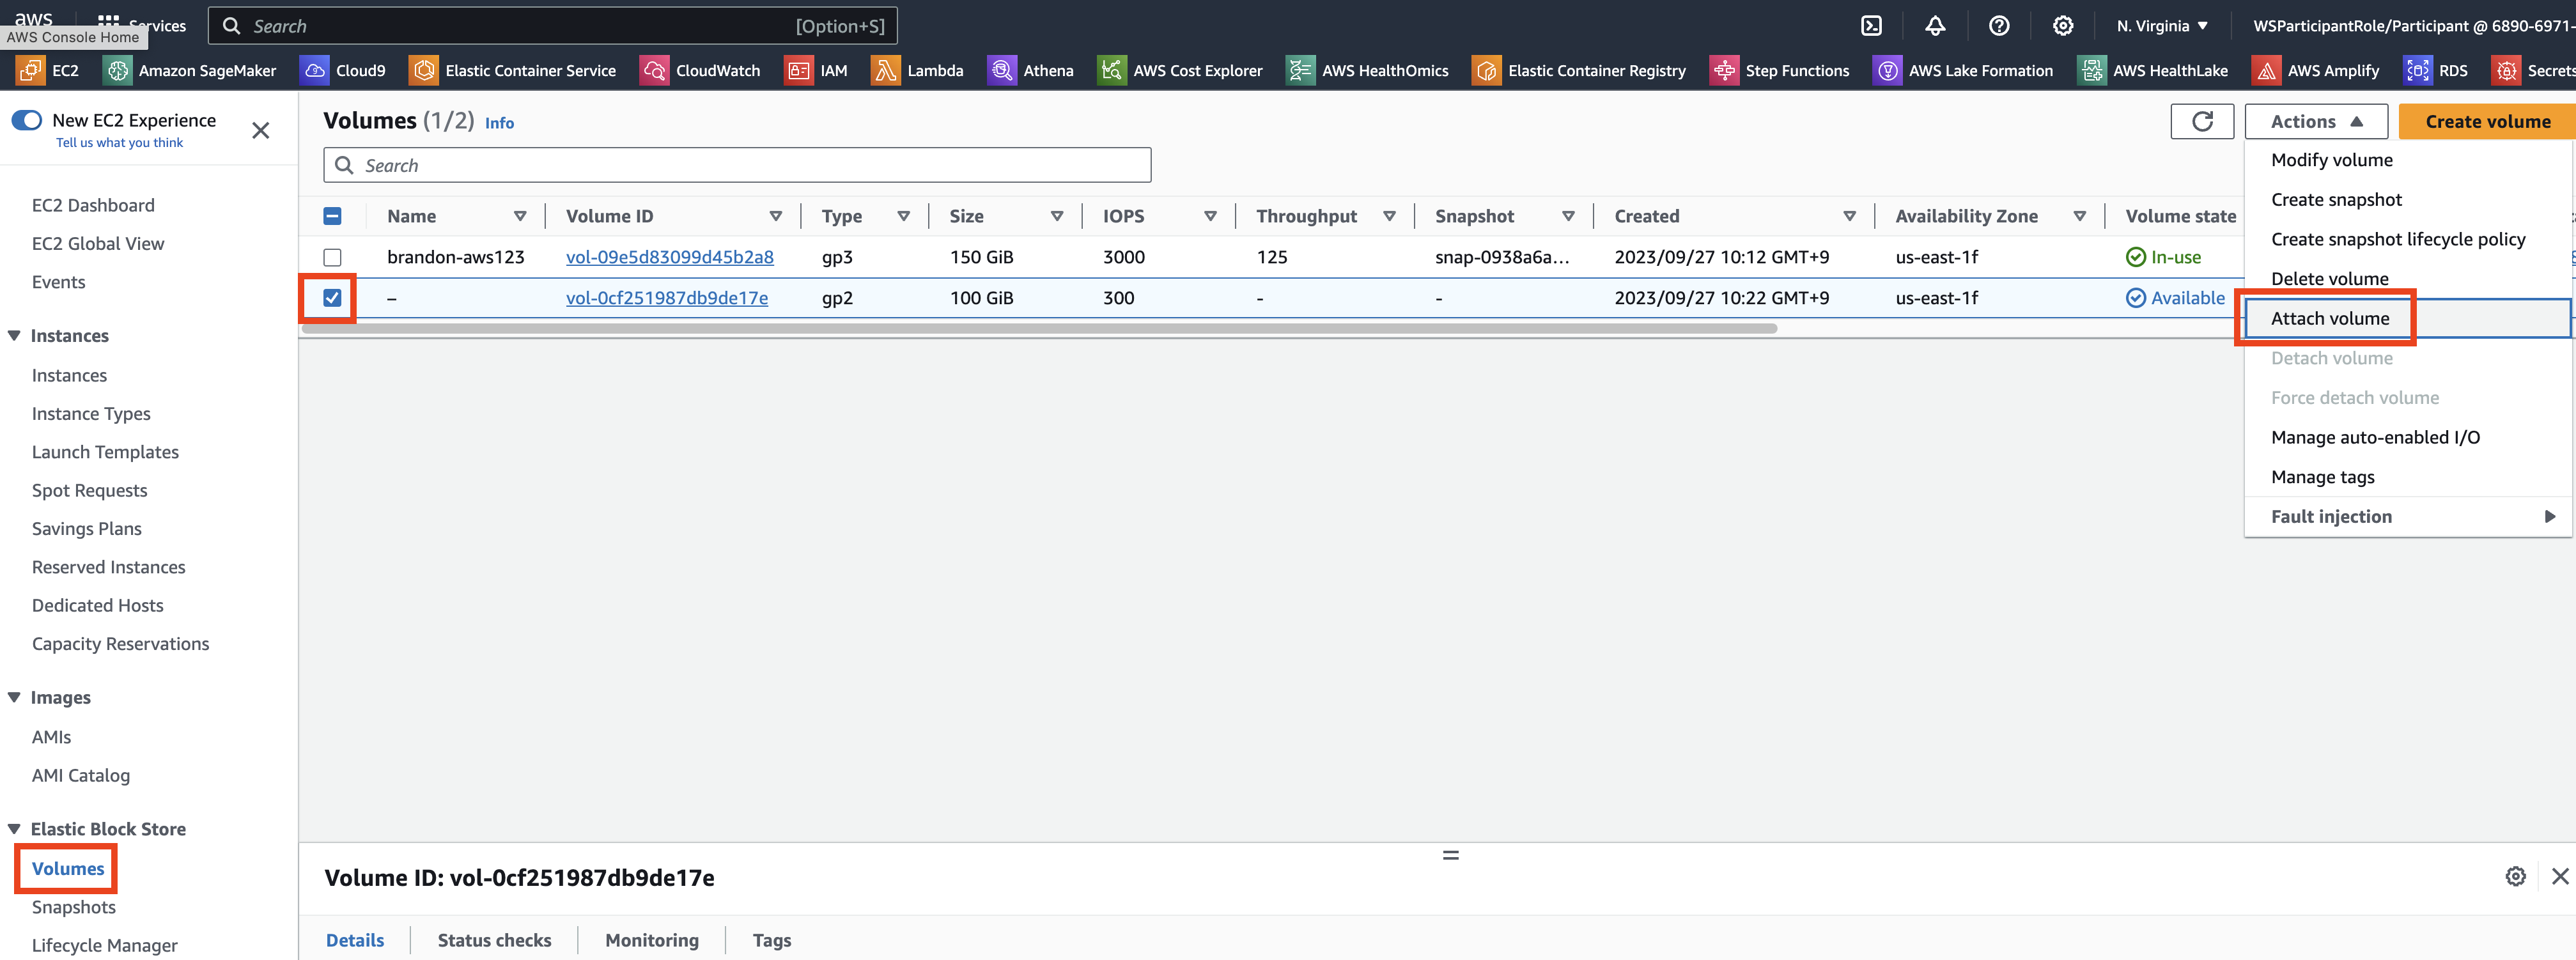
On the Left Navigation Bar click on Volumes under Elastic Block Store to view all the volumes. Select your newly created volume searching the list for the unique Name tag provided in the previous step.

-
Click on Actions and further click on Attach Volume
-
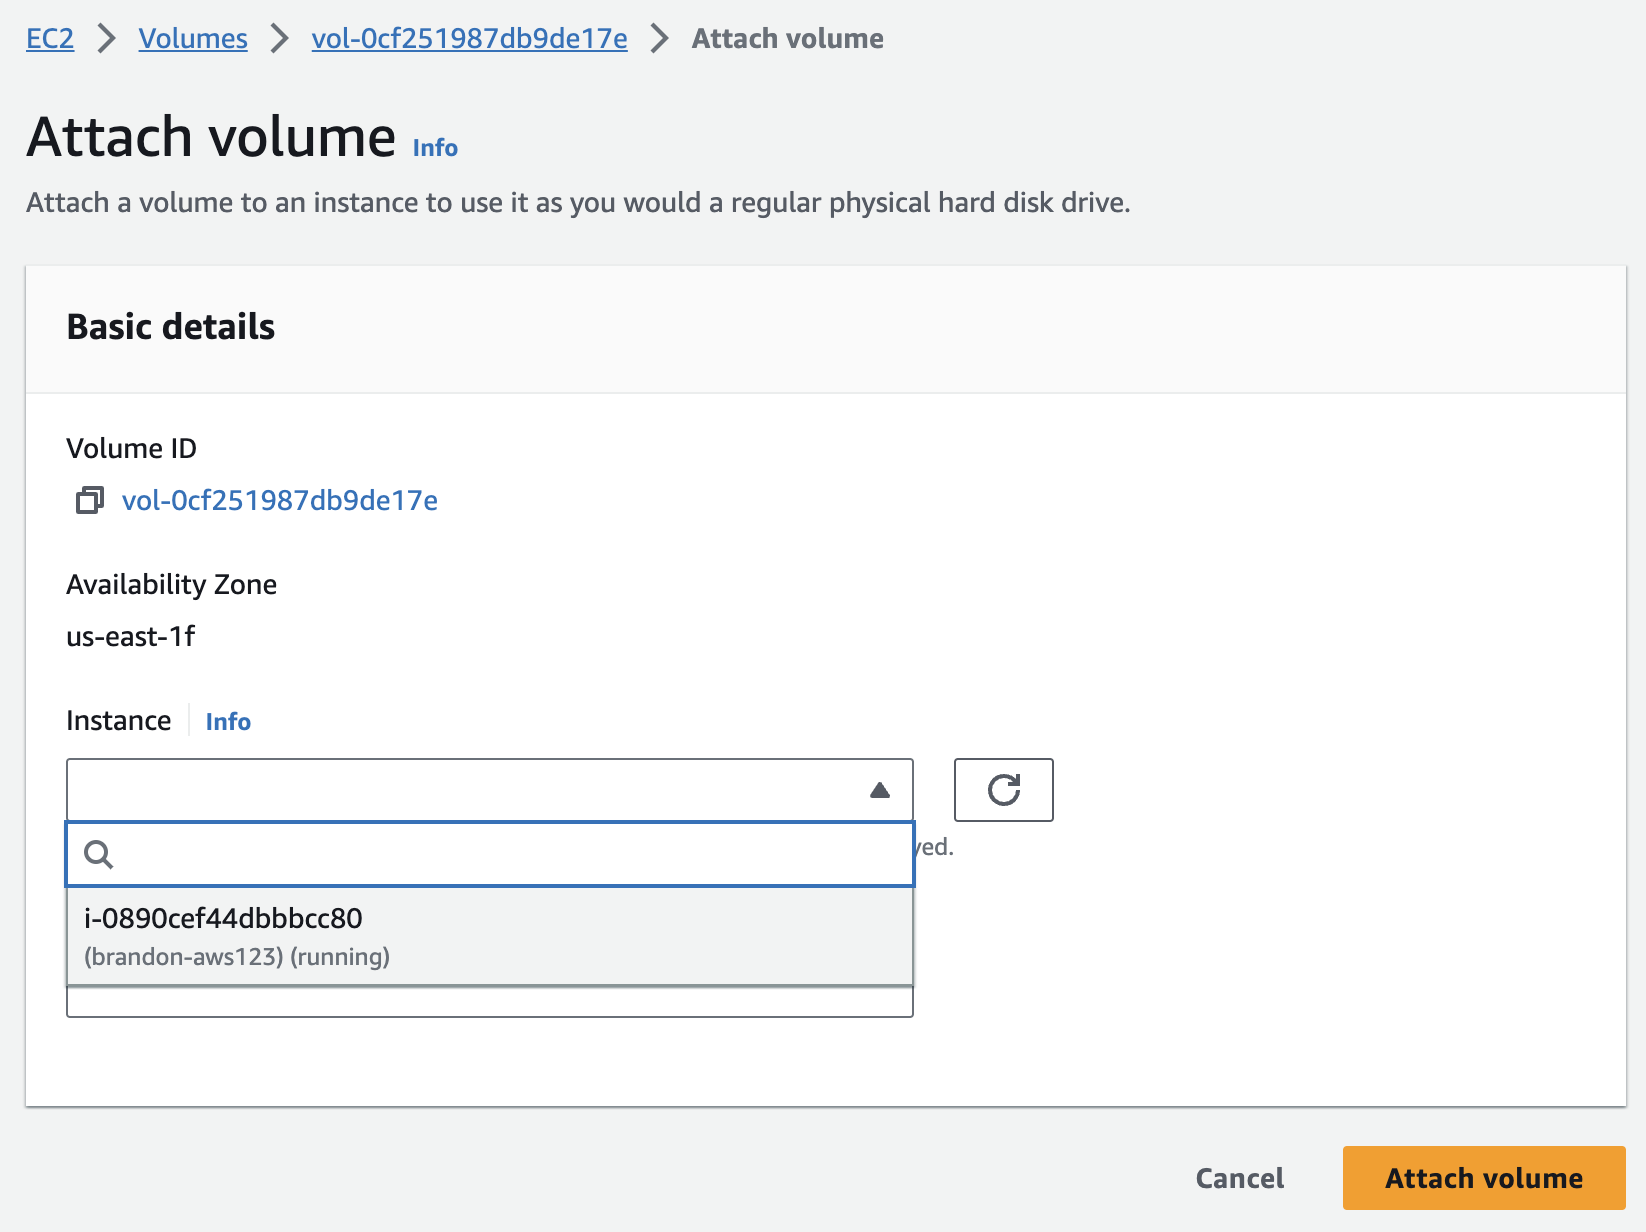
In the Attach Volume dialog, click on the Instance field and select the EC2 instance by looking for the Instance ID or Name Tag in the list. Click Attach to attach the volume.
If attached successfully - In the list of displayed volumes you should see your new volume having a status (under the State Column) indicating In Use.

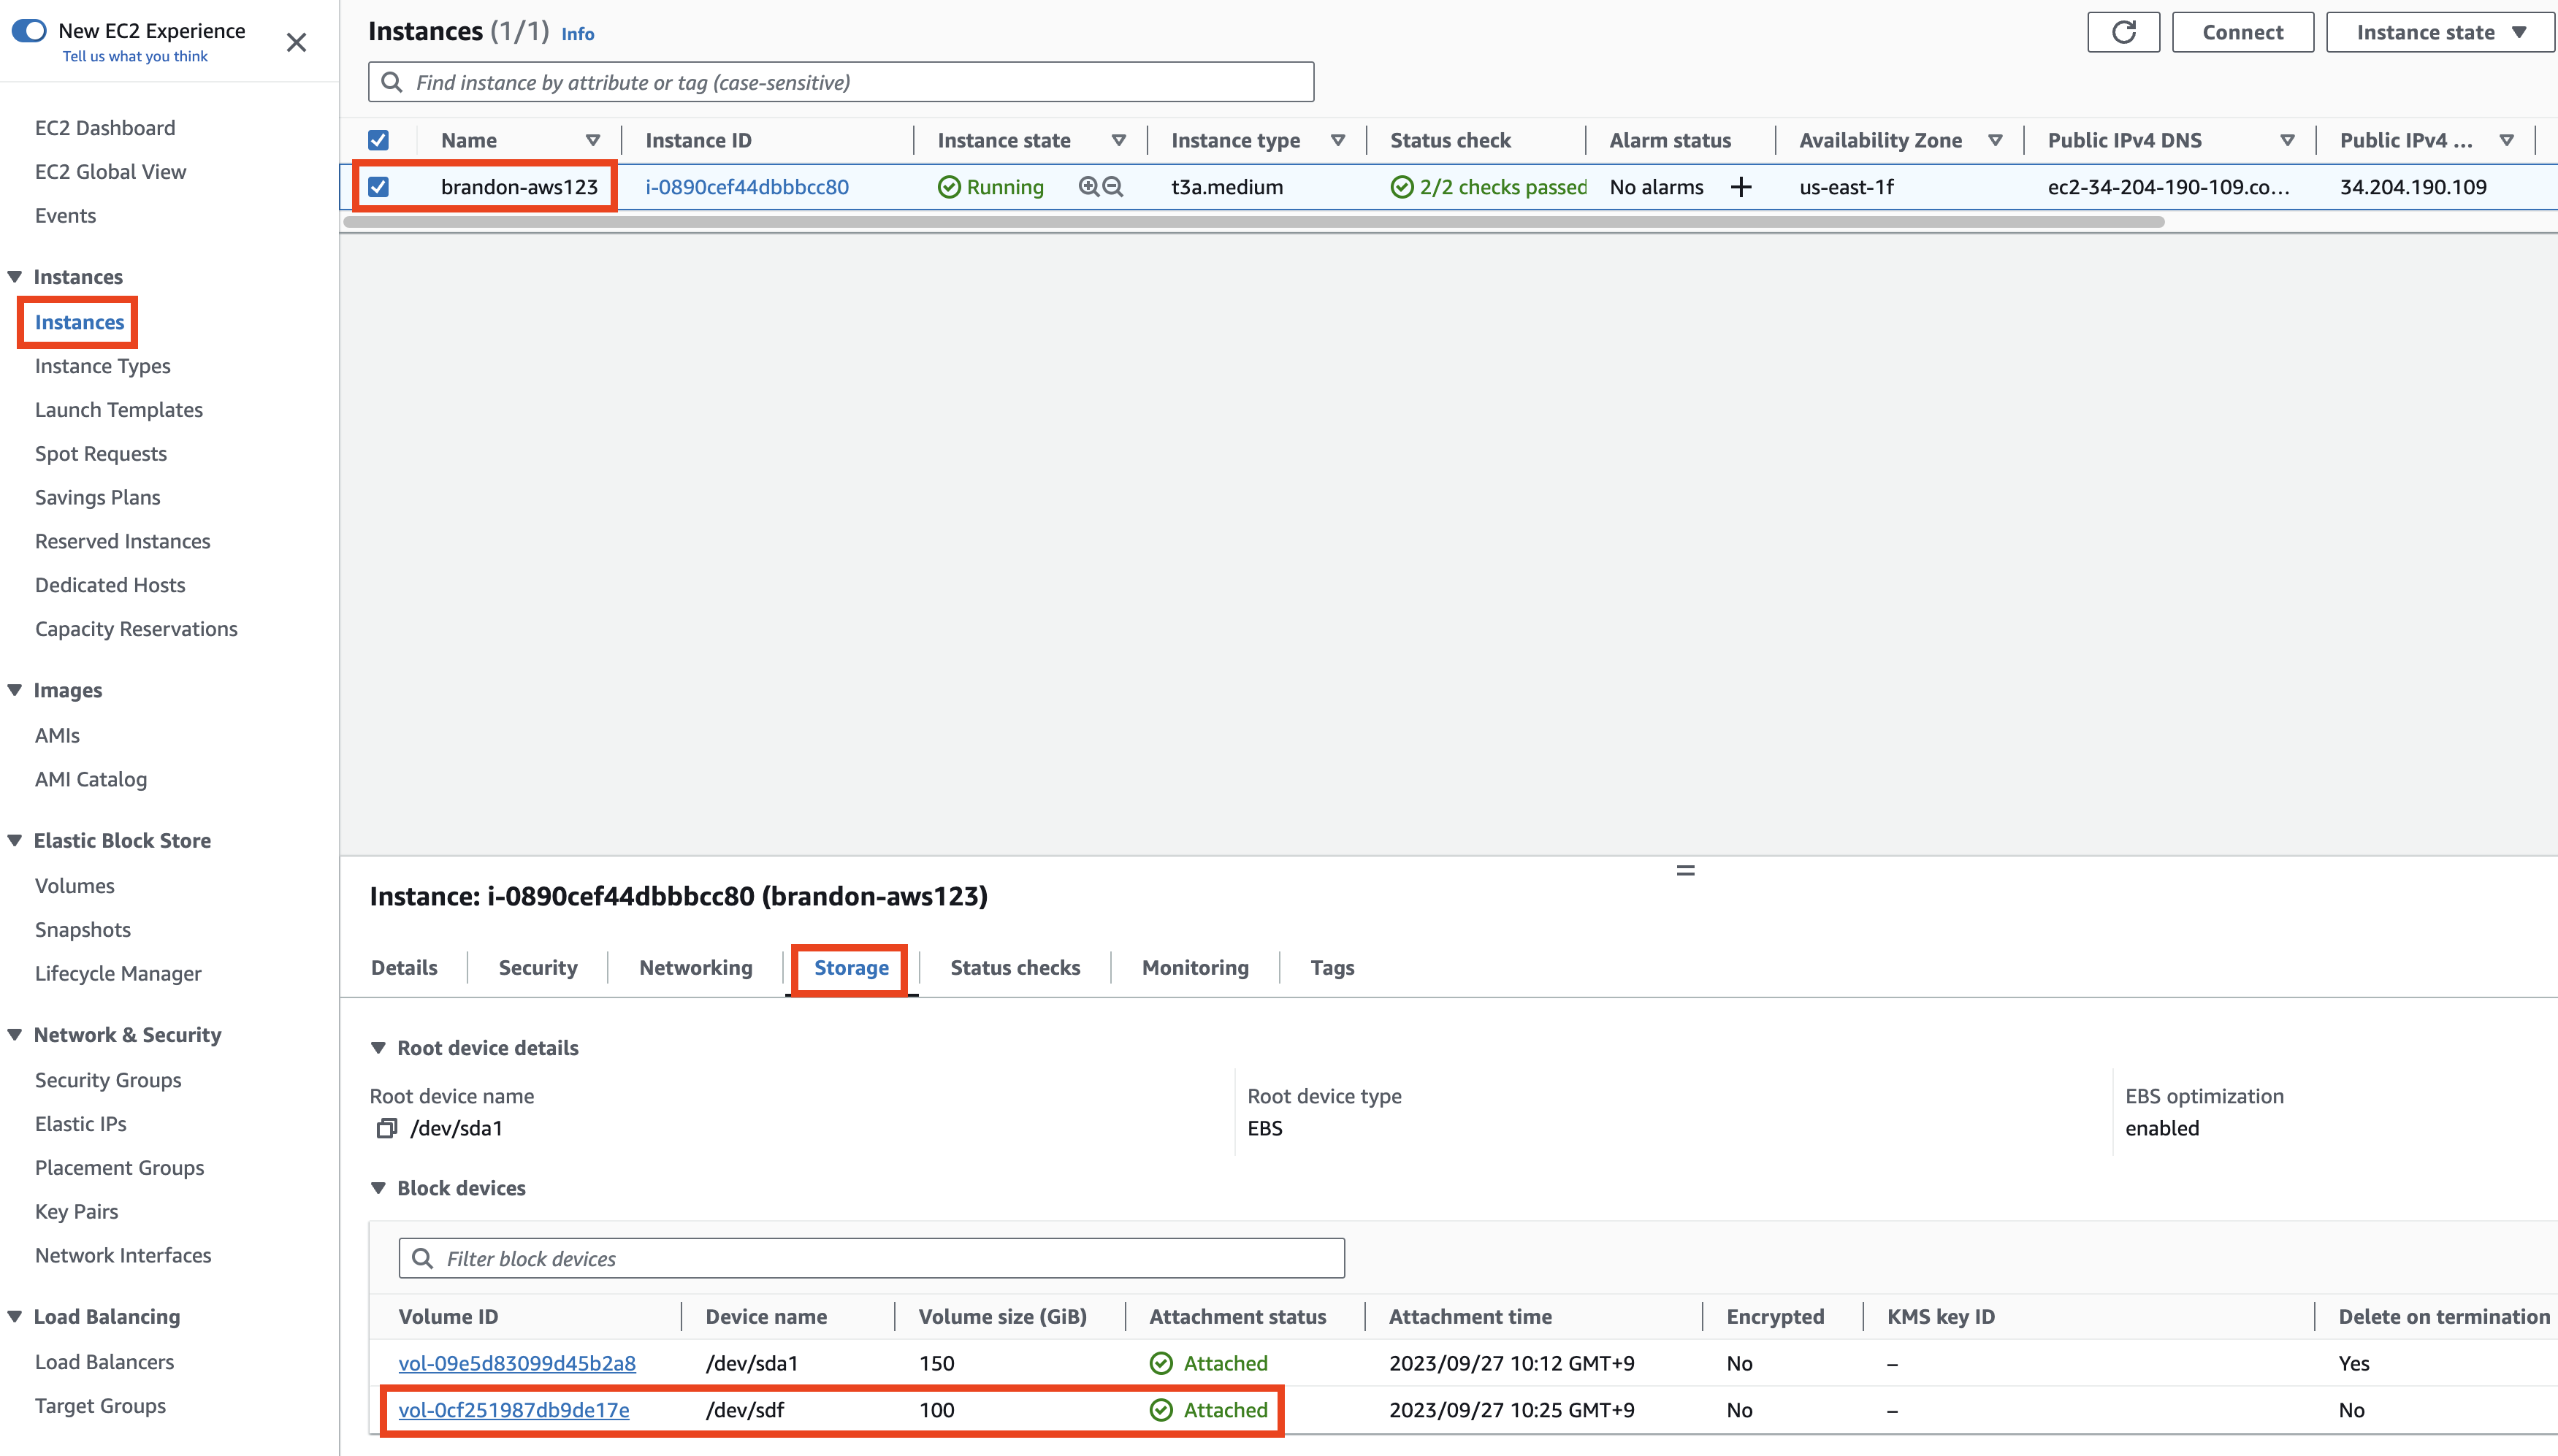
Important: Note down the specific device name for the next step of mounting the volume. The drive name may differ from what’s shown.
NOTE: Depending on the Linux version and the machine type, the device names may differ. The EC2 Console will generally show /dev/sdX, where X is a lower-case letter, but you may see /dev/xvdX or /dev/nvmeYn1. The following table may help with translating. Another way to help track is to pick different sizes for your EBS volumes (such as 151, 152, 153 GB for different volumes). | Device name (Console) | Alternate 1 | Alternate 2 | | — | — | — | | /dev/sda | /dev/xvda | /dev/nvme0n1 | | /dev/sdb | /dev/xvdb | /dev/nvme1n1 | | /dev/sdc | /dev/xvdc | /dev/nvme2n1 | | /dev/sdd | /dev/xvdd | /dev/nvme3n1 | | /dev/sde | /dev/xvde | /dev/nvme4n1 | | /dev/sdf | /dev/xvdf | /dev/nvme5n1 |
MOUNT볼륨 THE VOLUME마운트
-
Log in to your EC2 Instance.
-
List the available disks using the following command:
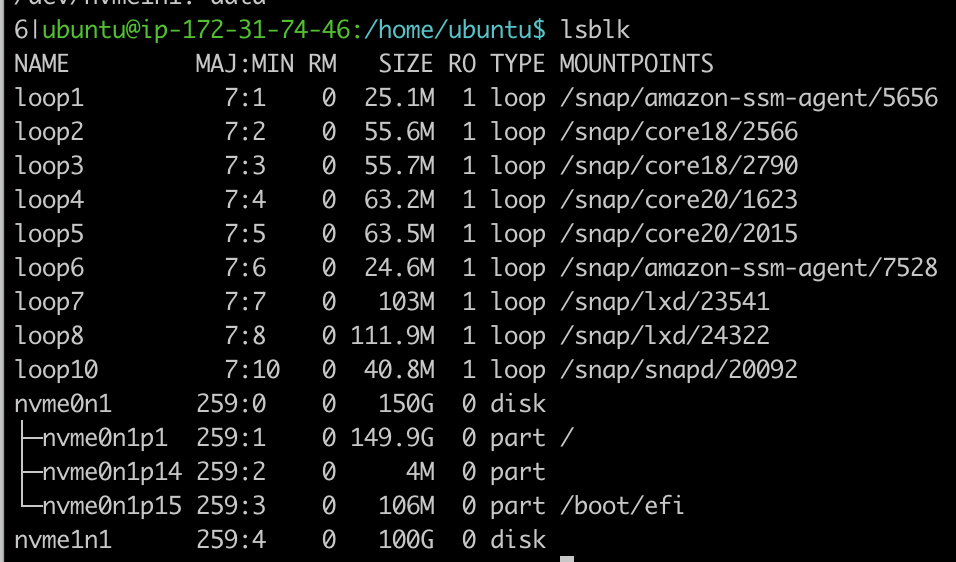
lsblk
The output will list the disks attached to your instance.
예시
NOTE: Depending on the Linux version and the machine type, the device names may differ. The EC2 Console will generally show /dev/sdX, where X is a lower-case letter, but you may see /dev/xvdX or /dev/nvmeYn1. The following table may help with translating. Another way to help track is to pick different sizes for your EBS volumes (such as 151, 152, 153 GB for different volumes).
| Device name (Console) | Alternate 1 | Alternate 2 |
|---|---|---|
| /dev/sda | /dev/xvda | /dev/nvme0n1 |
| /dev/sdb | /dev/xvdb | /dev/nvme1n1 |
| /dev/sdc | /dev/xvdc | /dev/nvme2n1 |
| /dev/sdd | /dev/xvdd | /dev/nvme3n1 |
| /dev/sde | /dev/xvde | /dev/nvme4n1 |
| /dev/sdf | /dev/xvdf | /dev/nvme5n1 |
- Check for an unmounted filesystem of size 100GB. For example: “nvme1n1” as shown below:
NAME        MAJ:MIN RM  SIZE RO TYPE MOUNTPOINT
nvme0n1     259:0    0  150G  0 disk
└─nvme0n1p1 259:1    0  150G  0 part /
nvme1n1     259:2    0   100G  0 disk
- Check if the volume has any data using the following command:
sudo file -s /dev/nvme1n1
Where “nvme1n1” is the device you noted from the previous section after attaching the device to the EC2 Instance.
If the above command output shows "/dev/nvme1n1: data", it means your volume is empty.
예시

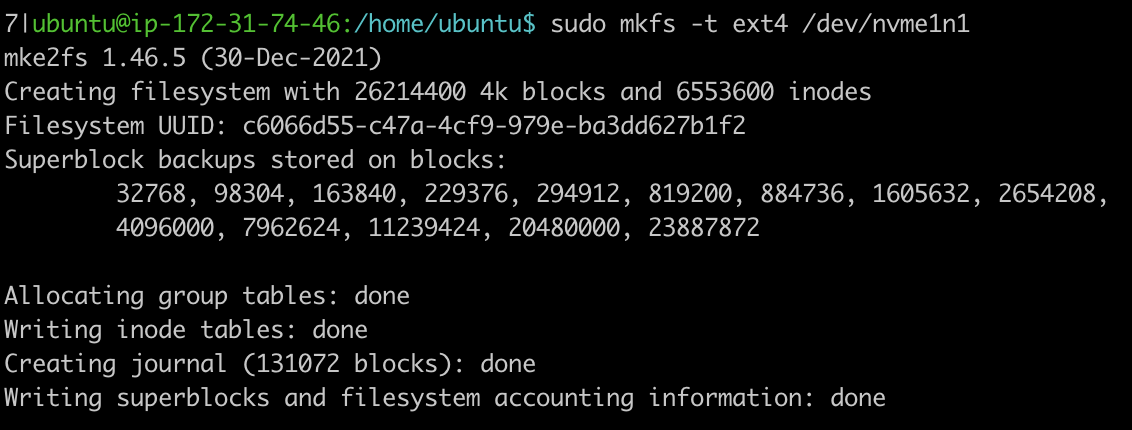
- Format the volume to the ext4 filesystem using the following command.
sudo mkfs -t ext4 /dev/nvme1n1
NOTE: This file-system formatting step is only for a new device, DO NOT run this step while mounting an existing volume as it will wipe out all data on the device.
예시
- Create a directory of your choice to mount our new ext4 volume. Let’s use the name “volume1”.
sudo mkdir /mnt/volume1
- Mount the volume to “volume1” directory using the following command.
sudo mount /dev/nvme1n1 /mnt/volume1
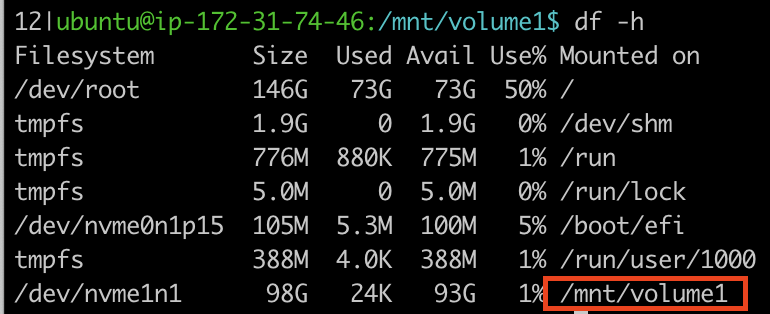
- cd into the volume1 directory and check the disk space for confirming the volume mount.
cd /mnt/volume1
df -h .
The above command would show the free space in the volume1 directory.
- At this point, the drive is owned by root and not user. We will want to change ownership of the drive, so that you can change the contents of the drive (Add/remove files, etc).
sudo chown -R ubuntu /mnt/volume1
예시

- For your own information, it is possible to later remove this device. Practice unmounting, then remounting it. To unmount the volume, you have to use the following command. Make sure to be outside the directory to unmount the volume.
sudo umount /dev/nvme1n1
But we’ll need this device for later, so remember to re-mount it.
sudo mount /dev/nvme1n1 /mnt/volume1