공유 AMI로부터 가상 머신 시작하기
AMI 소개
Amazon Machine Image(AMI)는 인스턴스를 시작하는 데 필요한 정보를 제공하는 AWS에서 지원되고 유지 관리되는 이미지입니다. 인스턴스를 시작할 때 AMI를 지정해야 합니다. 동일한 구성의 인스턴스가 여러 개 필요할 때는 한 AMI에서 여러 인스턴스를 시작할 수 있습니다. 서로 다른 구성의 인스턴스가 필요할 때는 다양한 AMI를 사용하여 인스턴스를 시작할 수 있습니다.
AMI에 관한 보다 자세한 사항은 다음 링크를 참고해주세요.
워크샵 소개
이 워크샵 섹션에서는 워크샵의 뒷부분에서 분석을 실행하는 데 사용할 사전 제작된 AMI에서 자체 EC2 Linux 인스턴스를 설정하는 방법을 안내합니다.
여기서는 NUS와 GIS의 Chen Lab에서 구축한 이미지를 사용할 것입니다. 여기에는 박테리아(및 일반) 유전체학에 유용한 많은 공통 도구가 설치되어 있습니다. 이 AMI에 무엇이 있고 어떻게 설정되었는지는 함께 제공되는 GitHub 리포지토리에 문서화되어 있습니다. 이러한 지침은 다른 시스템에서 동일한 소프트웨어를 설정하려는 경우 유용할 수 있으며, 자신의 작업을 위해 다른 소프트웨어를 설치할 때 몇 가지 힌트를 얻을 수 있습니다.
구체적으로 다음과 같은 방법을 배웁니다:
a. AWS 관리 콘솔에 로그인하여 탐색합니다.
b. AMI에서 Amazon EC2 인스턴스를 생성합니다.
c. EC2 인스턴스에 SSH로 접속하여 Linux 명령을 실행합니다.
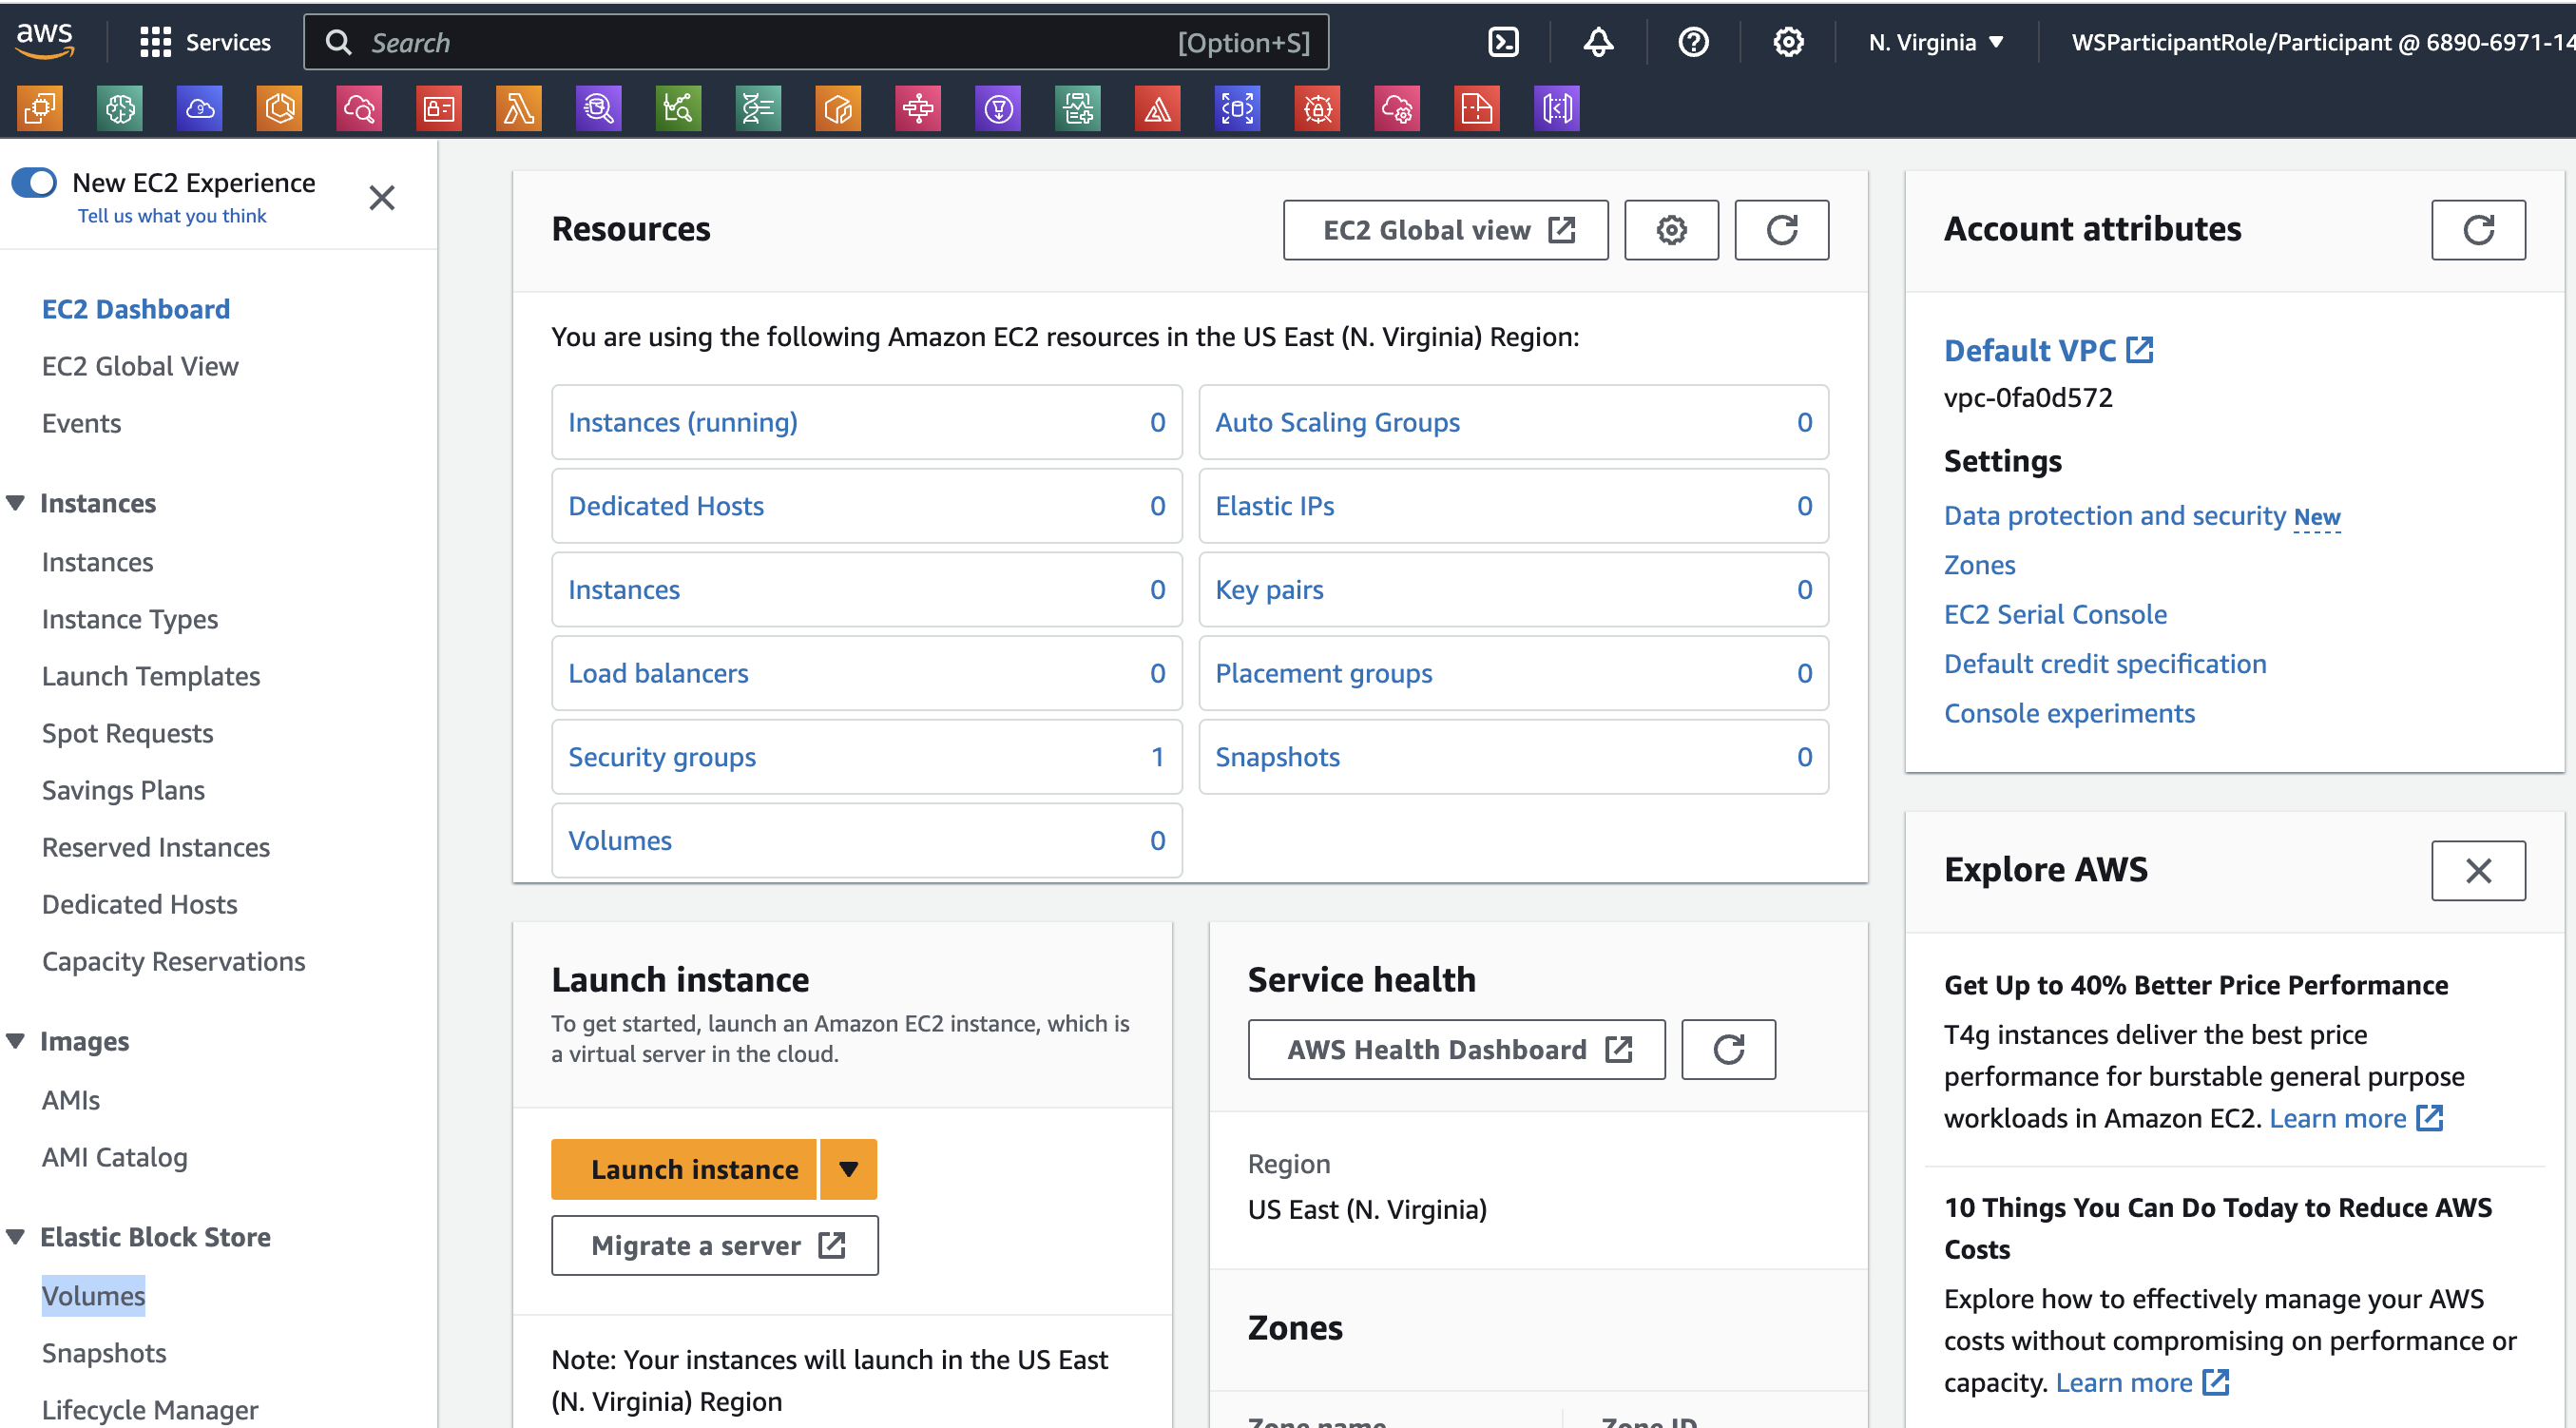
EC2 대시보드 시작
-
AWS 관리 콘솔 검색 창에 EC2를 입력합니다.
-
EC2를 선택하여 EC2 Dashboard를 엽니다.
대시보드의 레이아웃에 익숙해지는 데 몇 분 정도 시간을 할애하세요:
- 왼쪽 창: 저장된 Amazon 머신 이미지(AMI), 스토리지 볼륨 및 ssh 키와 같은 도구 및 기능입니다.
- 가운데: 리소스 목록 및 인스턴스 시작 기능.
- 오른쪽 창: 문서 및 가격 등의 일반 정보.
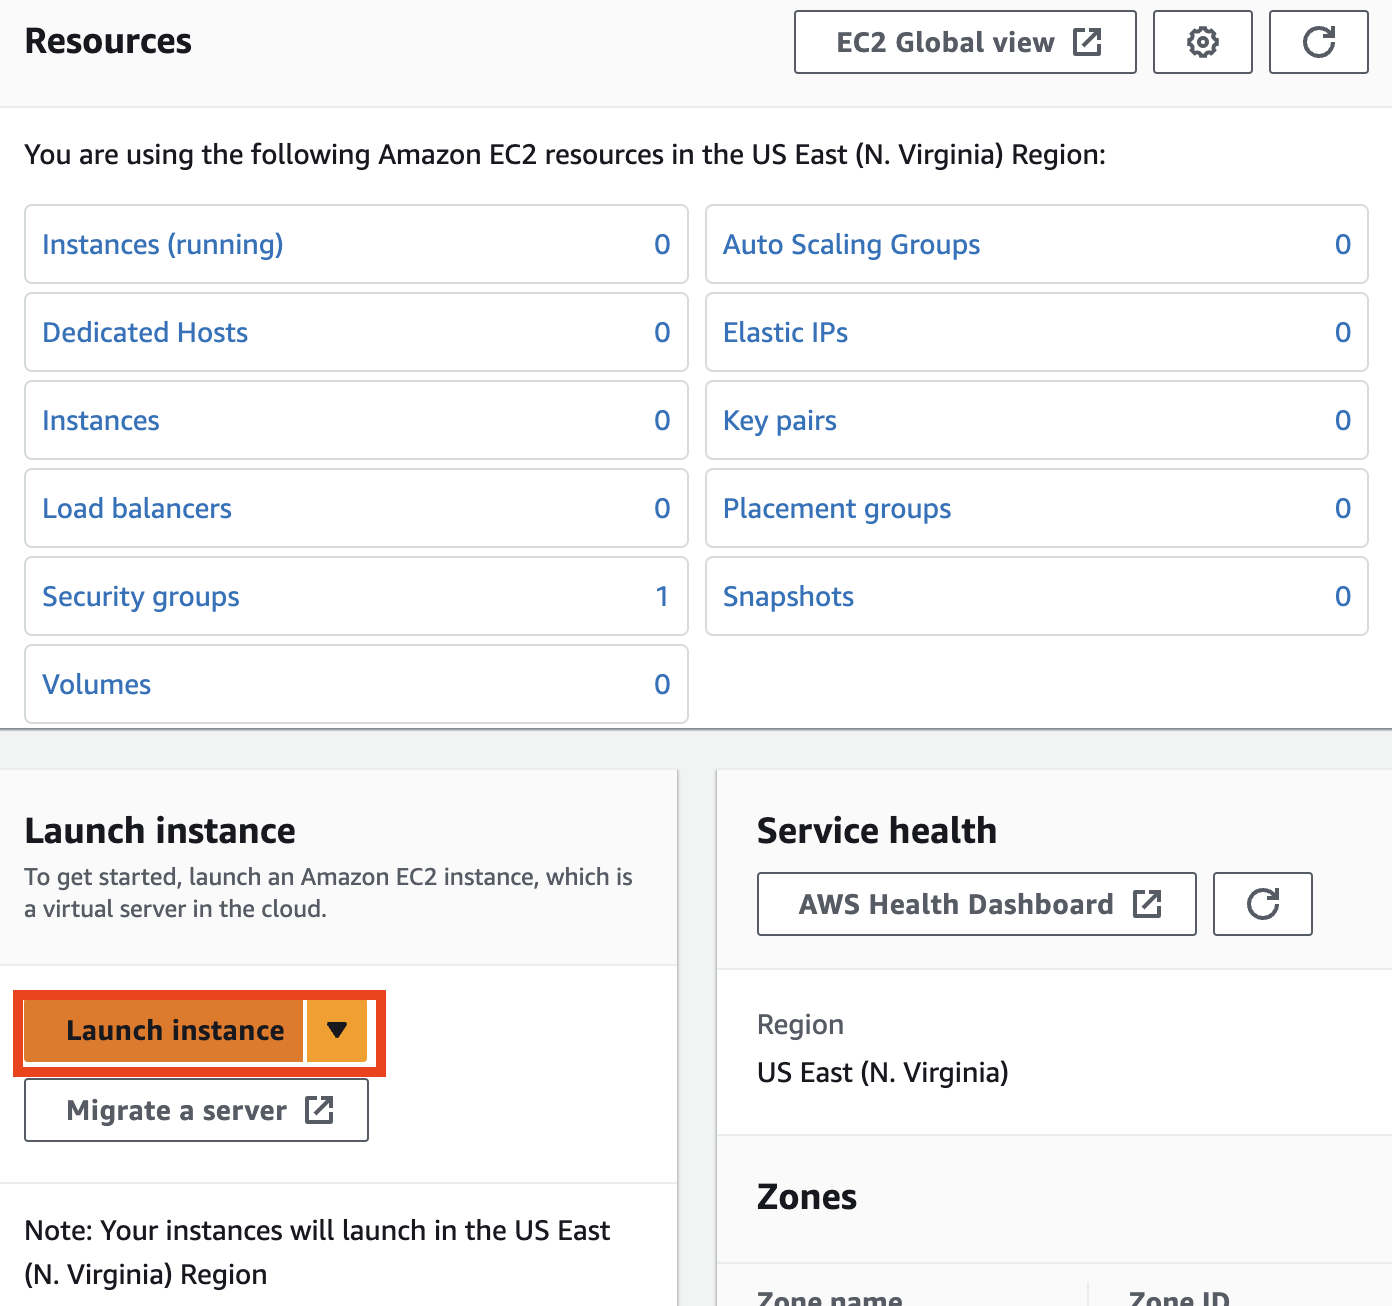
EC2 인스턴스 시작
이제 EC2 Linux 기반 인스턴스를 시작하겠습니다.
- Launch Instance 을 클릭한 다음 드롭다운 메뉴에서 Launch Instance을 다시 클릭합니다.
- Launch an instance 페이지에서 인스턴스의 원하는 이름을 지정할 수 있습니다.
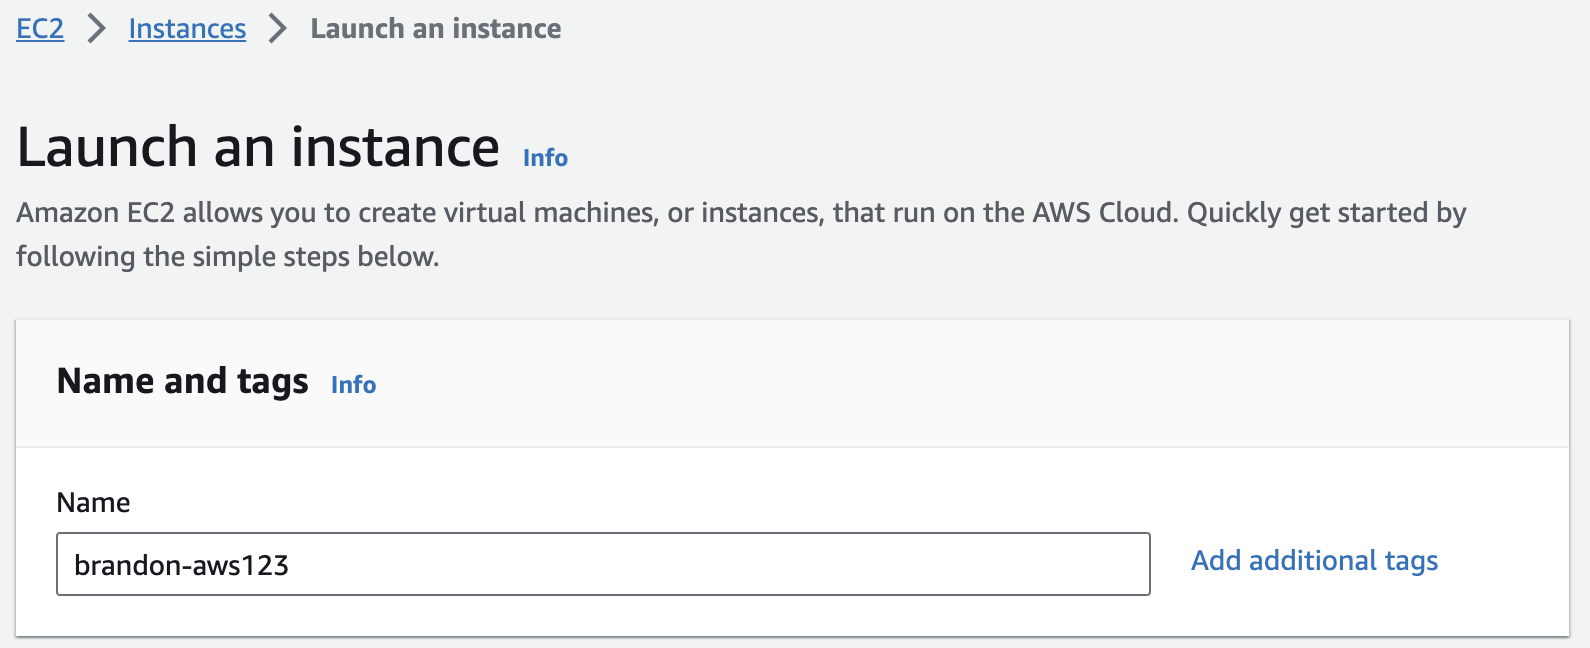
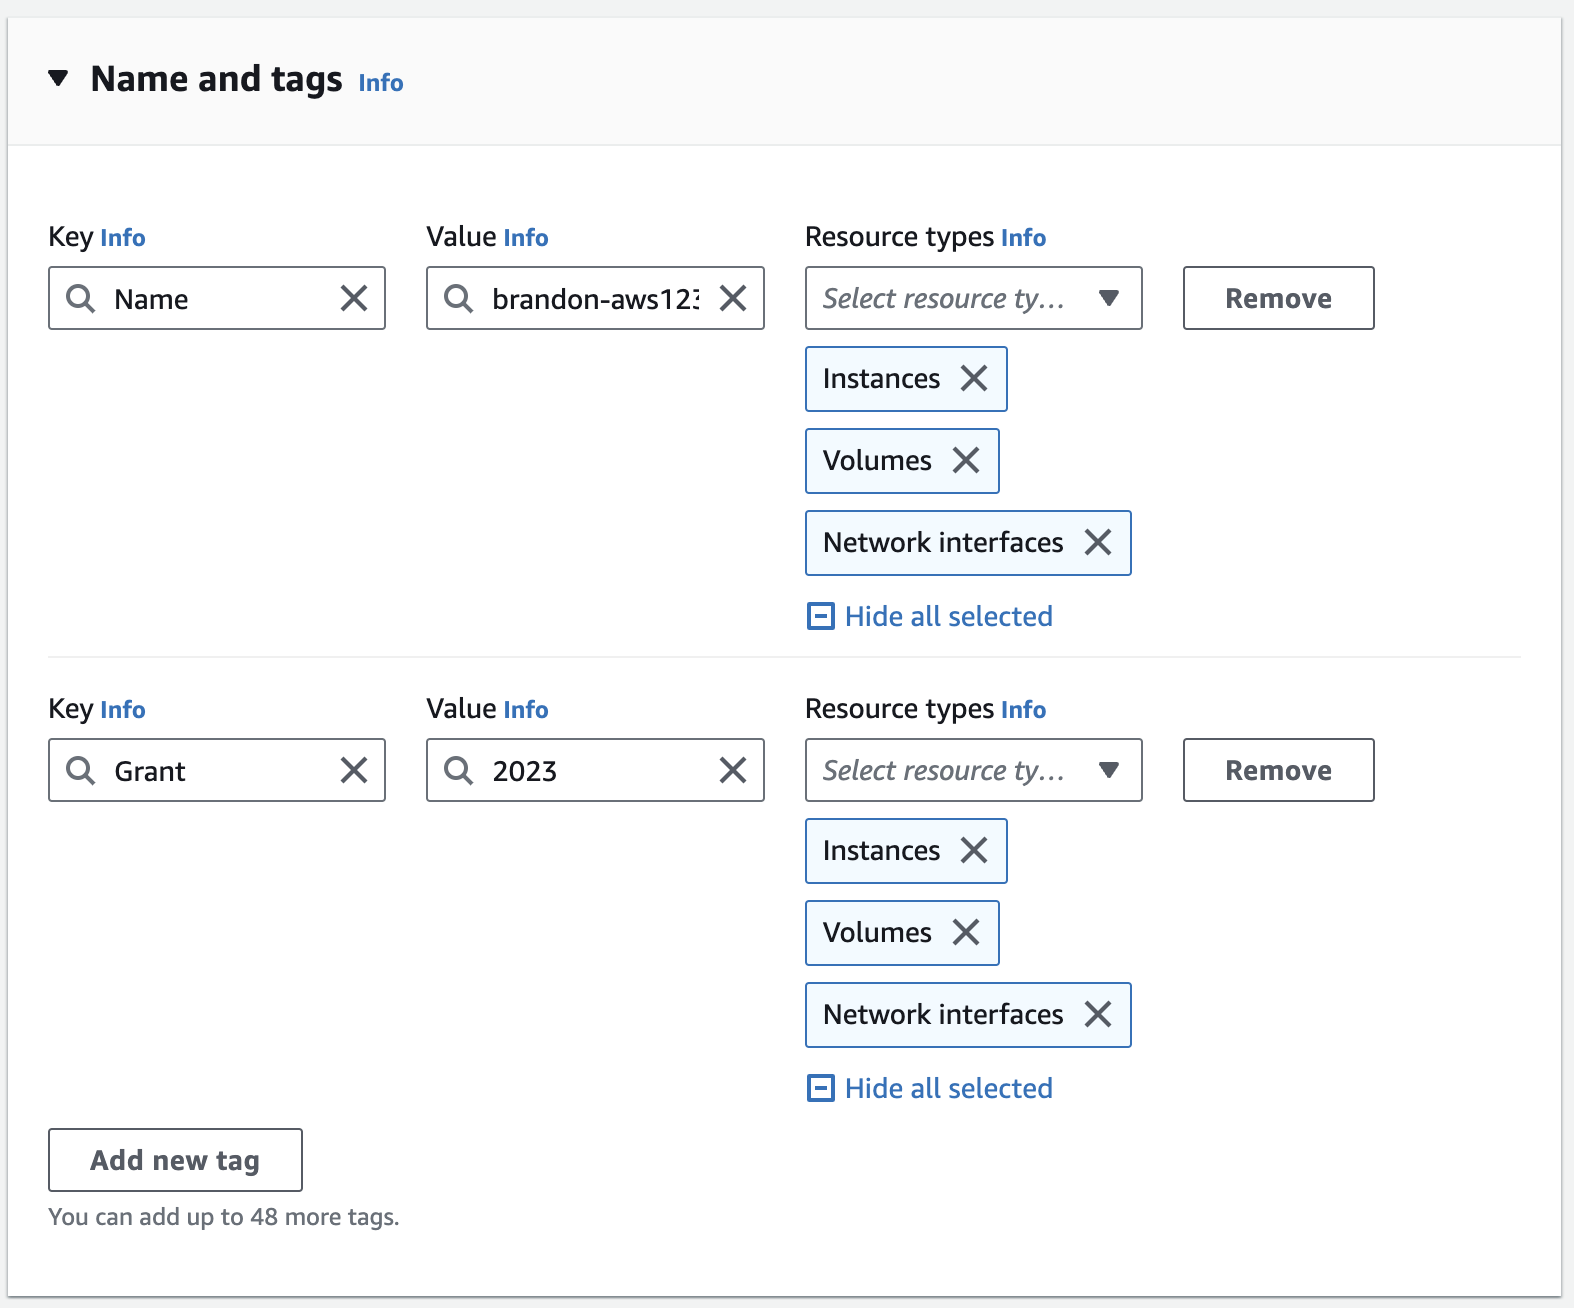
- Add additional tags 를 클릭하고 "Add Tag"를 클릭합니다. 인스턴스에 대해 제공한 "Name"을 찾을 수 있습니다. 이제 키와 값을 입력합니다. 이 키(더 정확하게는 태그)는 인스턴스가 시작되면 콘솔에 나타납니다. 이를 통해 복잡한 환경에서 실행 중인 머신을 쉽게 추적할 수 있습니다. 이전에 키 쌍에 사용한 것과 유사한 태그를 추가로 생성하여 이 머신에 사용자와 부여 키를 지정하고 동일한 값을 입력합니다. 준비가 되면 Resource types 아래에서 Instances, Volumes, Network interfaces 선택합니다.
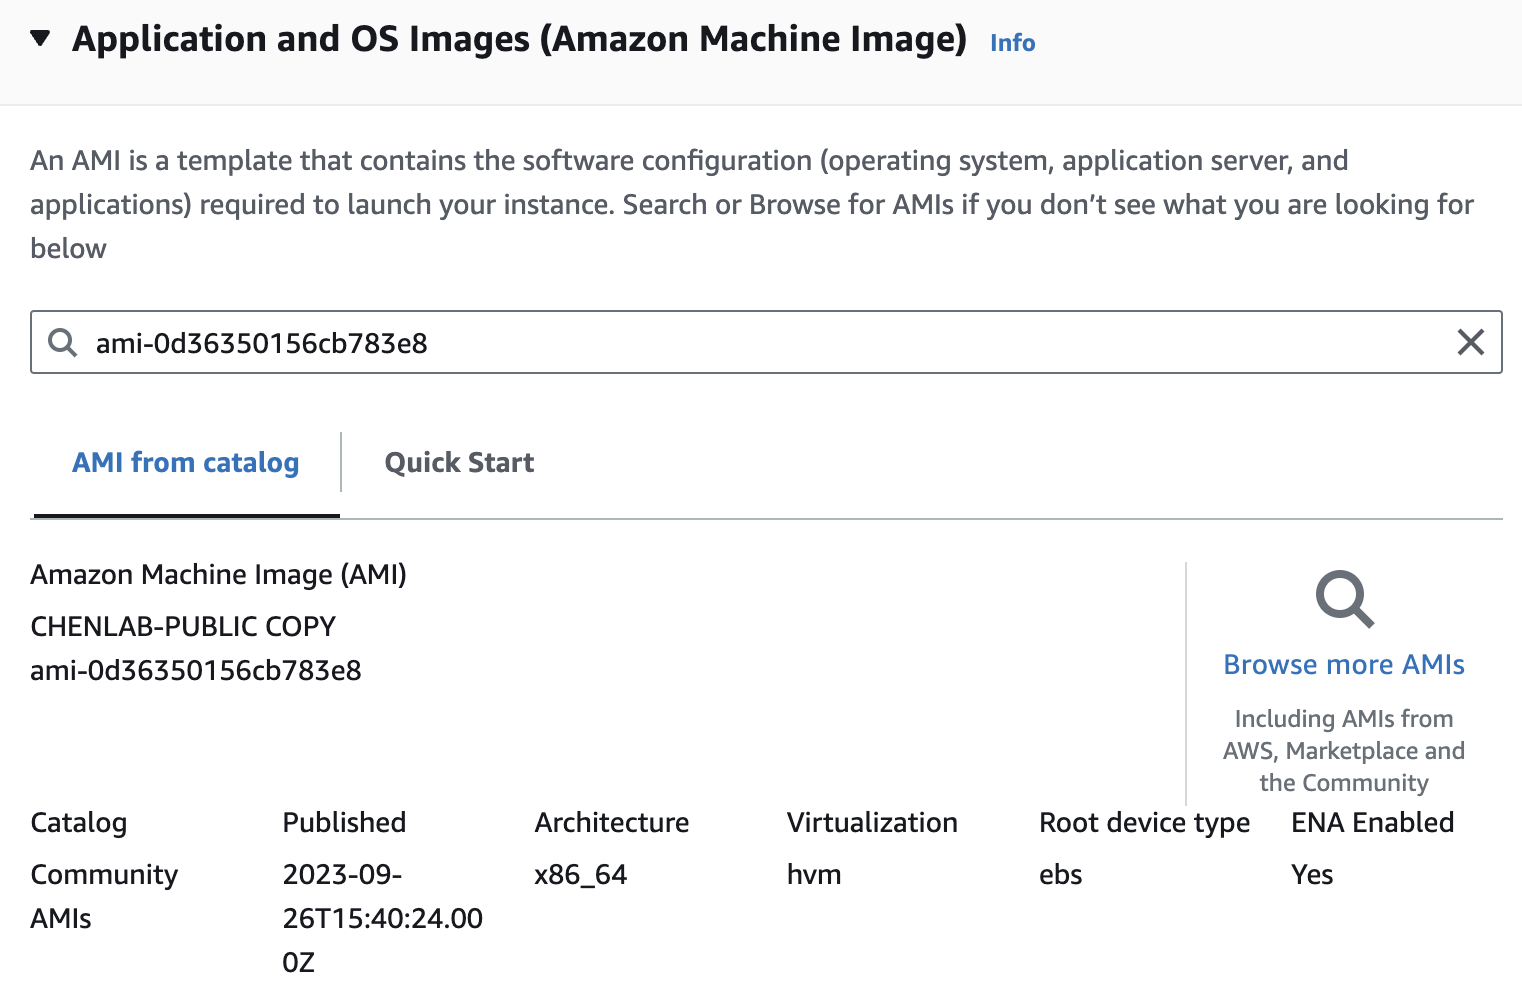
- Application and OS images (Amazon Machine Image) 아래에서 검색 상자에 교육용으로 공유된 AMI ID를 입력합니다. AMI는 사진과 다를 수 있으므로 강사의 안내를 참조하세요.
이 교육을 위해
CHENLAB-PUBLIC을 검색하여 가장 최신 AMI 버전(2022년 9월 기준, IDami-0d36350156cb783e8인 v2.10b)을 선택하시기 바랍니다.참고로 AMI는 각 리전 별로 모두 AMI ID 가 다릅니다. 리전 간 AMI를 복사하는 방법은 다음을 참고하세요.
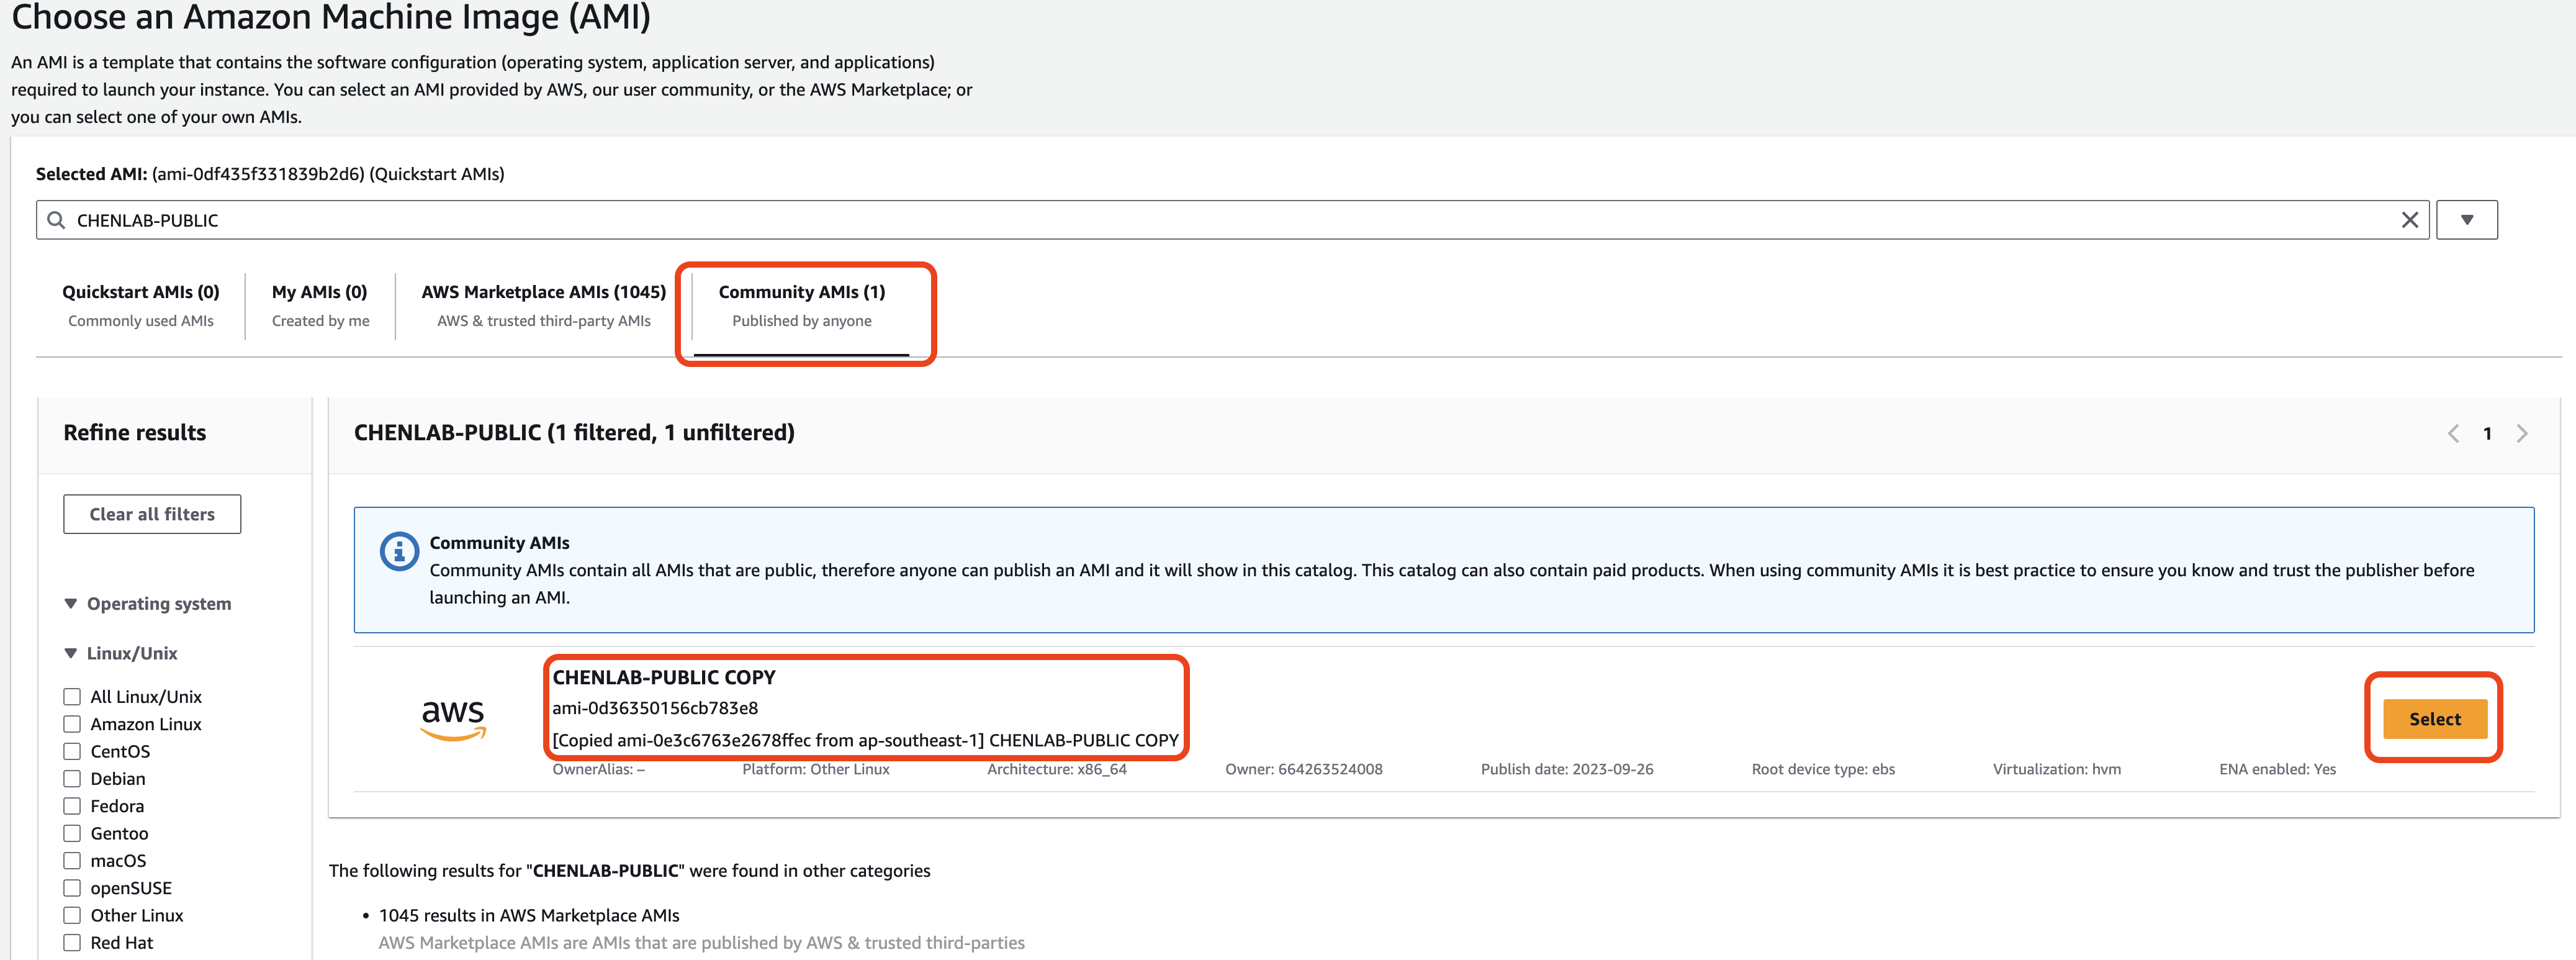
- Community AMIs에서 결과를 클릭합니다.
검색 결과는 Community AMIs에 표시됩니다.

-
Select 버튼을 클릭하여 AMI를 선택합니다. 최신 버전의 AMI를 선택해야 합니다(위 4단계 참고 참조).
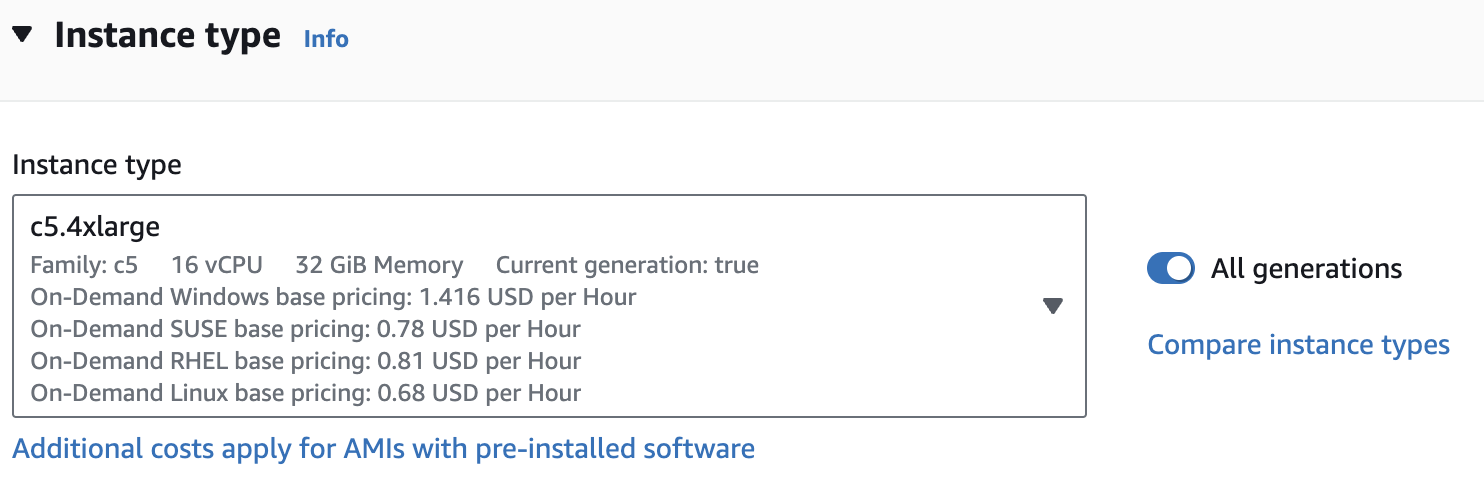
- Instance type에서 드롭다운 화살표를 클릭하고 검색창에 c5.4xlarge을 입력합니다.

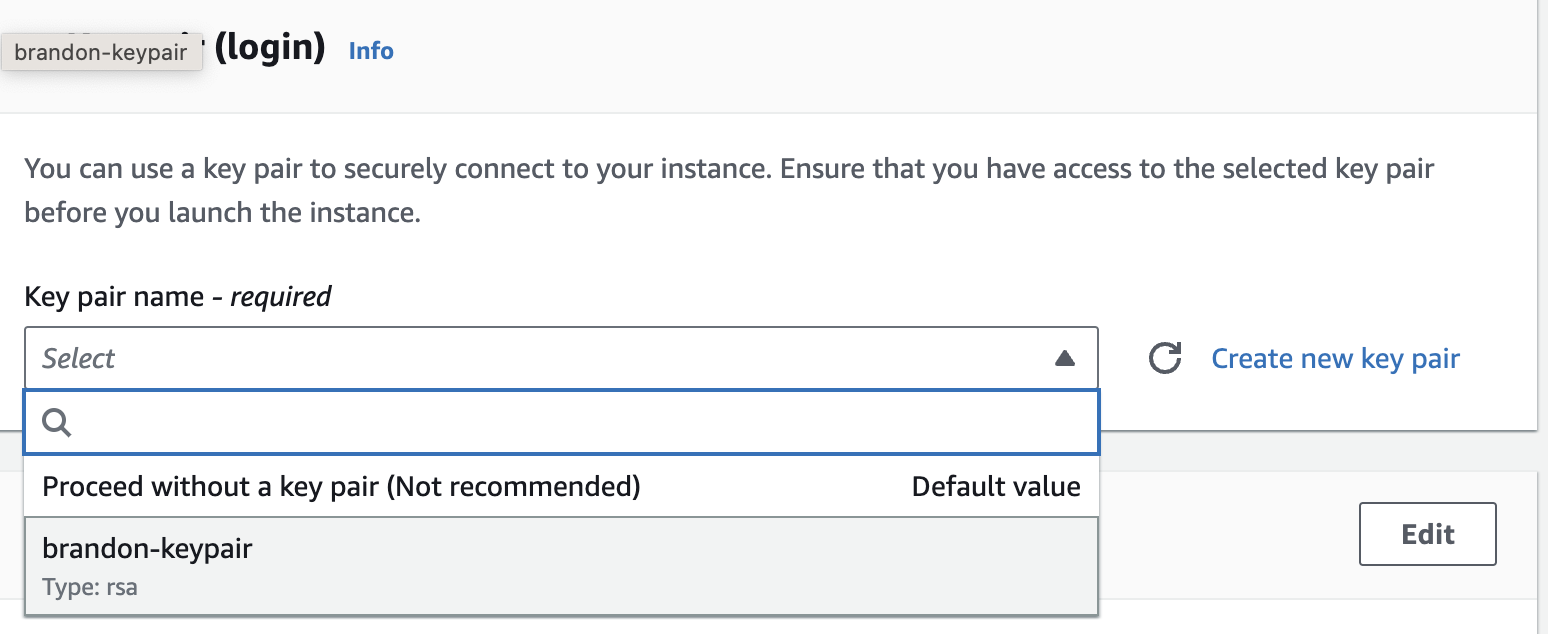
- Key pair (login) 아래의 드롭다운 목록에서 이 실습의 시작 부분에서 만든 키 쌍을 선택합니다.

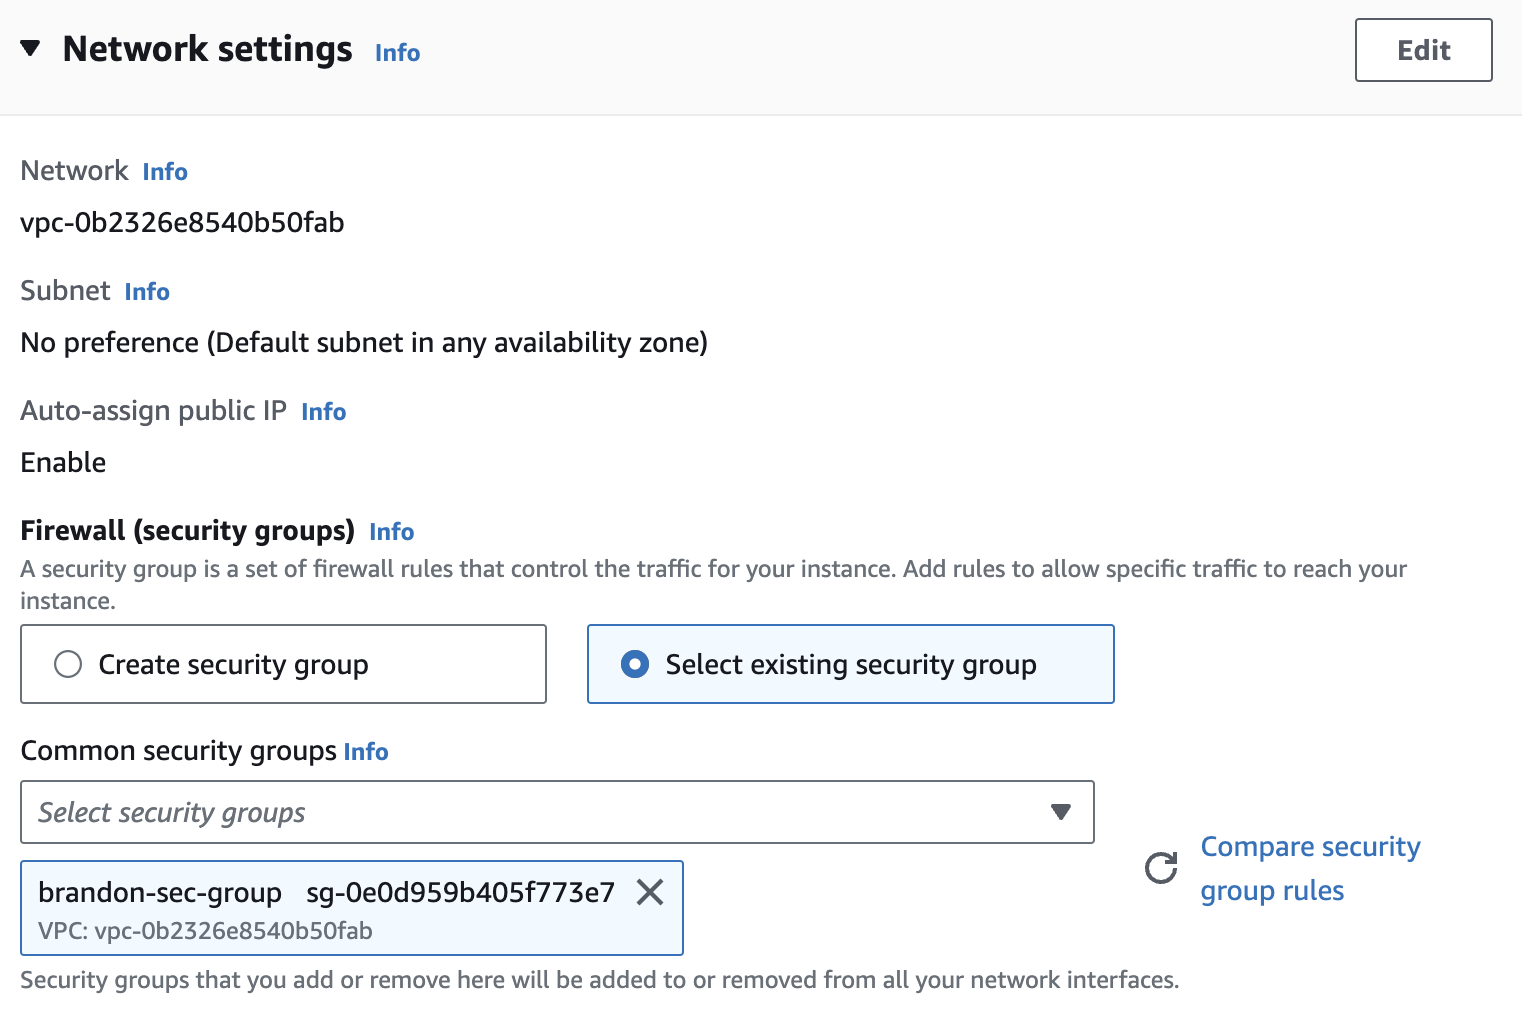
- 다음으로 Network settings에 대해 Edit을 클릭합니다. Subnet 및 Security group 세부 정보를 입력하라는 메시지가 표시됩니다. 보안 그룹은 방화벽 규칙이 됩니다. 앞 챕터에서 진행했다면 만들어진 보안 그룹을 사용할 수도 있습니다.
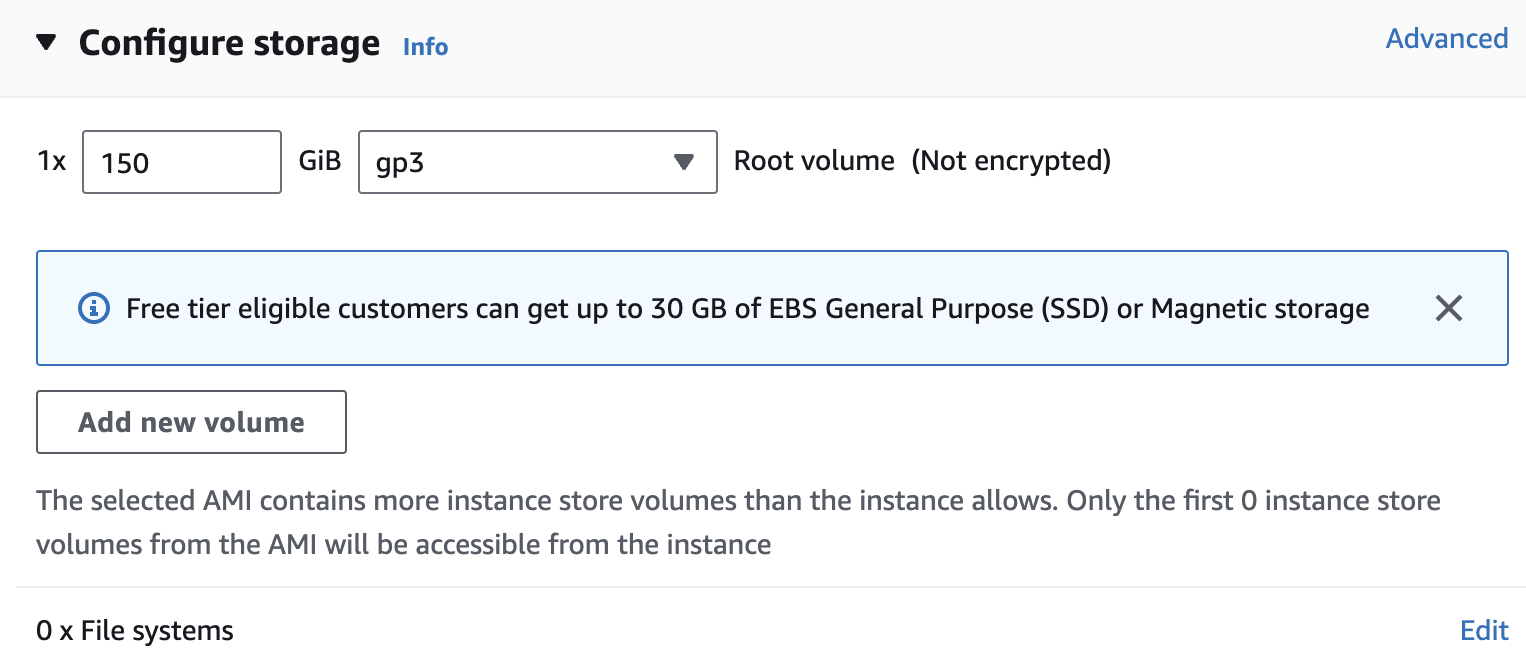
- Configure storage 에서 인스턴스에 스토리지 및 디스크 드라이브를 수정하거나 추가할 수 있습니다. 이 실습에서는 스토리지 기본값을 그대로 사용하겠습니다.

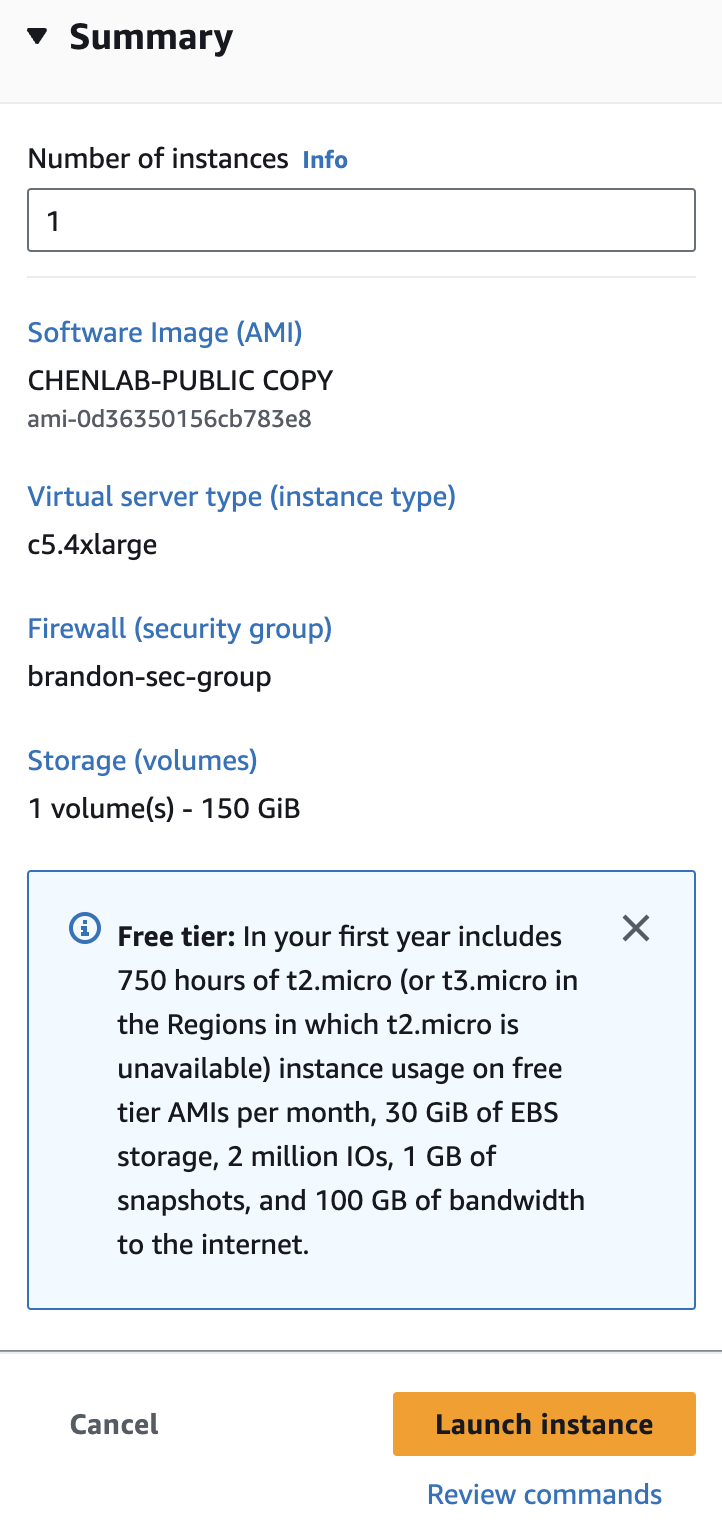
- Summary 에서 구성을 검토하고 Launch instance를 클릭합니다.

이제 인스턴스가 시작되며 잠시 시간이 걸릴 수 있습니다. Successfully initiated launch of instance 메시지와 함께 Launch Status 페이지가 표시됩니다.
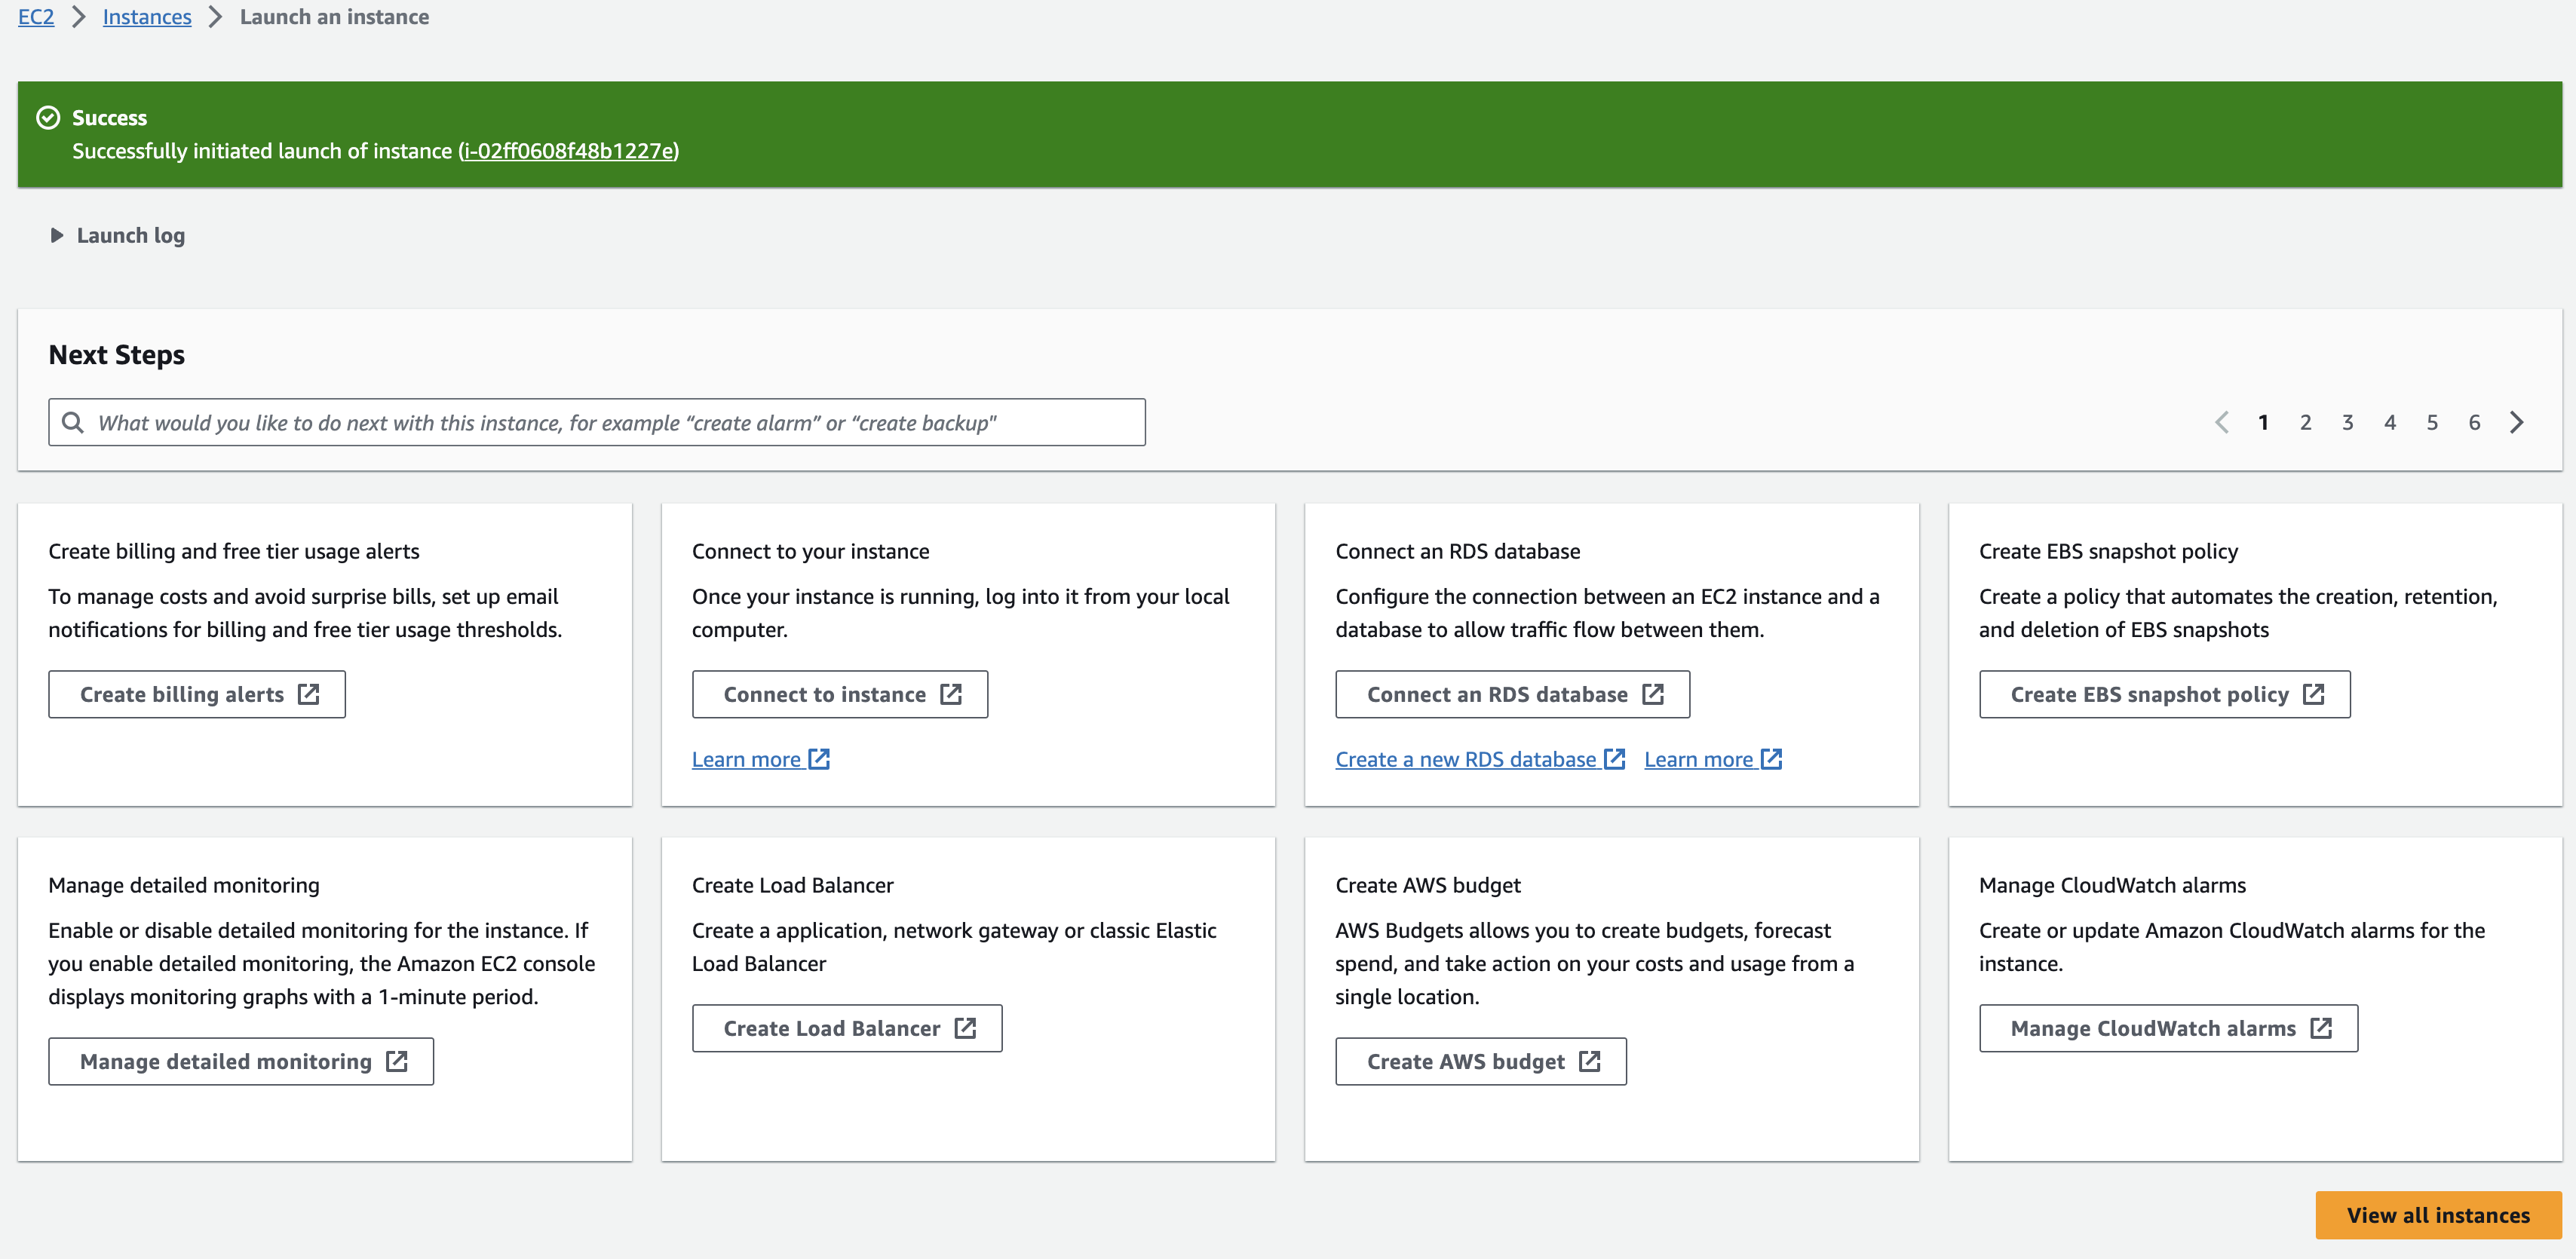
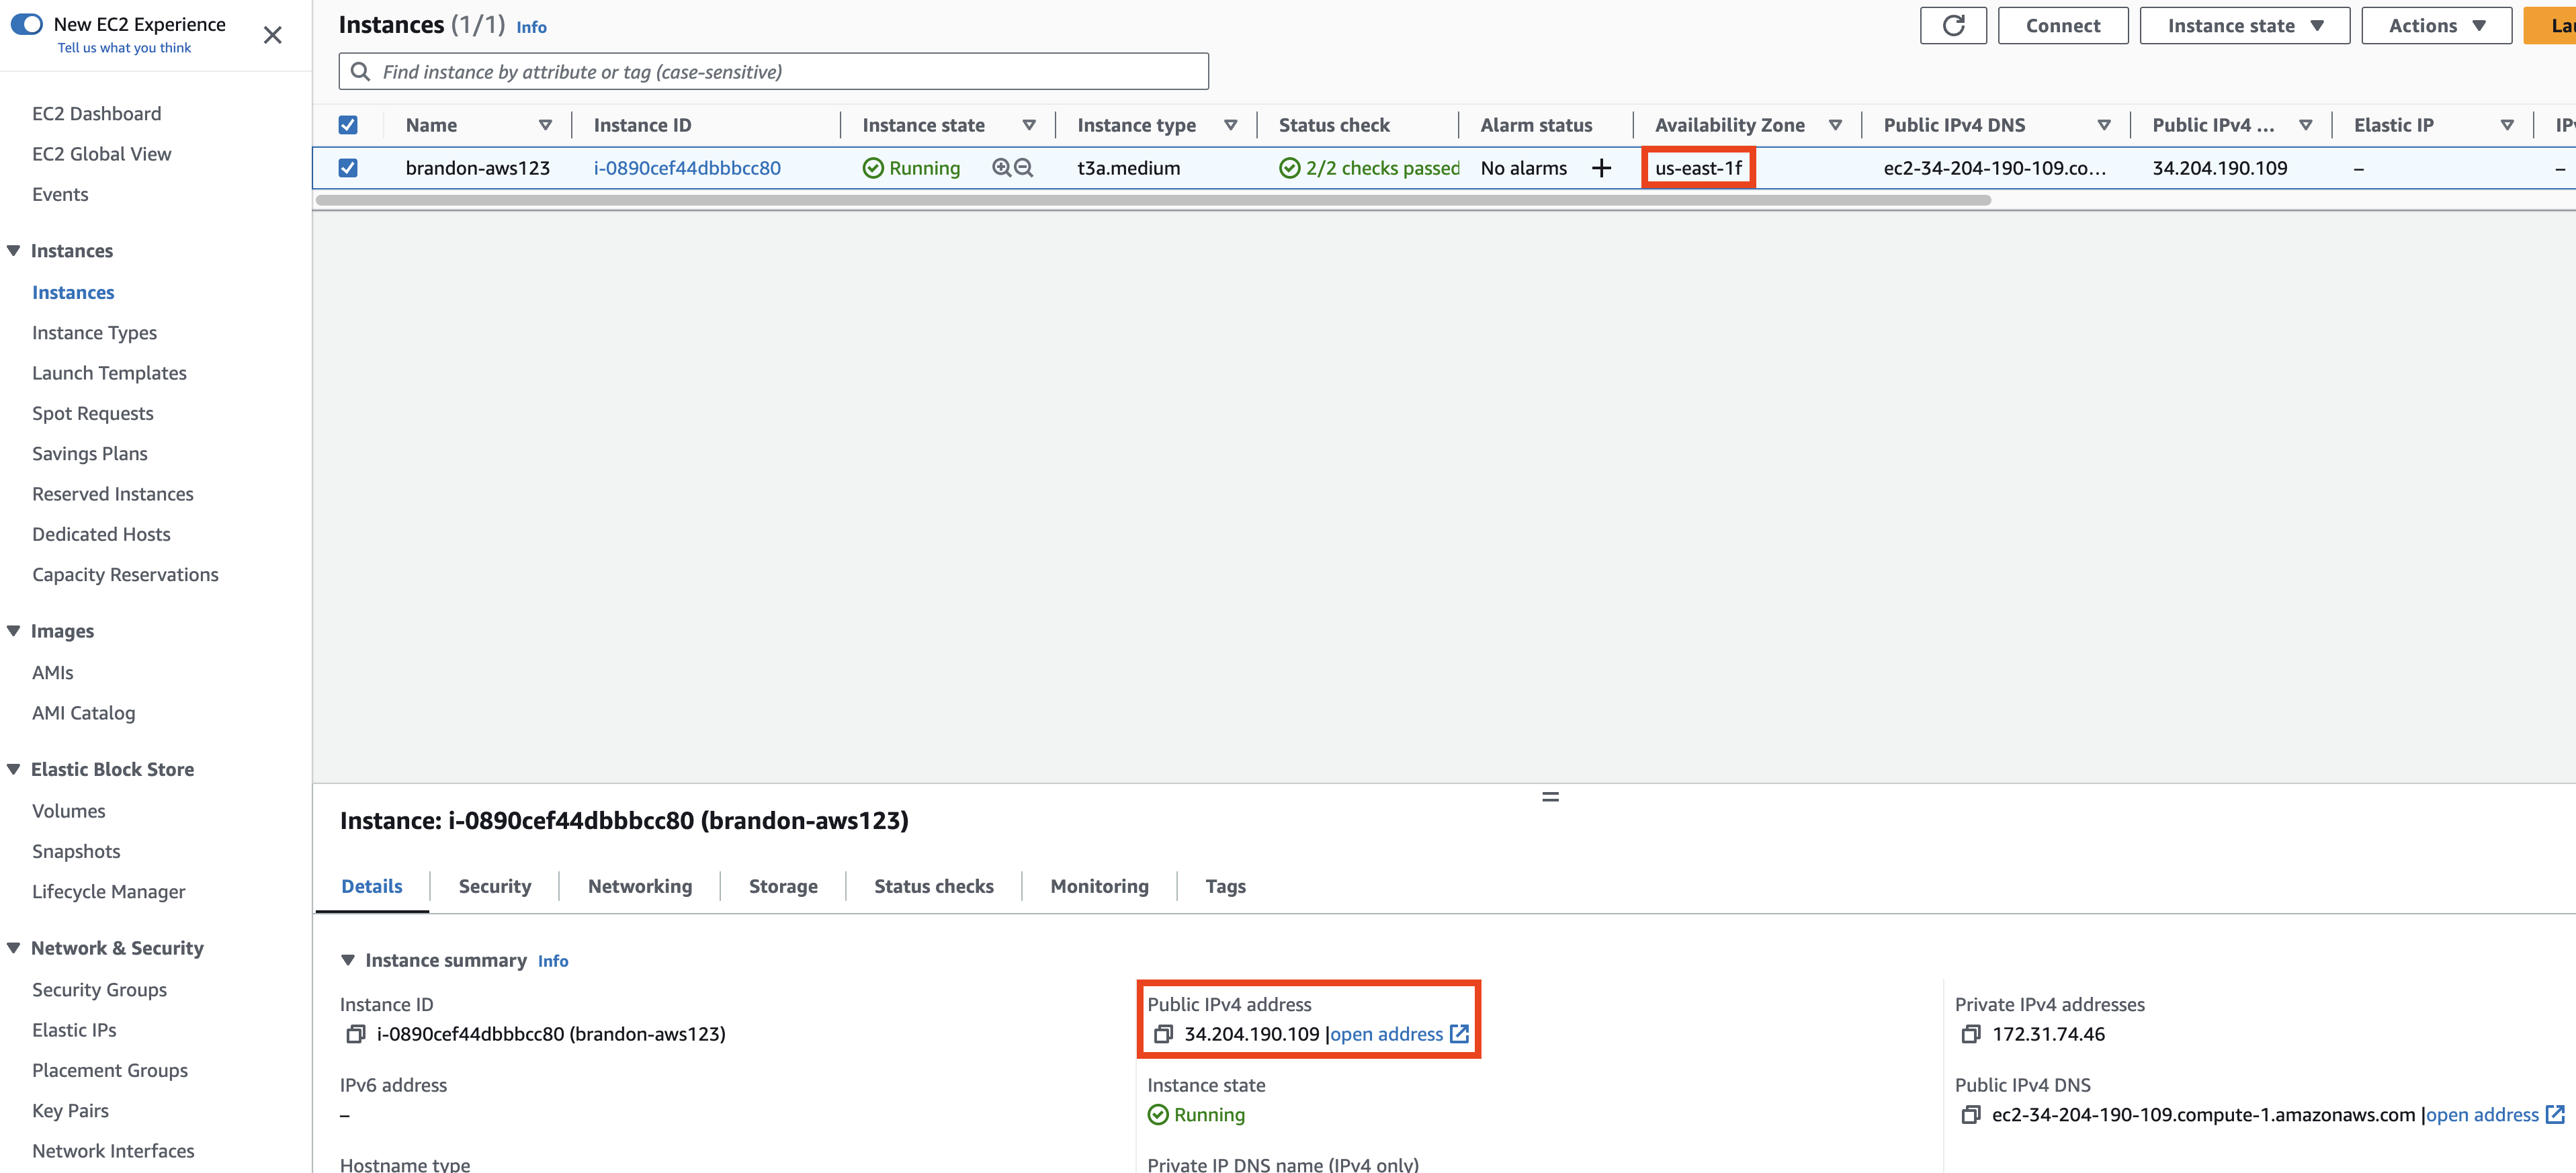
- 페이지 오른쪽 하단에서 View all Instances를 클릭하여 EC2 인스턴스 목록을 확인합니다. 인스턴스를 클릭합니다. 초기화 프로세스를 거치게 됩니다. 인스턴스가 시작되면 Linux 서버는 물론 인스턴스가 속한 가용 영역과 공개적으로 라우팅할 수 있는 DNS 이름이 표시됩니다.
SSH를 통해 EC2 인스턴스 접속하기
로컬 컴퓨터의 운영체제에 따라 로컬 컴퓨터에서 Linux 인스턴스로 연결하는 데 필요한 옵션이 결정됩니다. 다음은 Windows에서 PuTTY 또는 OpenSSH를 사용하여 연결하는 방법, Linux 및 MacOS-X에서 ssh 클라이언트를 사용하여 연결하는 방법, Linux용 Windows 하위 시스템(WSL)에서 ssh 클라이언트를 사용하여 연결하는 방법입니다.
사전 제작된
CHENLAB-PUBLICAMI는 우분투이므로 사용자 이름은 "ubuntu"가 됩니다. 참고로 이전 챕터에서 실습에 사용했던 Amazon Linux 2 이미지에 대한 사용자 이름은 "ec2-user" 였습니다.
Connecting from Windows using PuTTY
We will now use the private .ppk file of the key pair generated earlier to open a SSH session to the EC2 instance.
-
Start the PuTTy application.
-
Enter in the IP address of the EC2 instance in the Host Name (or IP address) field.
-
To save the session (so we dont have to repeat the configuration everytime) provide a name in the Saved Sessions field.
-
In the left navigation pane under Connections clickon SSH and next click on Auth.
-
In the Private key file for authentication field click Browse and browse in the .ppk file downloaded when creating the key pair earlier.
-
Next in the left navgation pane click on Session (scroll up if you need to) and and further click on Save to save the session.
-
Next click on Open to start the SSH session.
-
PuTTy will now attempt to start an SSH Session.
NOTE: You will get a security Alert The Servers host key is not cached in the registry, click on Yes to continue.
-
You will now be presented with the login as prompt.
-
At the login as prompt type ec2-user if your image is Amazon Linux OS or ubuntu if your image is Ubuntu Linux OS and hit enter.
You would have now logged into the EC2 instance on AWS.
Connecting from Windows using MobaXterm
We will use the private .pem key pair to open an SSH session to the EC2 instance.
-
Start the MobaXterm application.
-
To open a session, click on Session in the top-left corner, then click SSH.
-
Enter in the IP address of the EC2 instance in the Host Name field.
-
To the right, select username and enter your username for the session.
NOTE: Username to be used here is ec2-user if your image is Amazon Linux OS and ubuntu if your image is Ubuntu Linux OS.
-
Below, click on Advanced Settings, and select private key (use your .pem file).
-
Click Ok.
MobaXterm will have logged you in to your EC2 instance.
Connecting from Windows using Windows Subsystem for Linux
We will now use the private .pem file of the key pair generated earlier to open a SSH session to the EC2 instance.
- Copy the private key from Windows to WSL - In a WSL terminal window, copy the .pem file (for the key pair that you specified when you launched the instance) from Windows to WSL. Note the fully-qualified path to the .pem file on WSL to use when connecting to your instance.
cp /mnt/<Windows drive letter>/path/my-key-pair.pem ~/WSL-path/my-key-pair.pem
- In a terminal window, use the ssh command to connect to the instance. You specify the path and file name of the private key (.pem), the user name for your instance, and the public DNS name or IP Address.
NOTE: Username to be used here is ec2-user if your image is Amazon Linux OS and ubuntu if your image is Ubuntu Linux OS.
sudo ssh -i /path/my-key-pair.pem ubuntu@<ip-address>
you will see the following response
The authenticity of host '<ip-address>'
can't be established.
RSA key fingerprint is 1f:51:ae:28:bf:89:e9:d8:1f:25:5d:37:2d:7d:b8:ca:9f:f5:f1:6f.
Are you sure you want to continue connecting (yes/no)?
- Enter Yes
you will now be logged into the EC2 Instance.
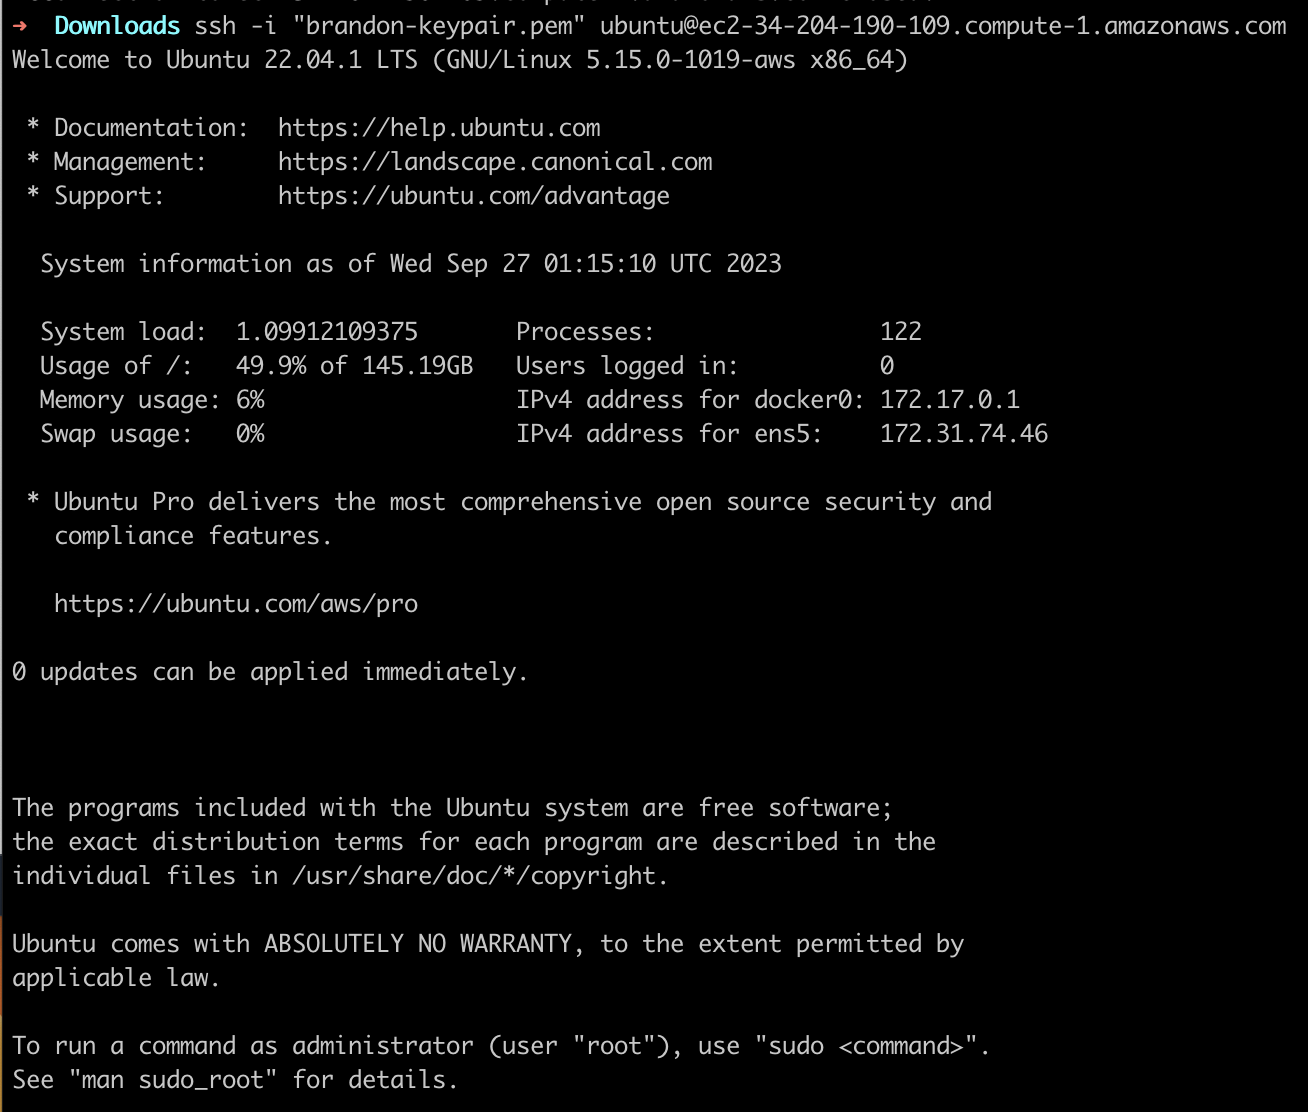
Connecting using SSH on Linux & MacOS and OpenSSH on Windows
We will now use the private .pem file of the key pair generated earlier to open a SSH session to the EC2 instance.
- In a terminal window, use the ssh command to connect to the instance. You specify the path and file name of the private key (.pem), the user name for your instance, and the public DNS name or IP Address of your instance.
NOTE: Username to be used here is ubuntu if your image is based on the Ubuntu Linux OS and ec2-user if your image is based on Amazon Linux OS. (See this page which covers many of the common AMI OSs.)
ssh -i /path/my-key-pair.pem ubuntu@<ip-address>
You see a response like the following:
The authenticity of host 'ec2-198-51-100-1.compute-1.amazonaws.com (198-51-100-1)' can't be established.
ECDSA key fingerprint is l4UB/neBad9tvkgJf1QZWxheQmR59WgrgzEimCG6kZY.
Are you sure you want to continue connecting (yes/no)?
- Enter Yes
You will now be logged into the Instance.
NOTE: you might need to change the permissions of the key file by running the chmod command as follows. Edit to match your path and key pair name.
sudo chmod 600 /path/my-key-pair.pem
For detailed directions on these please have a look at the following links:
PuTTY, Windows Susbsystem for Linux, MacOS-X ssh Client, Linux ssh client
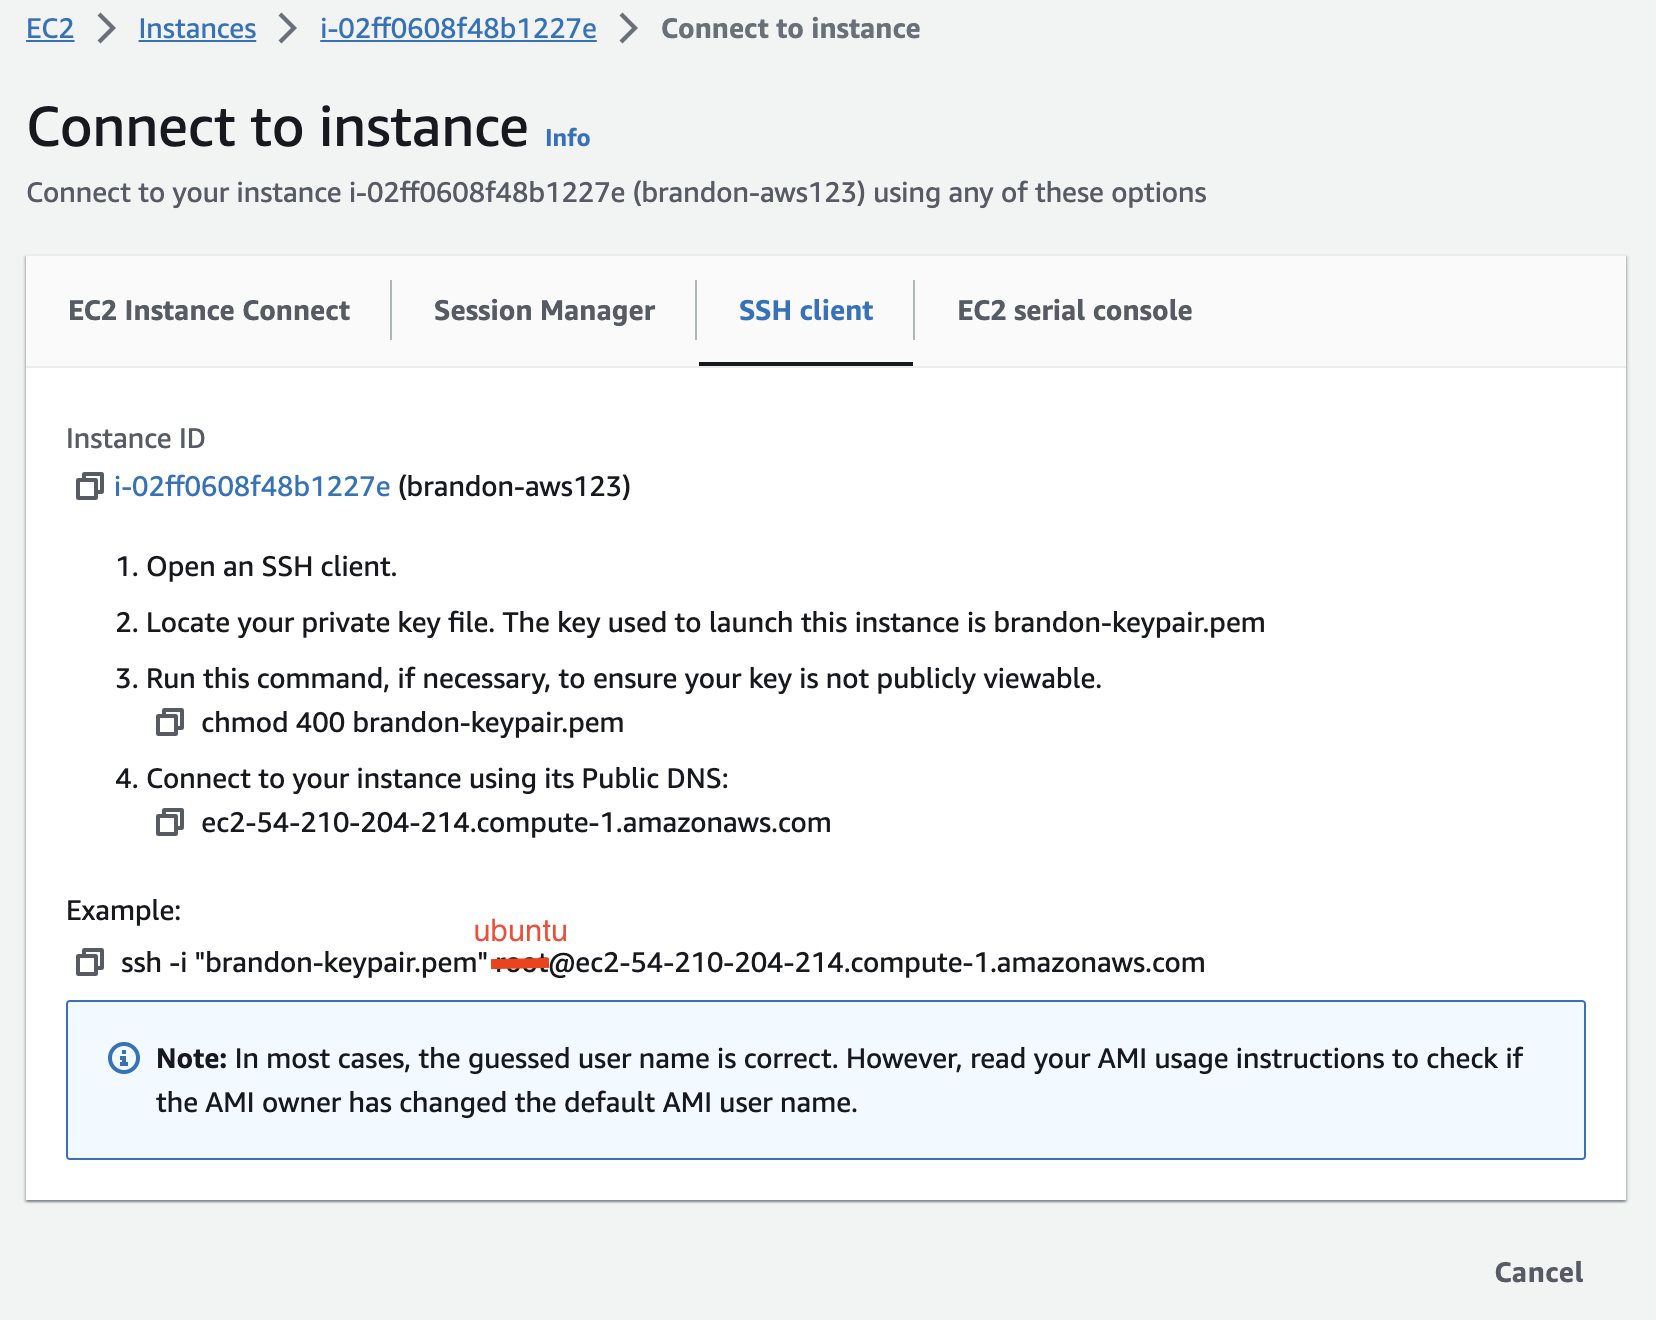
Connect 를 클릭해서 접속 방법을 가이드 받을 수 있습니다.

사전 제작된
CHENLAB-PUBLICAMI는 우분투이므로 사용자 이름은 "ubuntu"가 됩니다. 참고로 이전 챕터에서 실습에 사용했던 Amazon Linux 2 이미지에 대한 사용자 이름은 "ec2-user" 였습니다.
예)