공유 AMI로부터 가상 머신 시작하기
This workshop section walks you through setting up your own EC2 Linux instance from a premade AMI, which you will use to run analyses in later sections of the workshop.
We’ll be using an image built by the Chen Lab at NUS and GIS. This has a lot of common tools useful for bacterial (and general) genomics installed. We have documented what is on this AMI and how it was set up on our accompanying GitHub repository. Those instructions may be useful if you want to set up the same software on another system and may help you with some hints when installing other software as well for your own work.
Specifically, you learn how to:
a. Sign in to the AWS Management Console and explore it.
b. Create an Amazon EC2 instance from an AMI.
c. SSH into an EC2 instance and run Linux commands.
Launch the EC2 Dashboard
-
In the AWS Management Console search bar, type EC2.
-
Choose EC2 to open the EC2 Dashboard.
Spend a few minutes familiarizing yourself with the layout of the dashboard:
- Left pane: Tools and features, such as the saved Amazon Machine Images (AMIs), storage volumes, and ssh keys.
- Center: Resource listings and the ability to launch an instance.
- Right pane: General information, such as documentation and pricing.
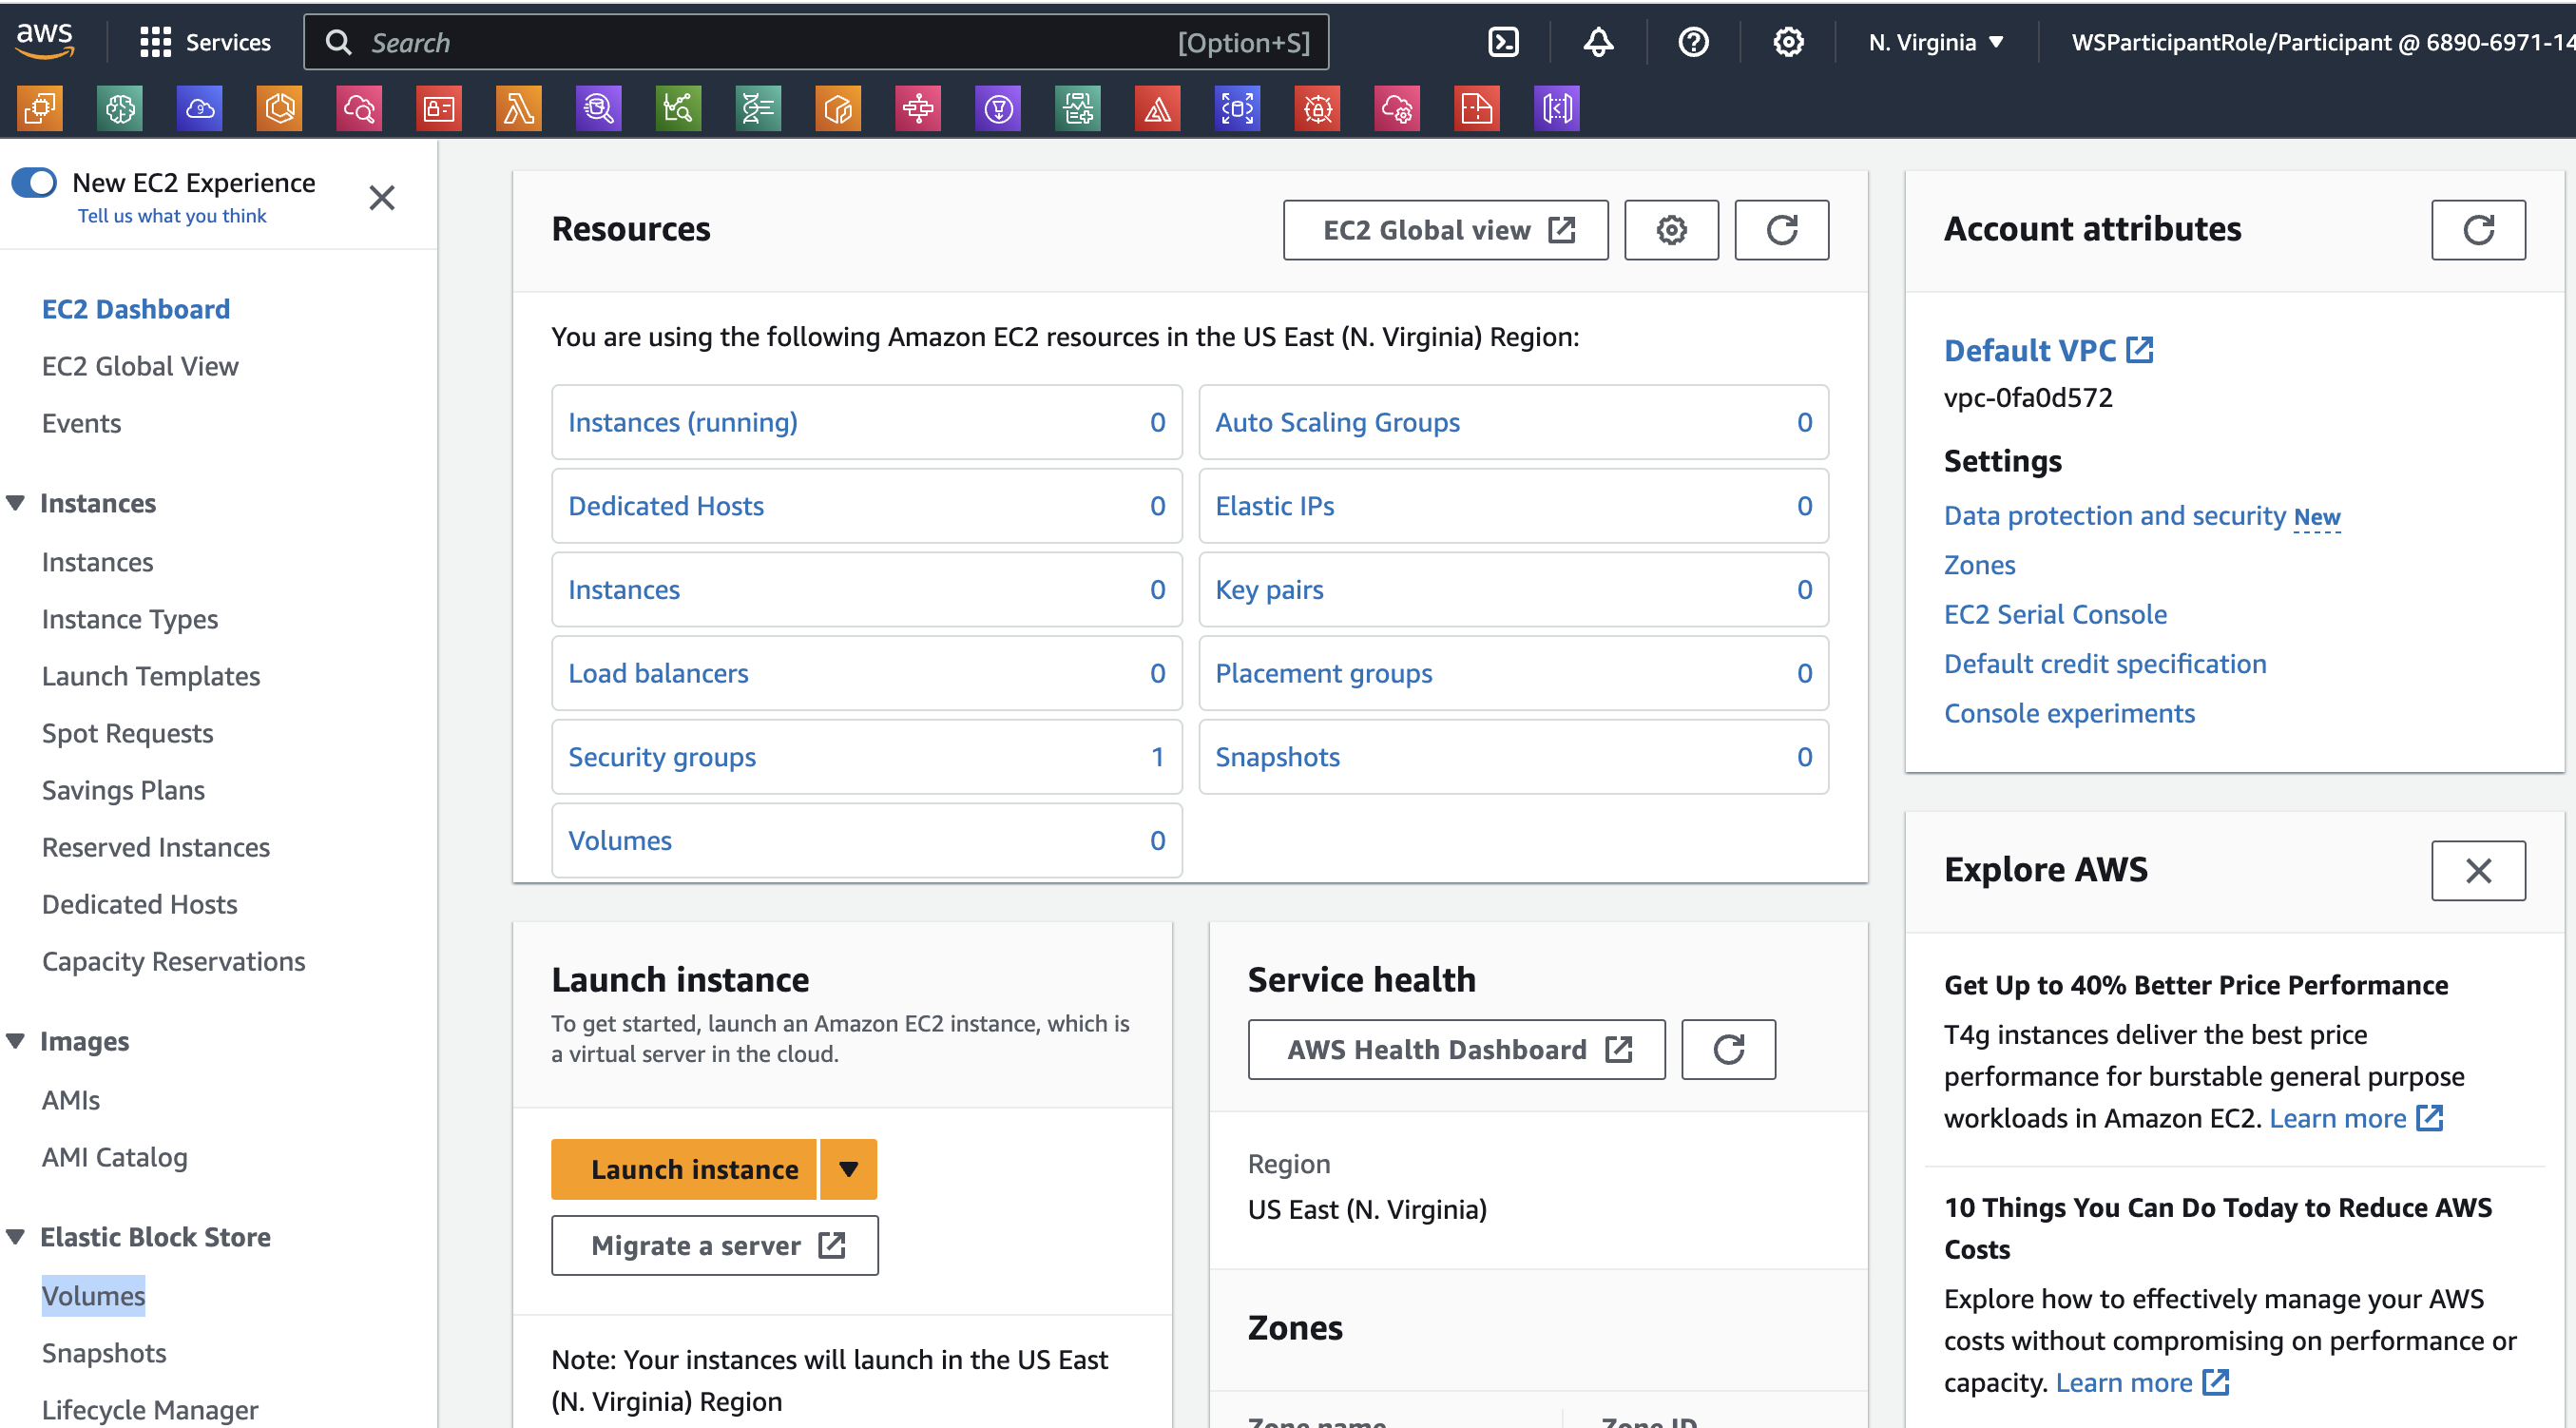
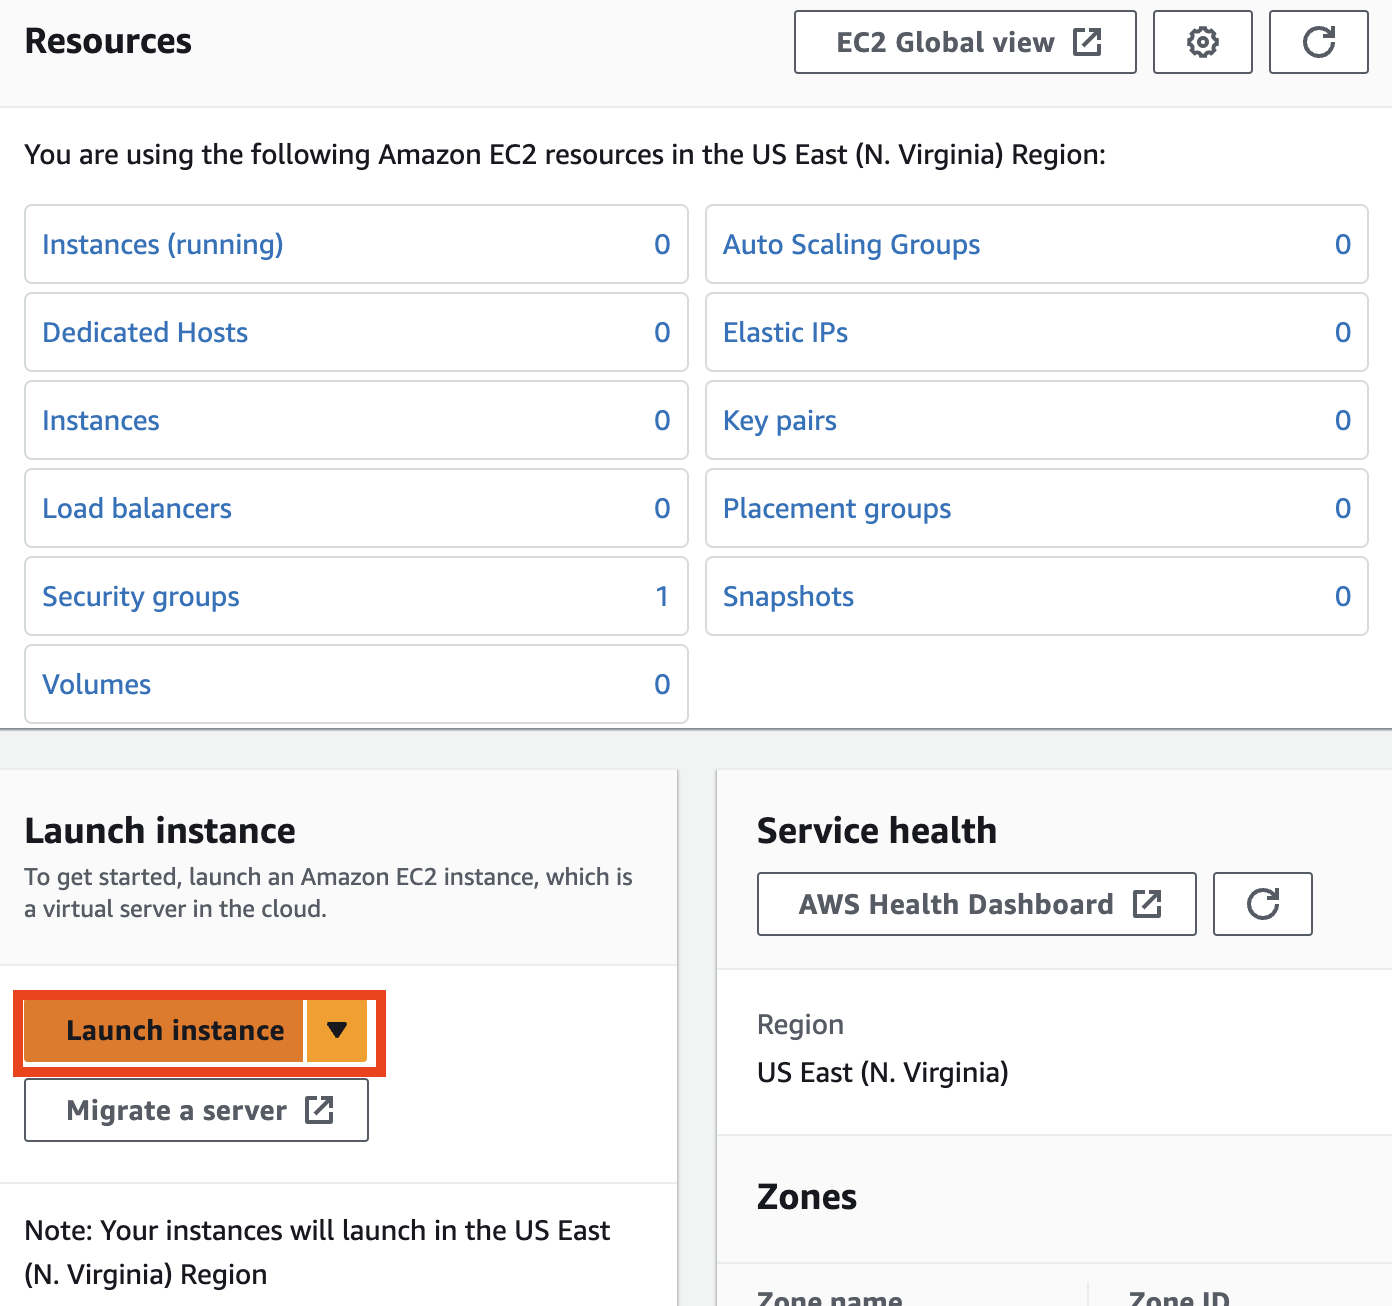
Launch an EC2 Instance
We will now launch an EC2 Linux-based instance.
- Click on Launch Instance, then click Launch instance again from the drop down menu.
- On the Launch an instance page, you can choose a friendly name for your instance.
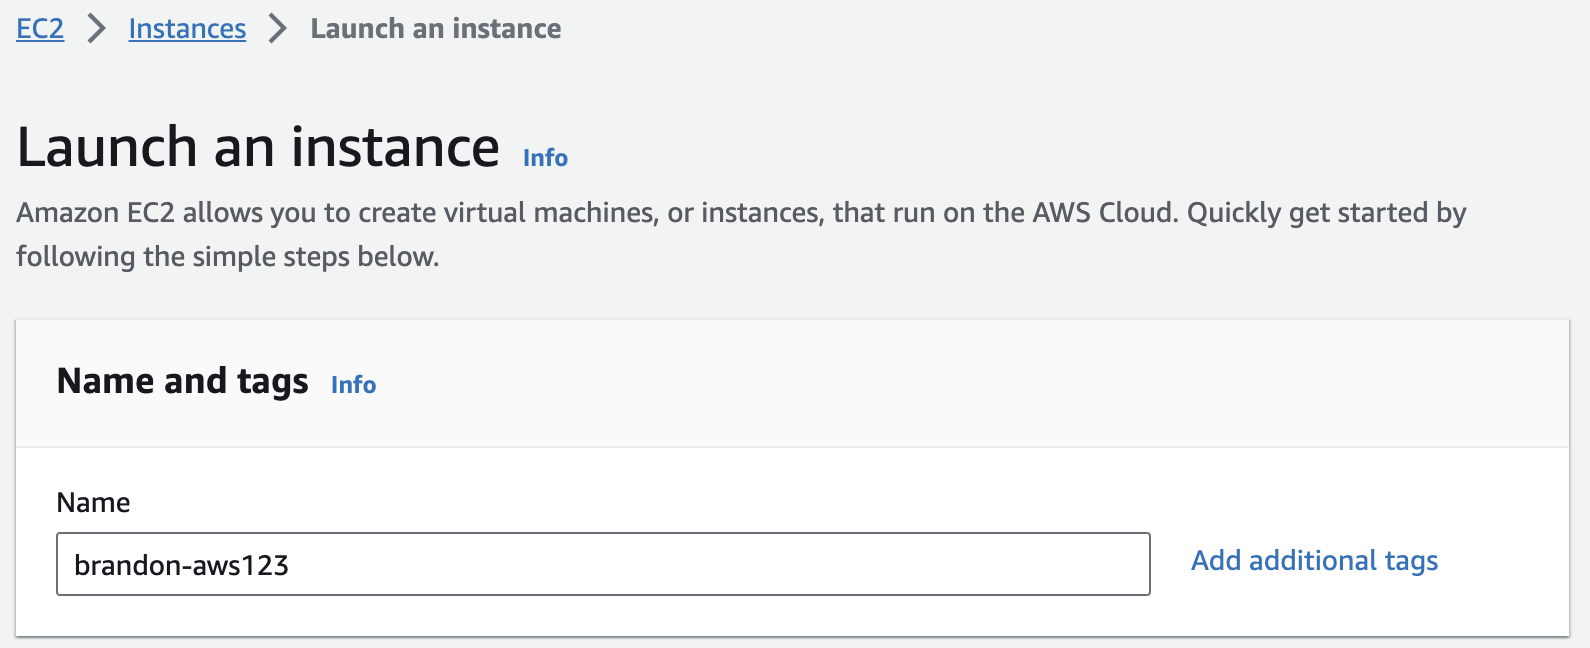
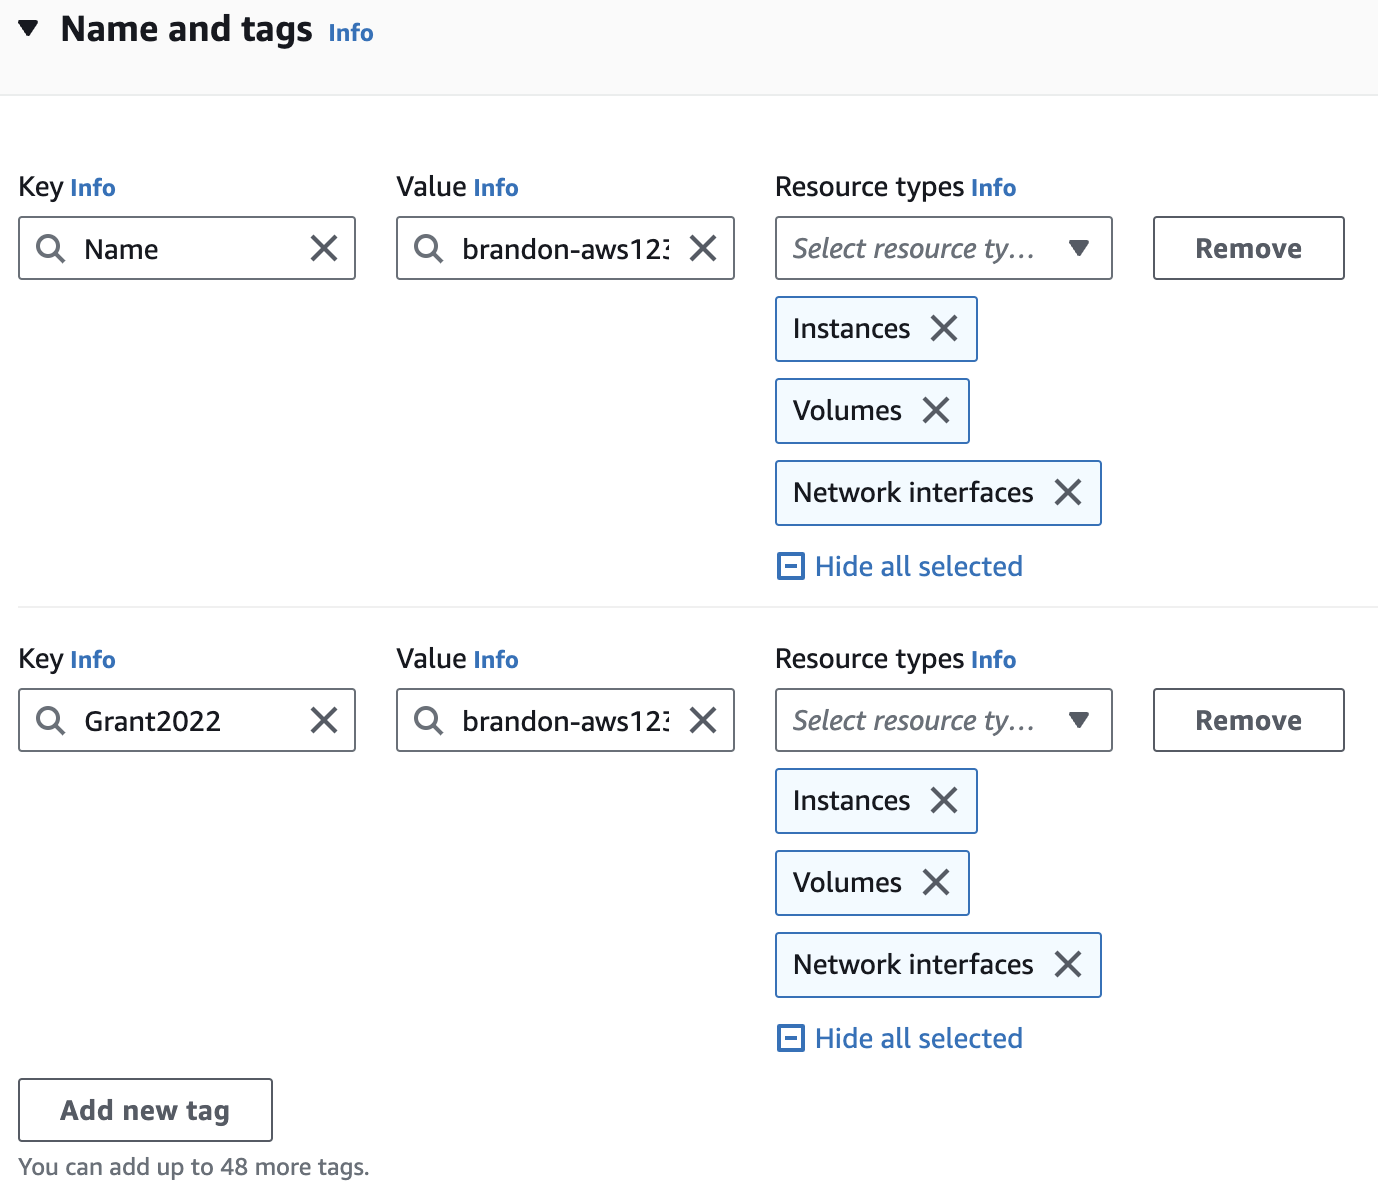
- Click on Add additional tags and “Add Tag”. You will find the “Name” you provided for your instance. Now enter the key and value. These keys, more correctly known as a tags, will appear in the console once the instance launches. It makes it easy to keep track of running machines in a complex environment. Create additional tags similar for the ones you used for the key pair previously - give a user and grant key to this machine, and enter the same values. When ready, select Instances, Volumes, Network interfaces under the Resource types.
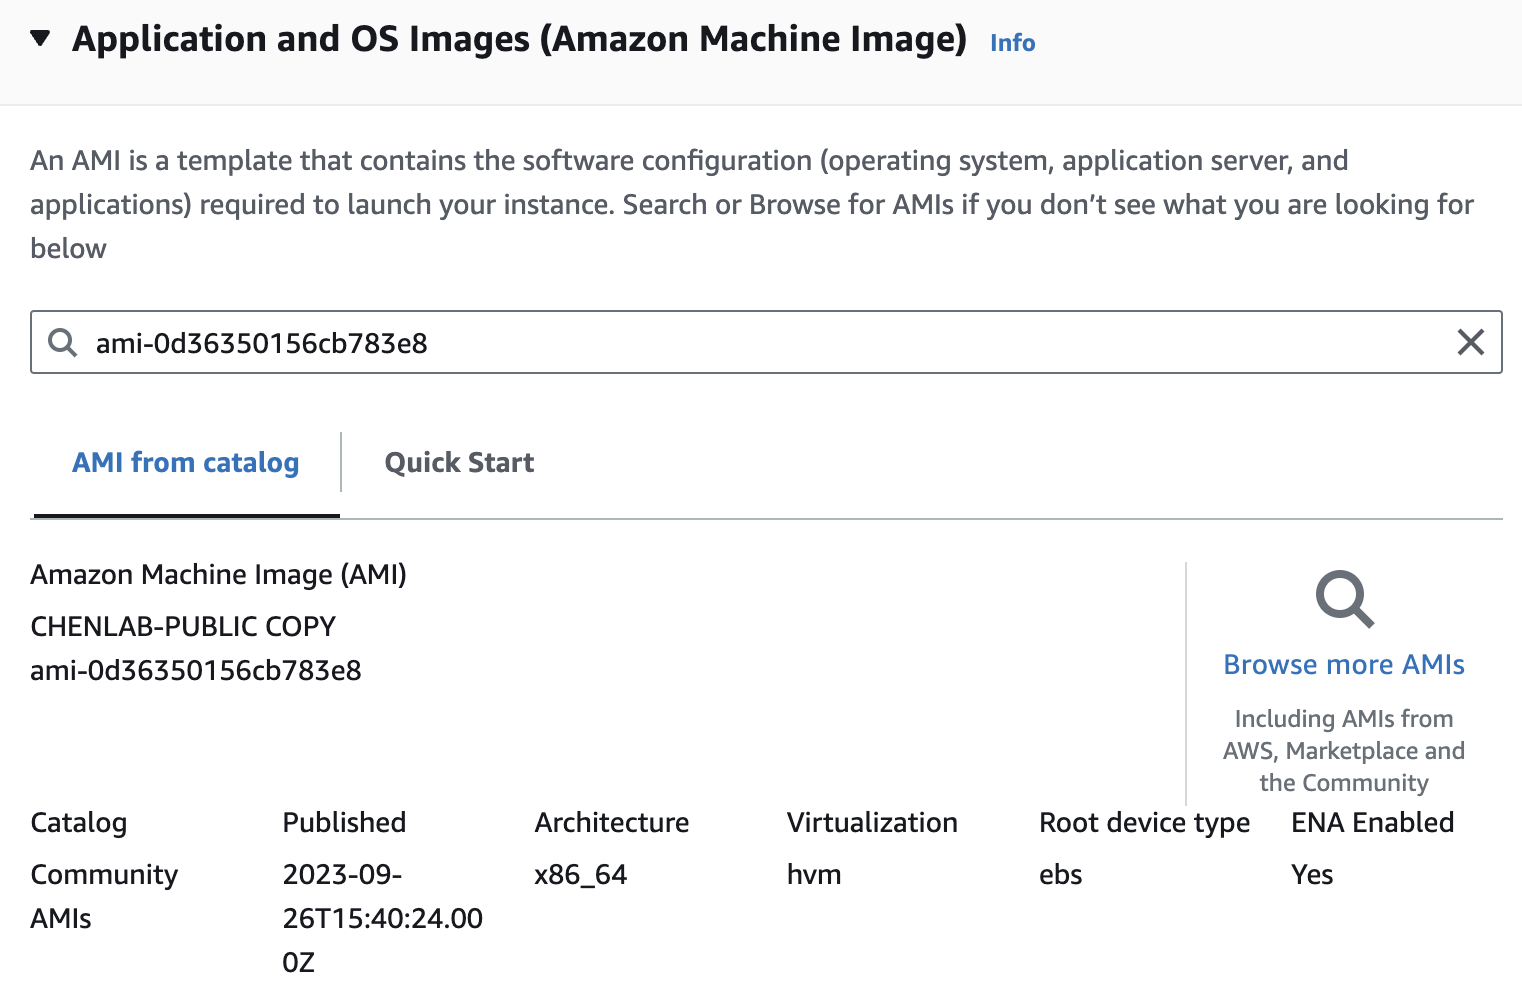
- Under Application and OS images (Amazon Machine Image) enter the AMI ID shared for the training into the search box. The AMI may differ from the one pictured; refer to instructor’s directions.
Note:
For this training, search for
CHENLAB-PUBLICand choose the most recent AMI version; as of September, 2022 this is v2.10b, which has IDami-0d36350156cb783e8. You can find out more about CHENLAB-PUBLIC AMIs in Appendix: About the AMI.
The results of the search appear in Community AMIs and in AWS Marketplace.
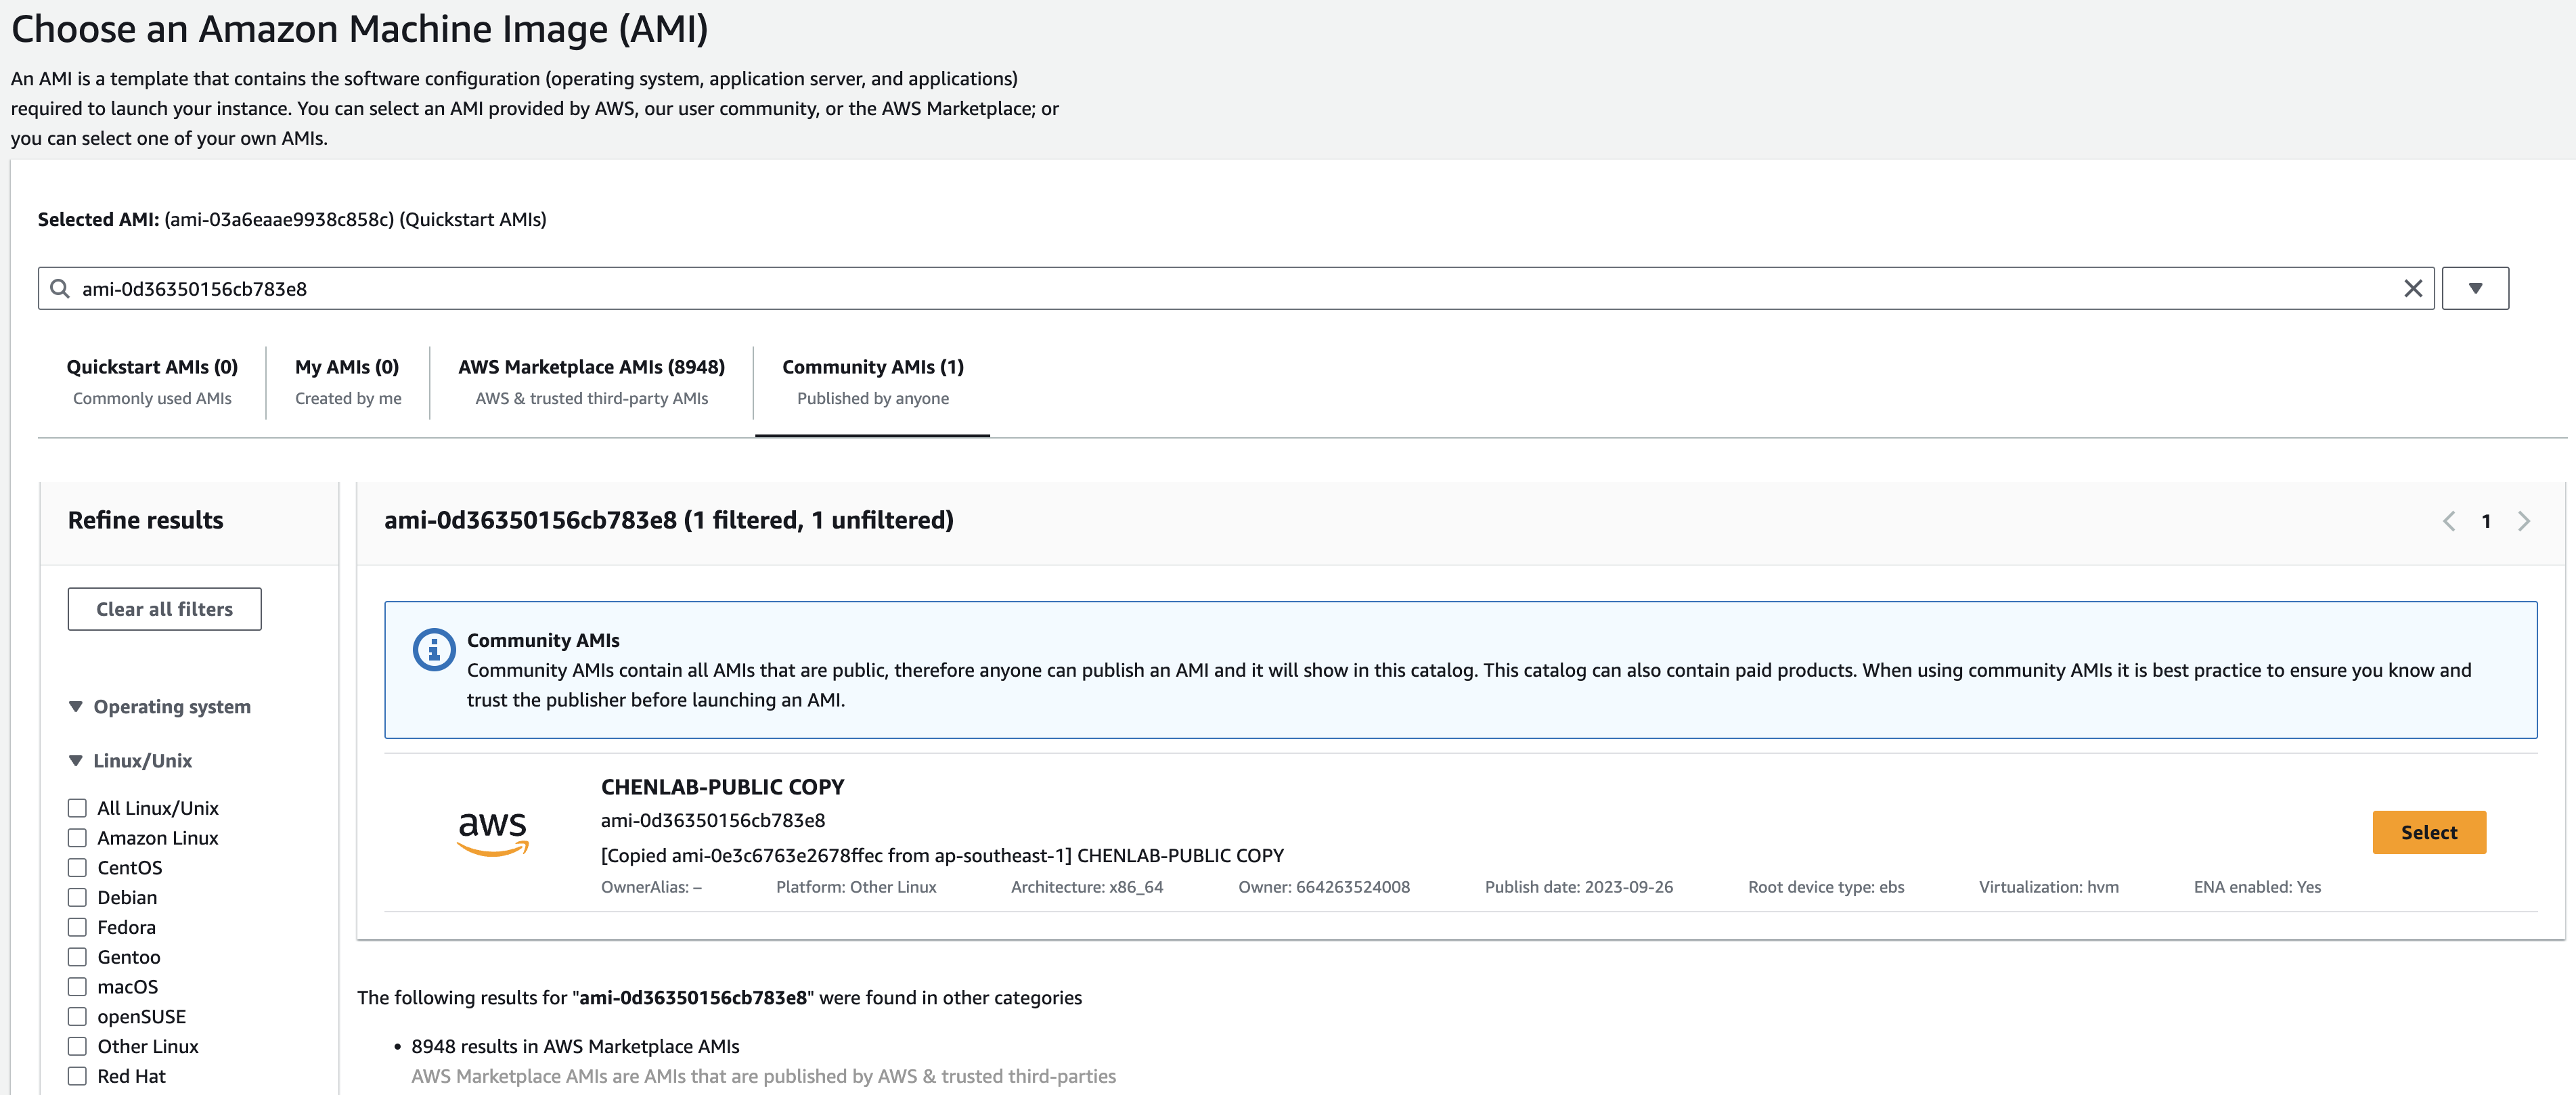
- Click on the results in Community AMIs.
The AMI ID will now appear.
-
Click on the Select button to select the AMI. Be sure to select the lastest version of the AMI (see above, Step 4. Note).
-
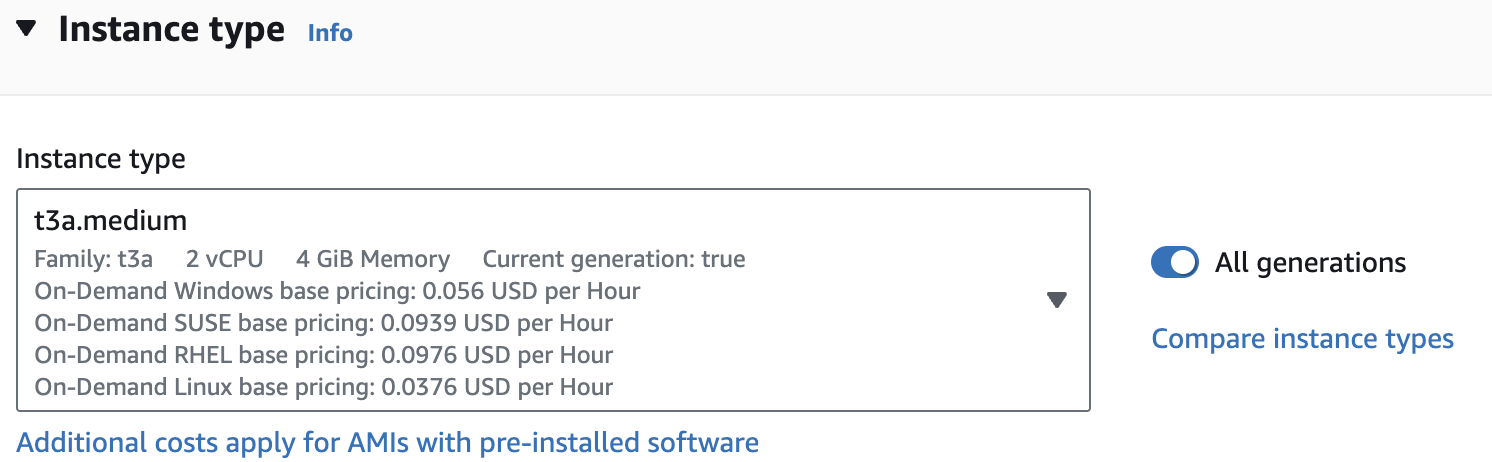
Under Instance type, click on the drop-down arrow and type t3a.medium into the search bar.

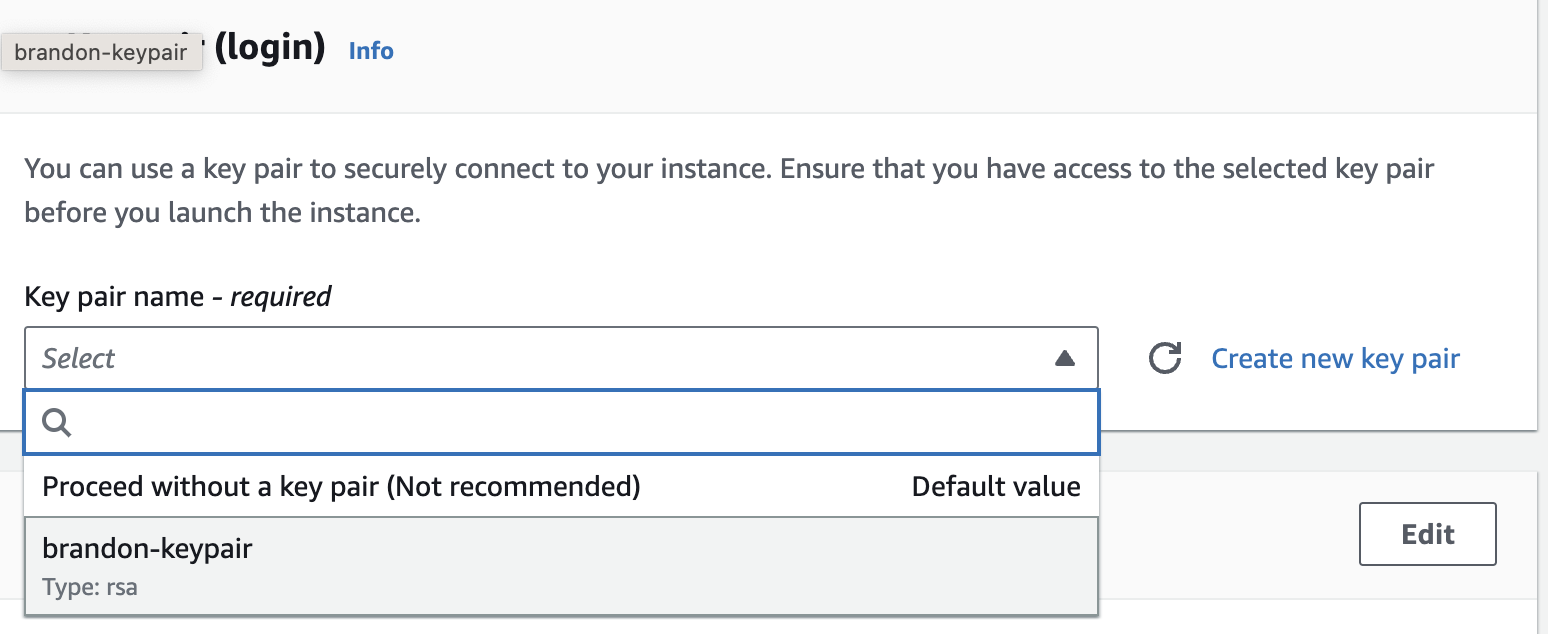
- Select the key pair that you created in the beginning of this lab from the drop-down list under Key pair (login).

- Next click on Edit against Network settings. You will be prompted to provide Subnet and Security group details. The security groups will be your firewall rules.
a. Note that the Subnet field can be configured to launch the instance in a specific Availability Zone; while we are keeping the default for this workshop, this gives you control over the location of your machine.
b. Provide a name for your new security group. NOTE: For the purpose of this lab use your “[Your initials]-sec-group”.
c. Confirm an existing SSH rule exists which allows TCP port 22.
d. To accept connections from anywhere, select the drop-down box under the Source type column and select Anywhere which will correspond to 0.0.0.0/0.
특별히 네트워크 설정 수정할 것은 없습니다. 앞에서 launch-wizard-1으로 새로운 보안 그룹이 만들어졌다면 이제 +1증가해서 자동으로 launch-wizard-2라는 보안 그룹 이름이 부여된다는 점을 확인해주세요. 보안 그룹 launch-wizard-1이 만들어져 있다면 새로 만들지 않고 이것으로 설정해도 무방합니다. (보안 그룹 설정 내용이 동일하므로)
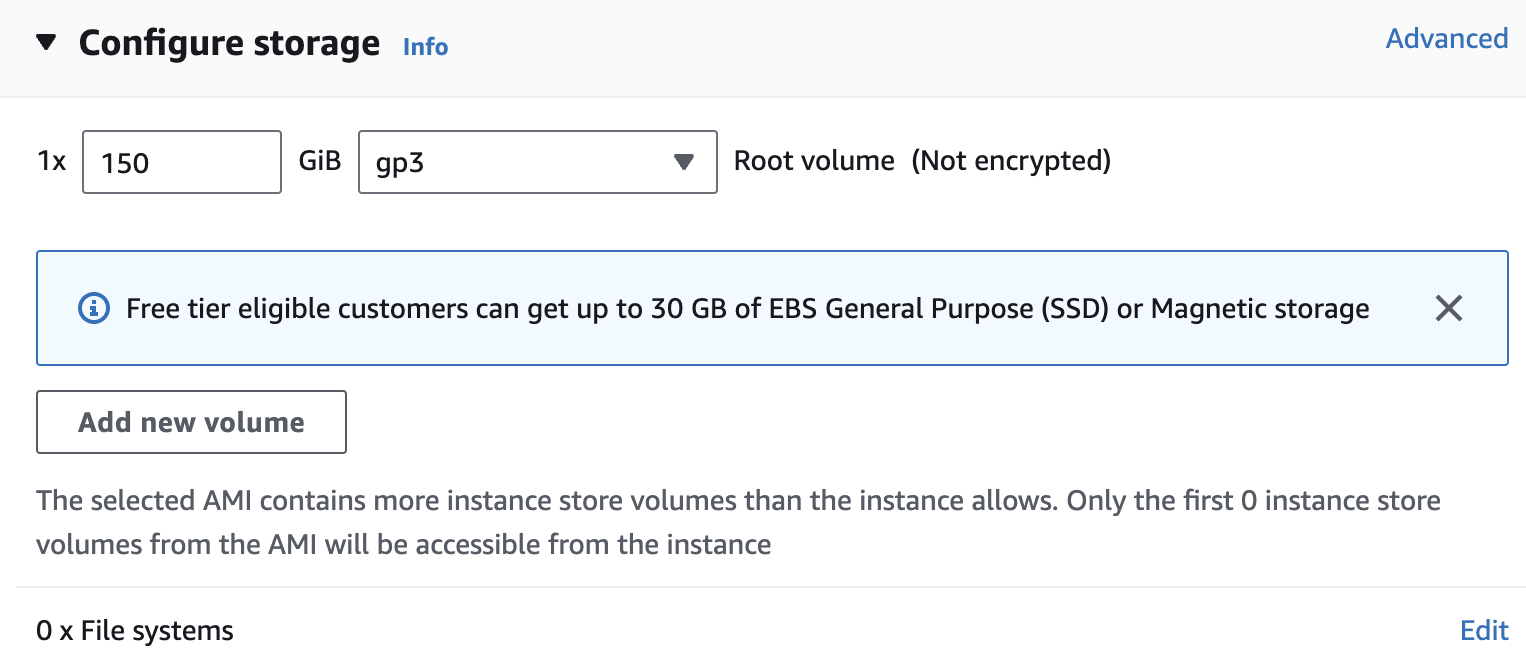
- Under Configure storage, you have the ability to modify or add storage and disk drives to the instance. For this lab, we will simply accept the storage defaults.

- Review your configuration under Summary and click Launch Instance.

Your instance will now start, which may take a moment. You will be shown the Launch Status page with the message Successfully initiated launch of instance.
- On the lower right of the page click on View all Instances to view the list of EC2 instances. Click on your instance. It will go through an initialization process. Once your instance has launched, you will see your Linux server as well as the Availability Zone the instance is in, and the publicly routable DNS name.
SSH into an EC2 instance
The operating system of your local computer determines the options that you have to connect from your local computer to your Linux instance. Here are directions to connect from Windows Using PuTTY or OpenSSH, From Linux & MacOS-X using ssh client and from Windows Subsystem for Linux (WSL) using ssh client.
Note: The premade CHENLAB-PUBLIC AMI is Ubuntu, so your username will be “ubuntu”
Connecting from Windows using PuTTY
We will now use the private .ppk file of the key pair generated earlier to open a SSH session to the EC2 instance.
-
Start the PuTTy application.
-
Enter in the IP address of the EC2 instance in the Host Name (or IP address) field.
-
To save the session (so we dont have to repeat the configuration everytime) provide a name in the Saved Sessions field.
-
In the left navigation pane under Connections clickon SSH and next click on Auth.
-
In the Private key file for authentication field click Browse and browse in the .ppk file downloaded when creating the key pair earlier.
-
Next in the left navgation pane click on Session (scroll up if you need to) and and further click on Save to save the session.
-
Next click on Open to start the SSH session.
-
PuTTy will now attempt to start an SSH Session.
NOTE: You will get a security Alert The Servers host key is not cached in the registry, click on Yes to continue.
-
You will now be presented with the login as prompt.
-
At the login as prompt type ec2-user if your image is Amazon Linux OS or ubuntu if your image is Ubuntu Linux OS and hit enter.
You would have now logged into the EC2 instance on AWS.
Connecting from Windows using MobaXterm
We will use the private .pem key pair to open an SSH session to the EC2 instance.
-
Start the MobaXterm application.
-
To open a session, click on Session in the top-left corner, then click SSH.
-
Enter in the IP address of the EC2 instance in the Host Name field.
-
To the right, select username and enter your username for the session.
NOTE: Username to be used here is ec2-user if your image is Amazon Linux OS and ubuntu if your image is Ubuntu Linux OS.
-
Below, click on Advanced Settings, and select private key (use your .pem file).
-
Click Ok.
MobaXterm will have logged you in to your EC2 instance.
Connecting from Windows using Windows Subsystem for Linux
We will now use the private .pem file of the key pair generated earlier to open a SSH session to the EC2 instance.
- Copy the private key from Windows to WSL - In a WSL terminal window, copy the .pem file (for the key pair that you specified when you launched the instance) from Windows to WSL. Note the fully-qualified path to the .pem file on WSL to use when connecting to your instance.
cp /mnt/<Windows drive letter>/path/my-key-pair.pem ~/WSL-path/my-key-pair.pem
- In a terminal window, use the ssh command to connect to the instance. You specify the path and file name of the private key (.pem), the user name for your instance, and the public DNS name or IP Address.
NOTE: Username to be used here is ec2-user if your image is Amazon Linux OS and ubuntu if your image is Ubuntu Linux OS.
sudo ssh -i /path/my-key-pair.pem ubuntu@<ip-address>
you will see the following response
The authenticity of host '<ip-address>'
can't be established.
RSA key fingerprint is 1f:51:ae:28:bf:89:e9:d8:1f:25:5d:37:2d:7d:b8:ca:9f:f5:f1:6f.
Are you sure you want to continue connecting (yes/no)?
- Enter Yes
you will now be logged into the EC2 Instance.
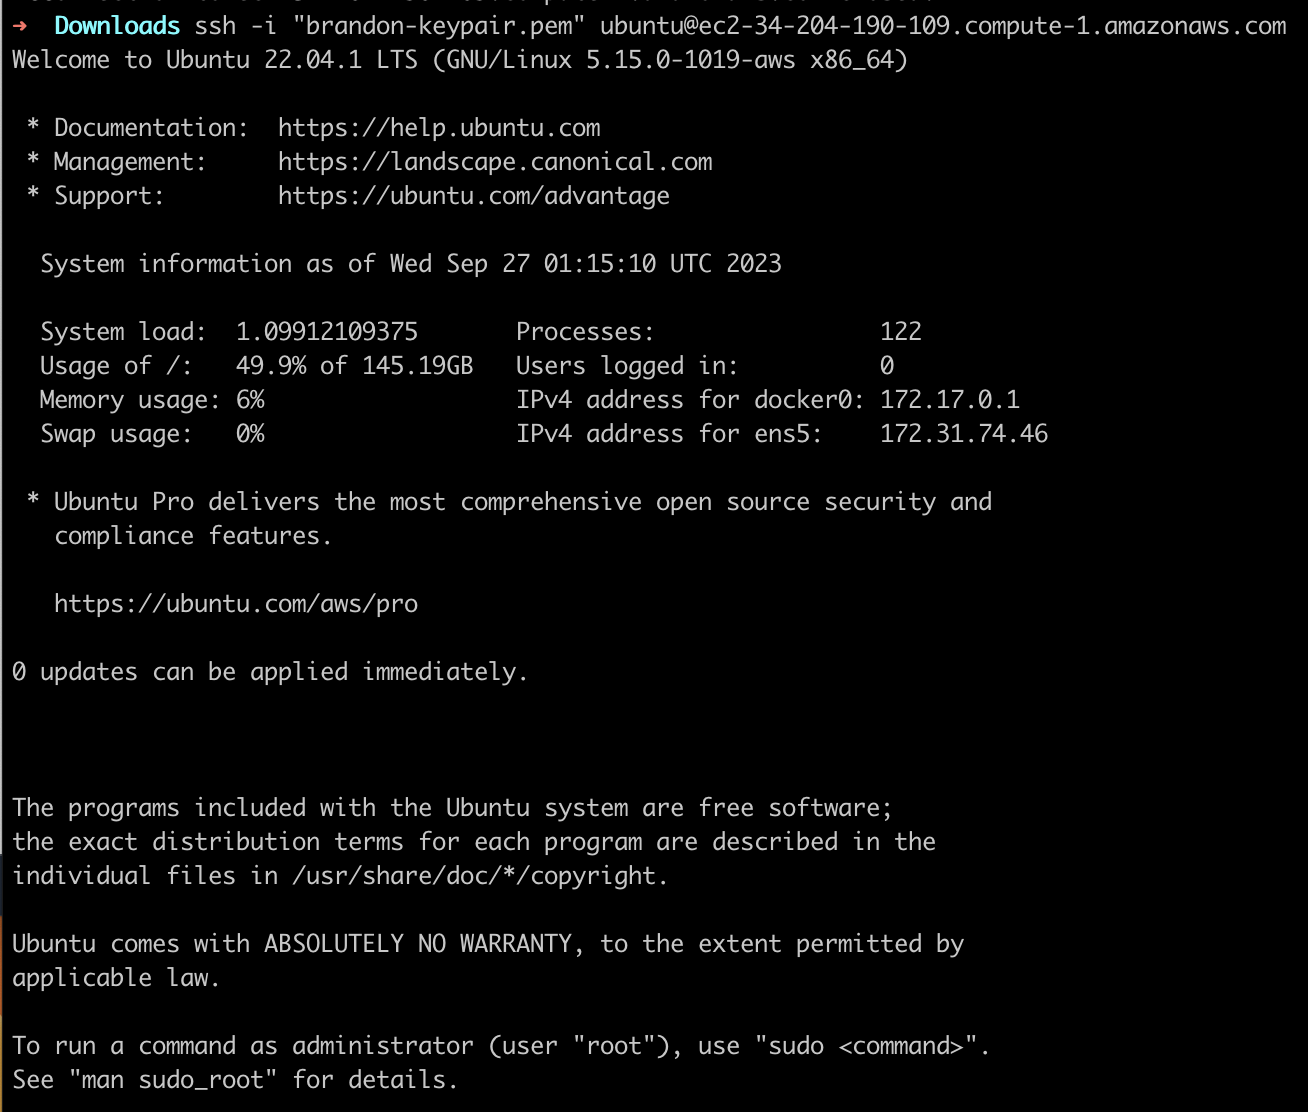
Connecting using SSH on Linux & MacOS and OpenSSH on Windows
We will now use the private .pem file of the key pair generated earlier to open a SSH session to the EC2 instance.
- In a terminal window, use the ssh command to connect to the instance. You specify the path and file name of the private key (.pem), the user name for your instance, and the public DNS name or IP Address of your instance.
NOTE: Username to be used here is ubuntu if your image is based on the Ubuntu Linux OS and ec2-user if your image is based on Amazon Linux OS. (See this page which covers many of the common AMI OSs.)
ssh -i /path/my-key-pair.pem ubuntu@<ip-address>
You see a response like the following:
The authenticity of host 'ec2-198-51-100-1.compute-1.amazonaws.com (198-51-100-1)' can't be established.
ECDSA key fingerprint is l4UB/neBad9tvkgJf1QZWxheQmR59WgrgzEimCG6kZY.
Are you sure you want to continue connecting (yes/no)?
- Enter Yes
You will now be logged into the Instance.
NOTE: you might need to change the permissions of the key file by running the chmod command as follows. Edit to match your path and key pair name.
sudo chmod 600 /path/my-key-pair.pem
For detailed directions on these please have a look at the following links:
PuTTY, Windows Susbsystem for Linux, MacOS-X ssh Client, Linux ssh client
예)