리눅스 머신 실행
Launch the EC2 Dashboard대시보드로부터 인스턴스 실행하기
In the AWS Management관리 Console콘솔 search검색 bar,창에 typeEC2를 EC2입력합니다.
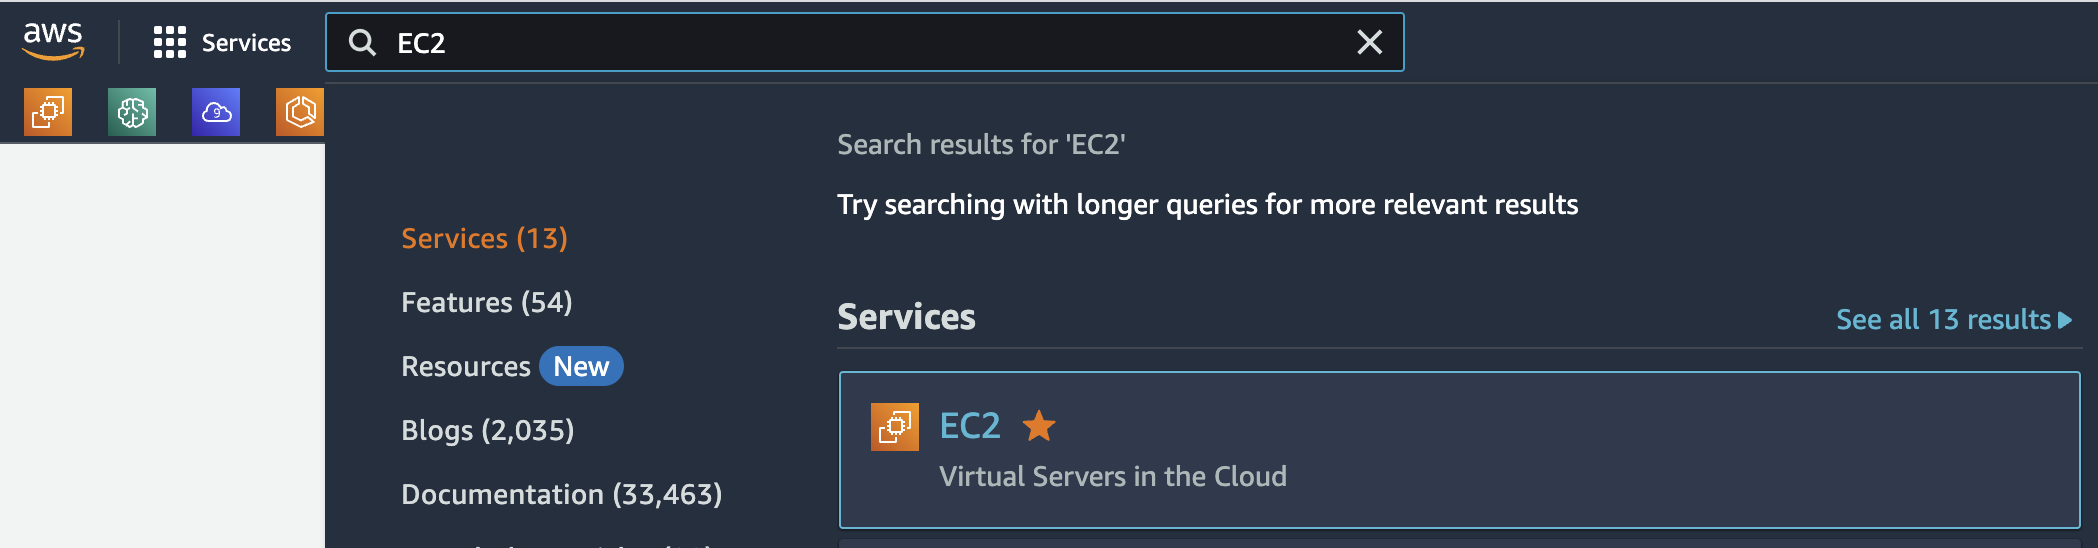
Choose EC2를 to open the선택하여 EC2 Dashboard대시보드를 엽니다.
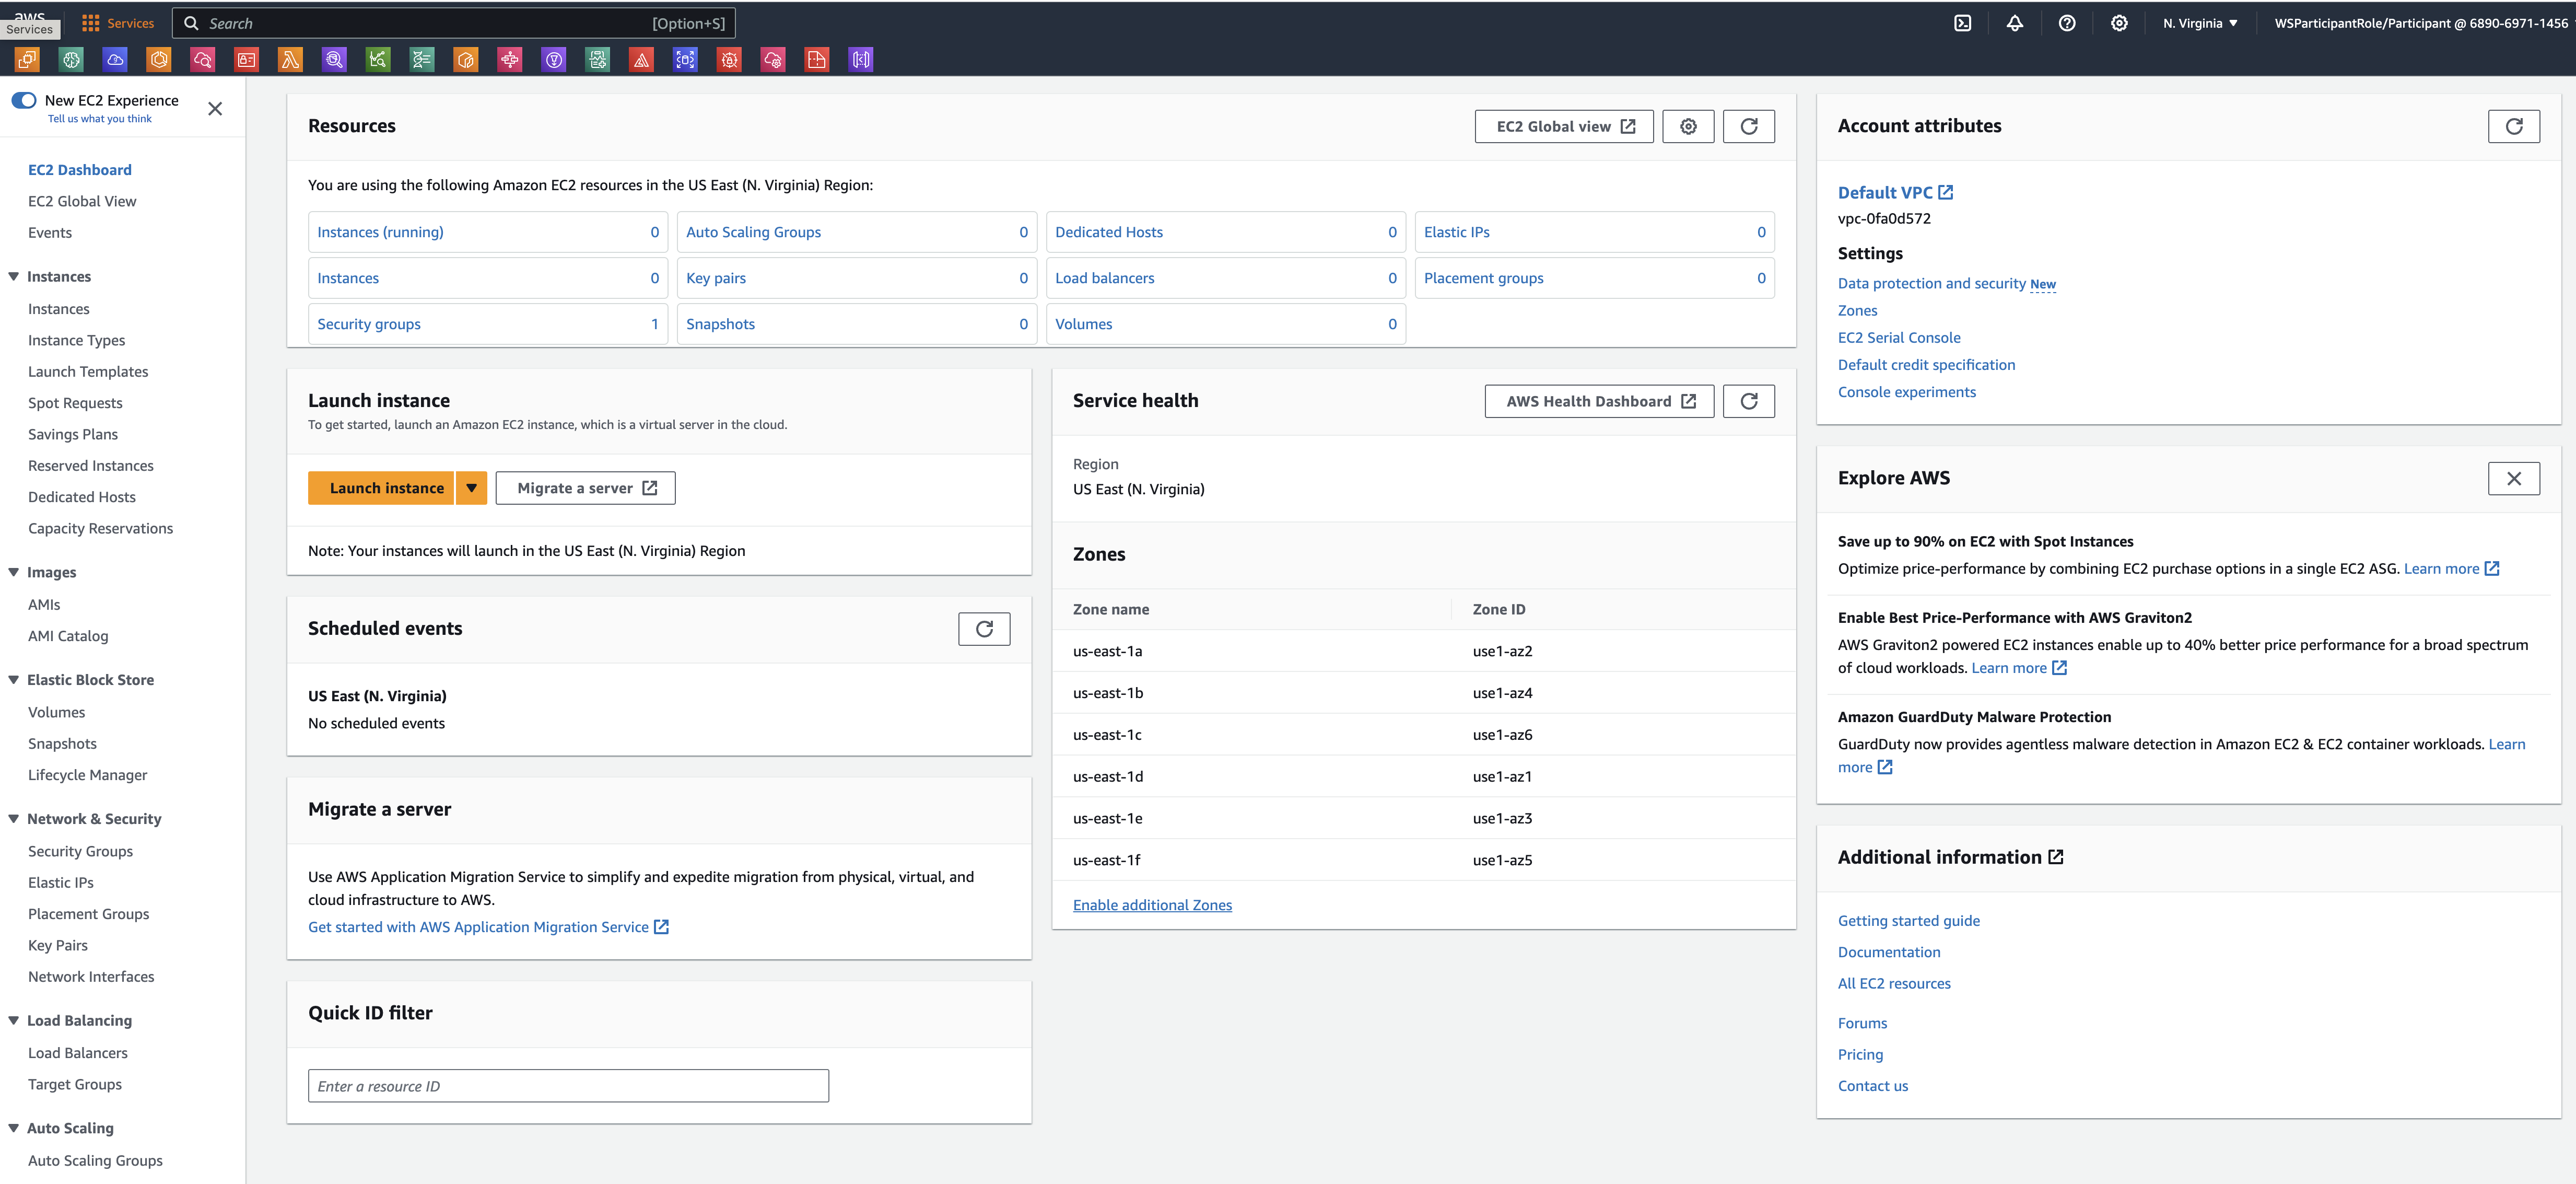
Instances인스턴스는 may그래픽 be사용자 launched인터페이스(콘솔) via또는 a명령줄 graphical스크립트를 user통해 interface시작할 (the수 console)있습니다. or with command line scripts. We’ll start with the graphical console interface first, known as the먼저 EC2 Dashbord대시보드라고 하는 그래픽 콘솔 인터페이스부터 시작하겠습니다.
Spend대시보드의 a레이아웃에 few익숙해지는 minutes데 familiarizing몇 yourself분 with정도 the시간을 layout of the dashboard:투자하세요:
Left왼쪽Navigation탐색pane창:Tools and features, such as the saved저장된 AmazonMachine머신Images이미지(AMIs)AMI),storage스토리지volumes, and볼륨, sshkeys.키와 같은 도구 및 기능.Center가운데:Resource리소스listings목록and및the인스턴스ability시작to launch an instance.기능.Right오른쪽pane창:General문서information,및such가격as등의documentation일반and pricing.정보.
Create신규 a키페어 new Key Pair (Optional)생성하기
In이 this실습 section of the lab you will create a섹션에서는 Linux instance인스턴스를 and생성하고 login로그인하여 to몇 it to run a few가지 Linux commands.명령을 To실행합니다. log인스턴스에 in로그인하려면 toSSH를 an통해 instance,연결할 you수 need있어야 to합니다. be인스턴스에 able액세스하기 to위한 connect몇 via가지 SSH.보안 There계층이 are있으며, severalAWS에서 layers기본적으로 of사용하도록 security설정되어 for있습니다. accessing그 instances중 that하나는 are(아주 enabled대략적으로) by고유한 default사용자 by이름과 AWS.비밀번호와 One비슷하다고 of생각할 these수 is with an있는 SSH key키 pair,쌍을 which사용하는 can (very roughly) be thought of as like a unique username and password.것입니다.
The다음 following단계에서는 steps새 outlineLinux how인스턴스에 to로그인하는 create데 a사용할 new새 SSH key키 pair쌍을 that만드는 then방법을 you간략하게 will use to log in to a new Linux instance.설명합니다.
-
Sign into theAWSManagement관리Console콘솔에and open the로그인하고 Amazon EC2console at콘솔(https://console.aws.amazon.com/ec2)을 엽니다. -
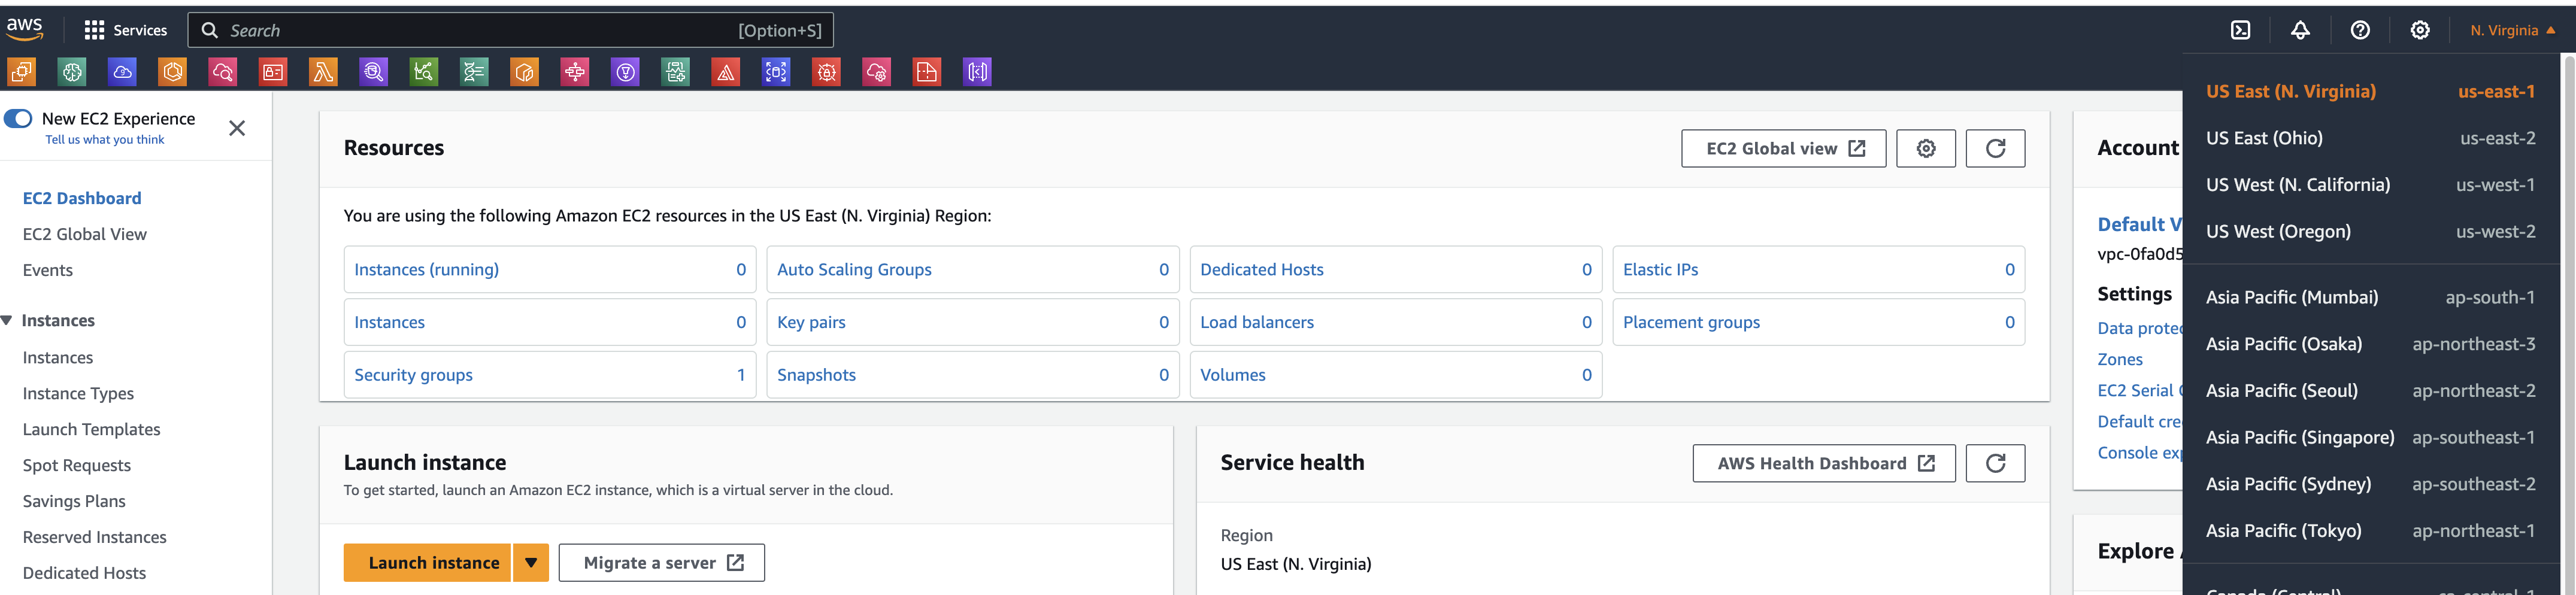
InAWSthe관리upper-right콘솔의corner오른쪽of상단the모서리에서 원하는 AWSManagement Console, confirm you are in the desired AWS region지역(예:(e.g.,N.Virginia)에N.Virginia)있는지 확인합니다.
실습을 하면서 가끔 사용하는 브라우저의 국가 설정에 의해 다른 리전으로 리전 정보가 바뀌는 경우가 있습니다. 워크샵에 사용하고 있는 리전 정보가 맞는지 꼭 확인해주세요. 다른 리전일 경우 실습이 정상적으로 진행되지 않을 수 있습니다.
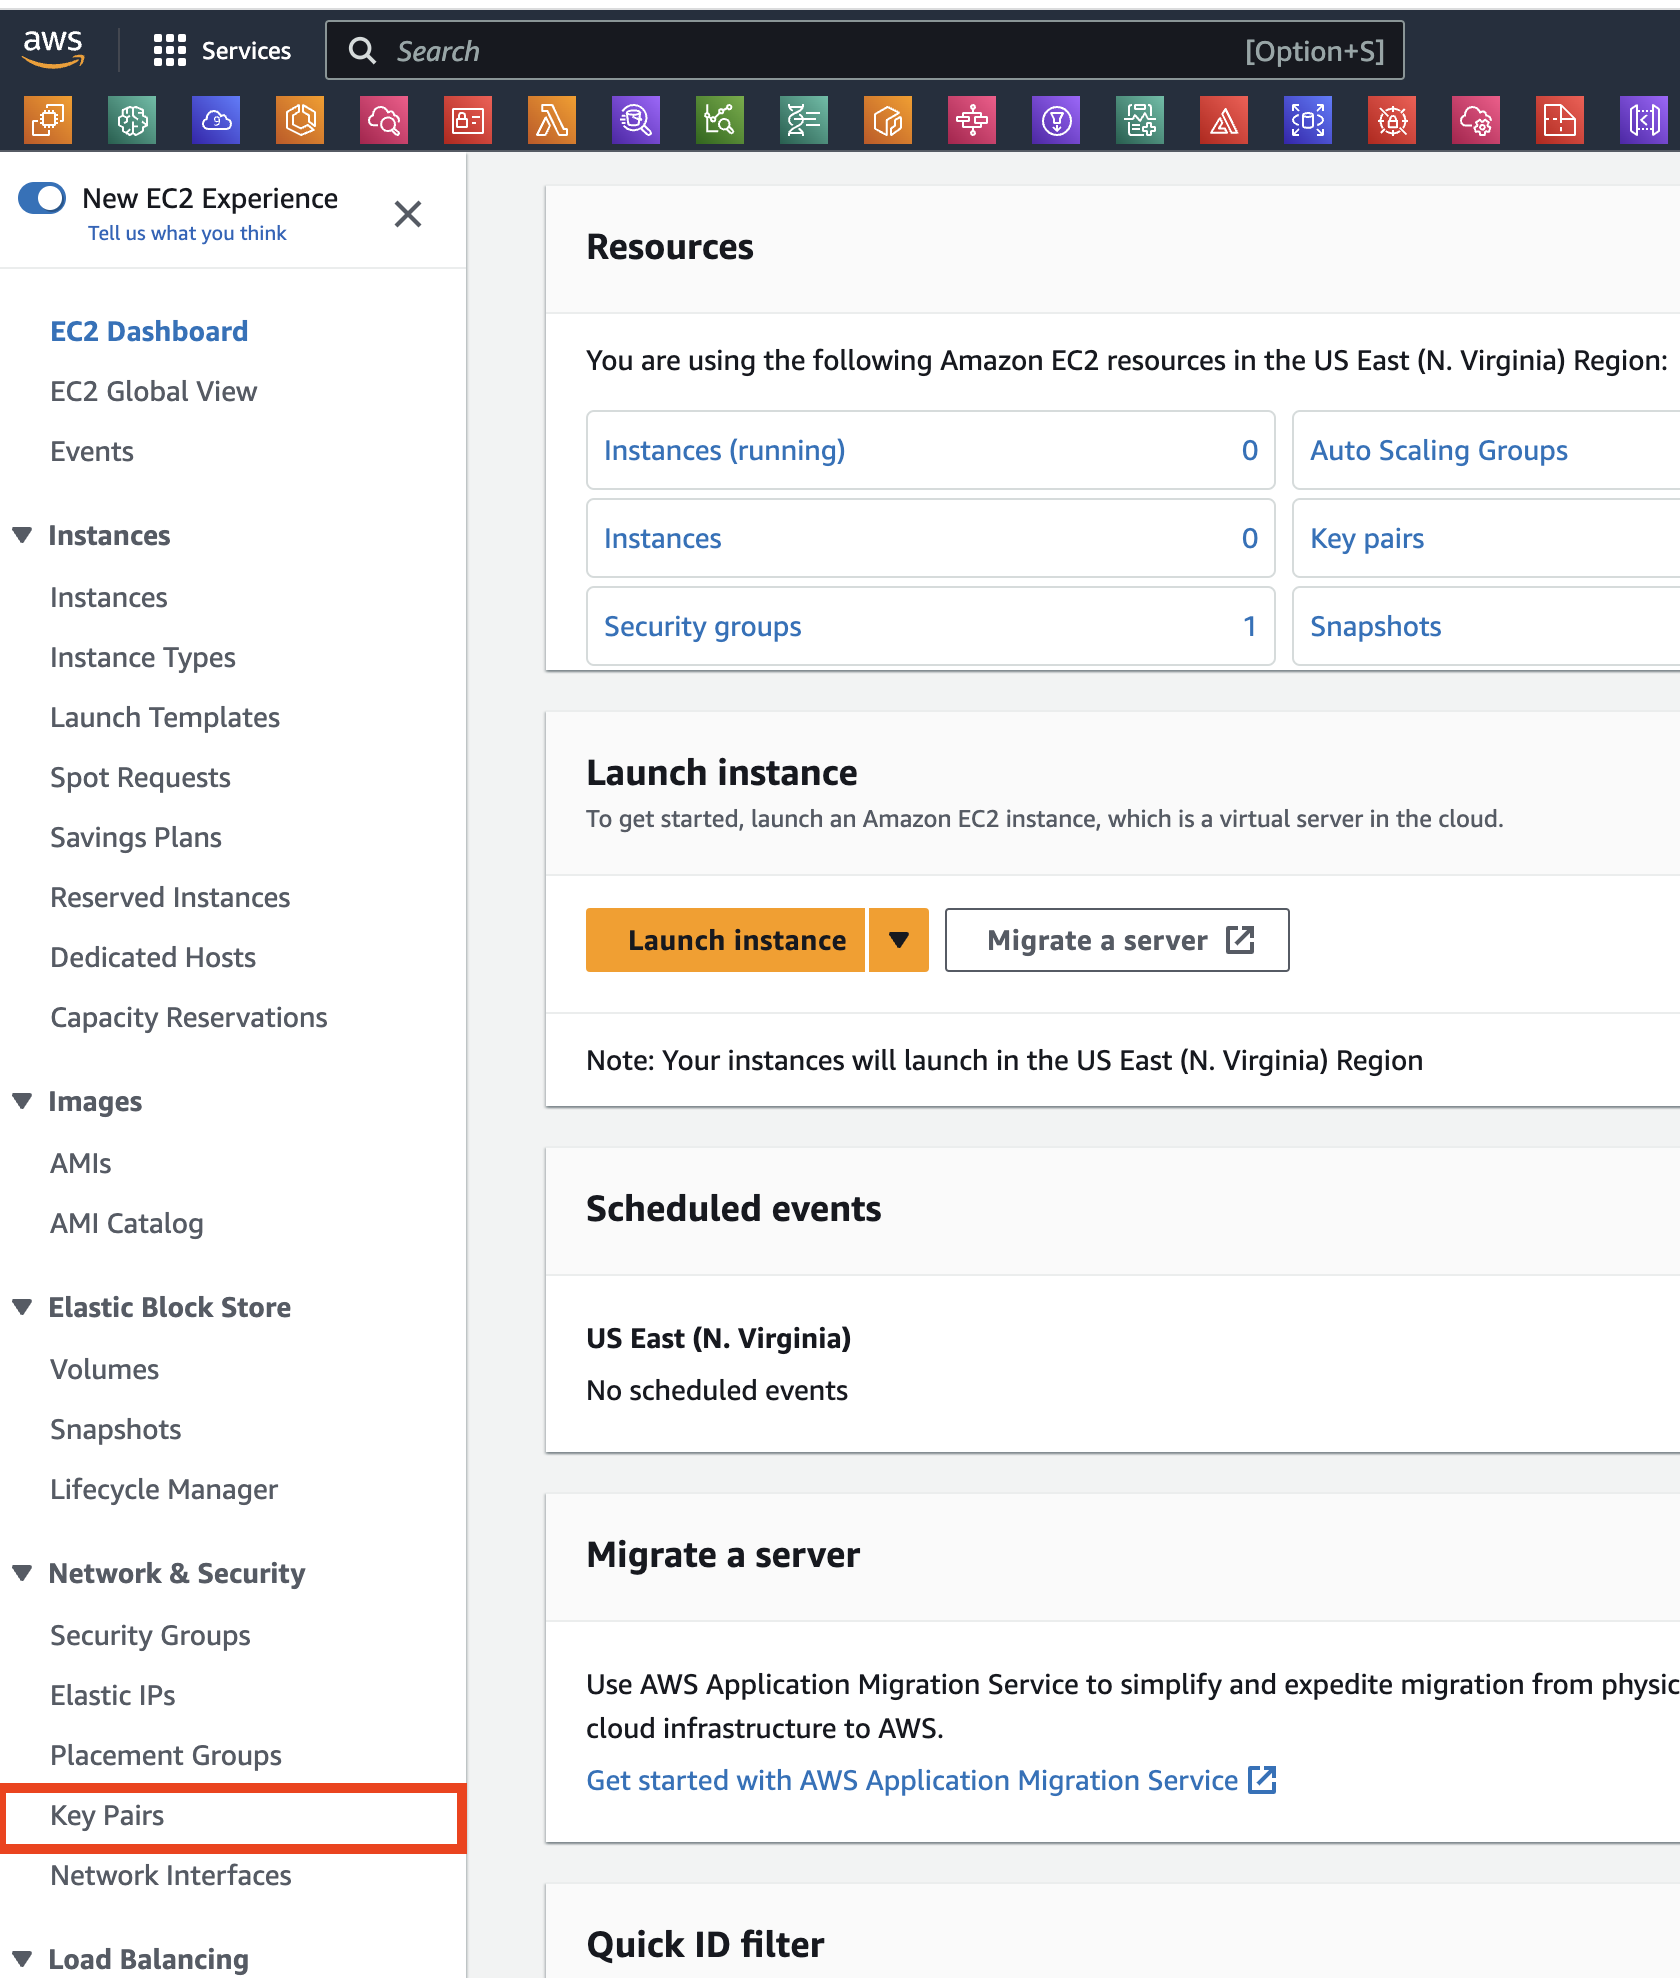
On the섹션에서 Key Pairspage을click클릭합니다.the그러면 SSH 키 쌍을 관리할 수 있는 페이지가 표시됩니다.
- Key Pairs 페이지에서 브라우저 창 상단의 Create Key Pair
button버튼을at클릭합니다.the top of the browser window.

In결과the팝업resulting창에서pop원하는up키window,쌍provide(Keyapair)key이름을pair입력하고nameEC2of인스턴스에your연결하는choosing데and select.ppkor.pemdepending on which사용할 sshclient클라이언트에you따라will use to connect to the EC2 Instance (ForPuTTYselect.ppk 또는 .pem을 선택합니다(PuTTY의 경우 .ppk 선택).ForWindowsSubsystem하위Linux,시스템 Linux, MacOS-X sshClient,클라이언트, Linux sshclient클라이언트, Windows sshclient클라이언트의select경우 .pempem을 선택합니다.).
이 워크샵의 목적을 위해 여러 명이
NOTE: For the purpose of this workshop please provide a unique key pair name, so that it might not clash with key pair names provided by other participants using the same동일한 AWSaccount.계정을You사용하는could경우에는use다른your참가자가name제공한initials키in쌍the이름과key충돌하지pair않도록for고유한easy키identification.쌍 이름을 제공하세요. 쉽게 식별할 수 있도록 키 쌍에 이름 이니셜을 사용할 수 있습니다.
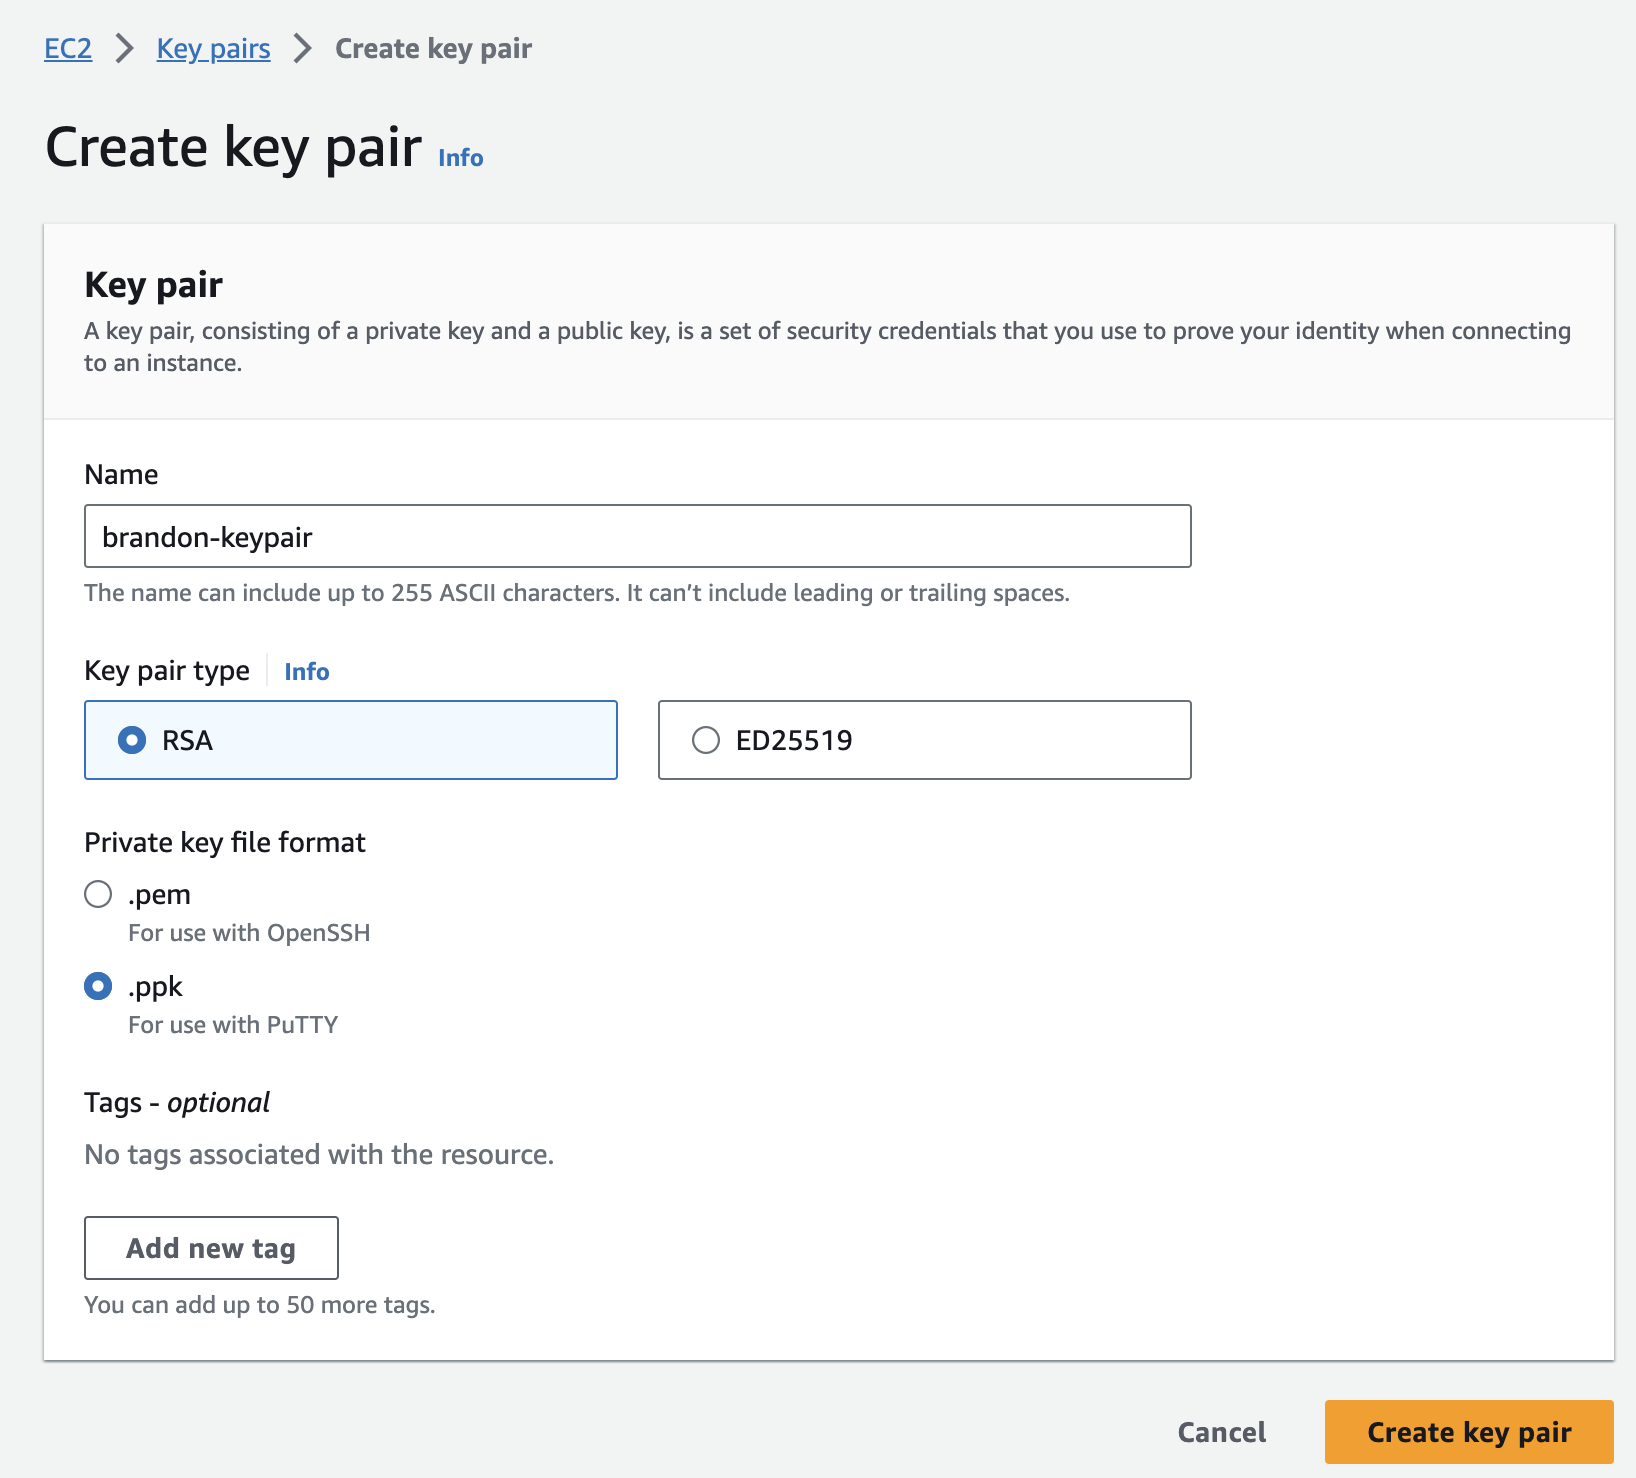
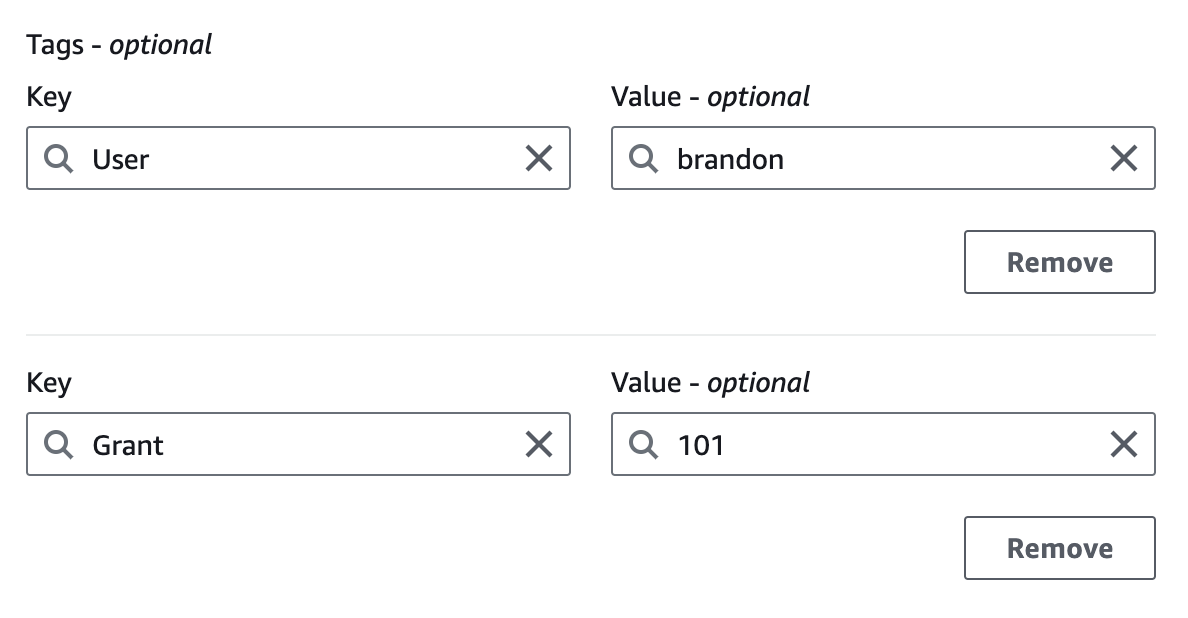
- Add new tag 를 클릭합니다. 나중에 자세히 설명하겠지만 태그는 AWS에서 리소스를 추적하는 효율적인 방법입니다. 이 리소스에 사용자(이니셜 입력)와 가상의 보조금(숫자를 입력하되 일관성 있게 입력)이라는 두 개의 태그를 추가하겠습니다. Create key pair를 클릭합니다. Click add tag. We’ll get into this later, but tagging is an efficient way to track your resources in AWS. We’ll add two tags to this resource- the user (enter your initials) and an imaginary grant (enter a number, but be consistent). Click on Create key pair.
-
생성한 키 쌍이 시스템에 자동으로 다운로드됩니다. 브라우저의 안내에 따라 파일을 기본 다운로드 위치에 저장합니다. 파일이 다운로드되었는지 확인하고 파일을 찾을 수 있는지 확인합니다. 방금 다운로드한 .ppk/pem 파일의 전체 경로를 기억하세요. 이 파일에는 향후 SSH 연결을 위한 개인 키가 포함되어 있습니다.The key pair you created should automatically download to your system. Follow any browser instructions to save the file to the default download location. Verify that the file has downloaded and you can locate it. Remember the full path to this .ppk/pem file you just downloaded. This file contains your private key for future SSH connections.
-
화면 상단에 키 쌍을 성공적으로 만들었습니다라는 메시지가 표시됩니다. 생성한 키 쌍이 나열된 것을 볼 수 있습니다. You will see a message appear at the top of the screen that says Successfully created key pair. You will see the key pair you created listed.
Launch an EC2 Instance
We will now launch an EC2 Linux based instance.
-
Return to the AWS Management Console and open the Amazon EC2 Dashboard.
-
In the upper-right corner of the AWS Management Console, confirm you are in the desired AWS region (e.g., N. Virginia).
- Click Launch instance, then click Launch instance again from the drop down menu.


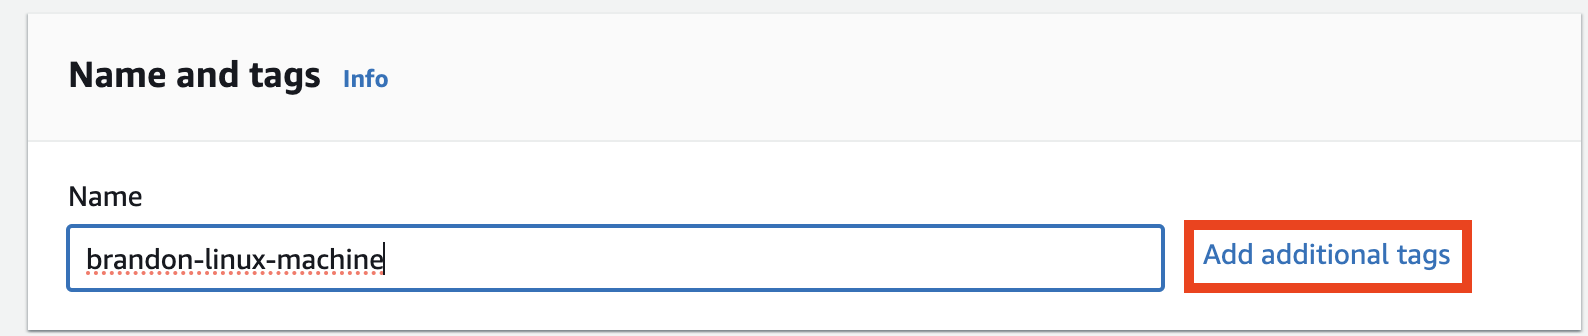
- On the Launch an instance page, you can choose a friendly name for your instance.
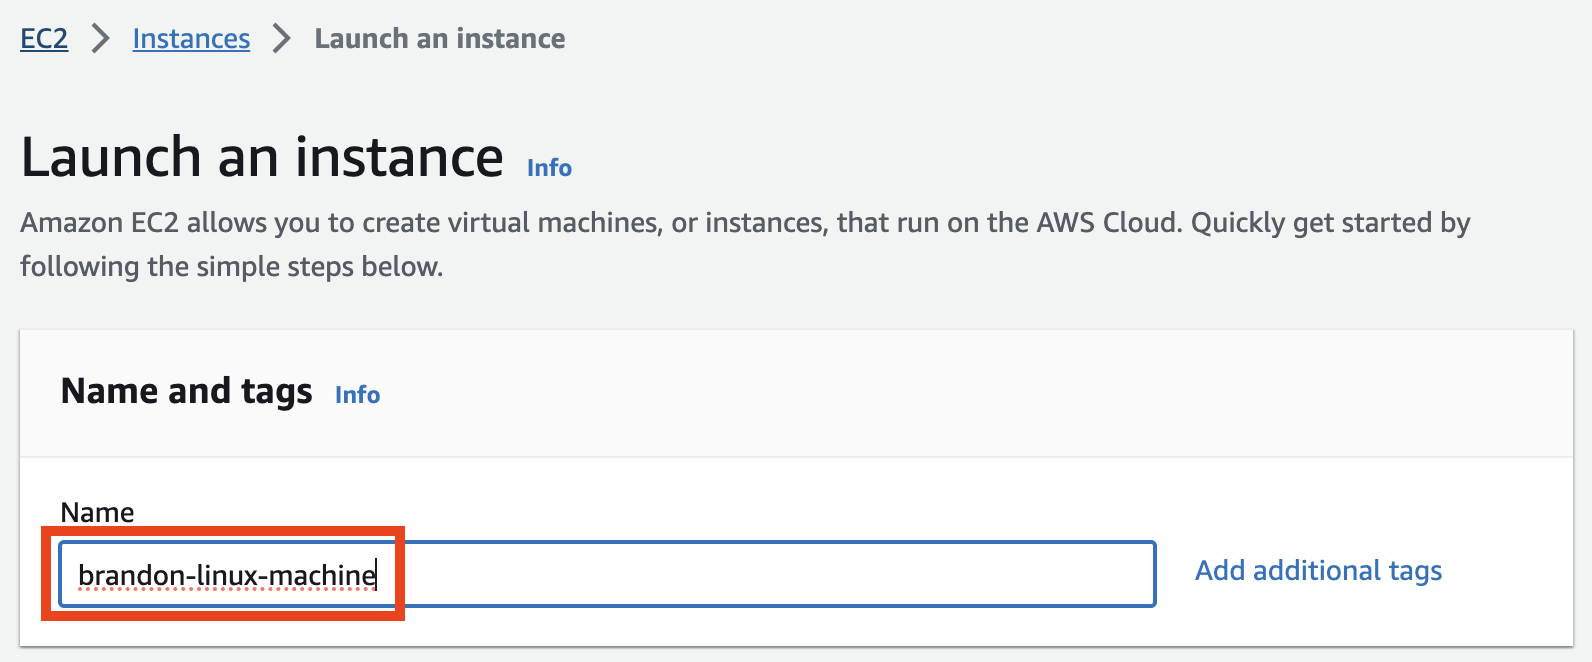

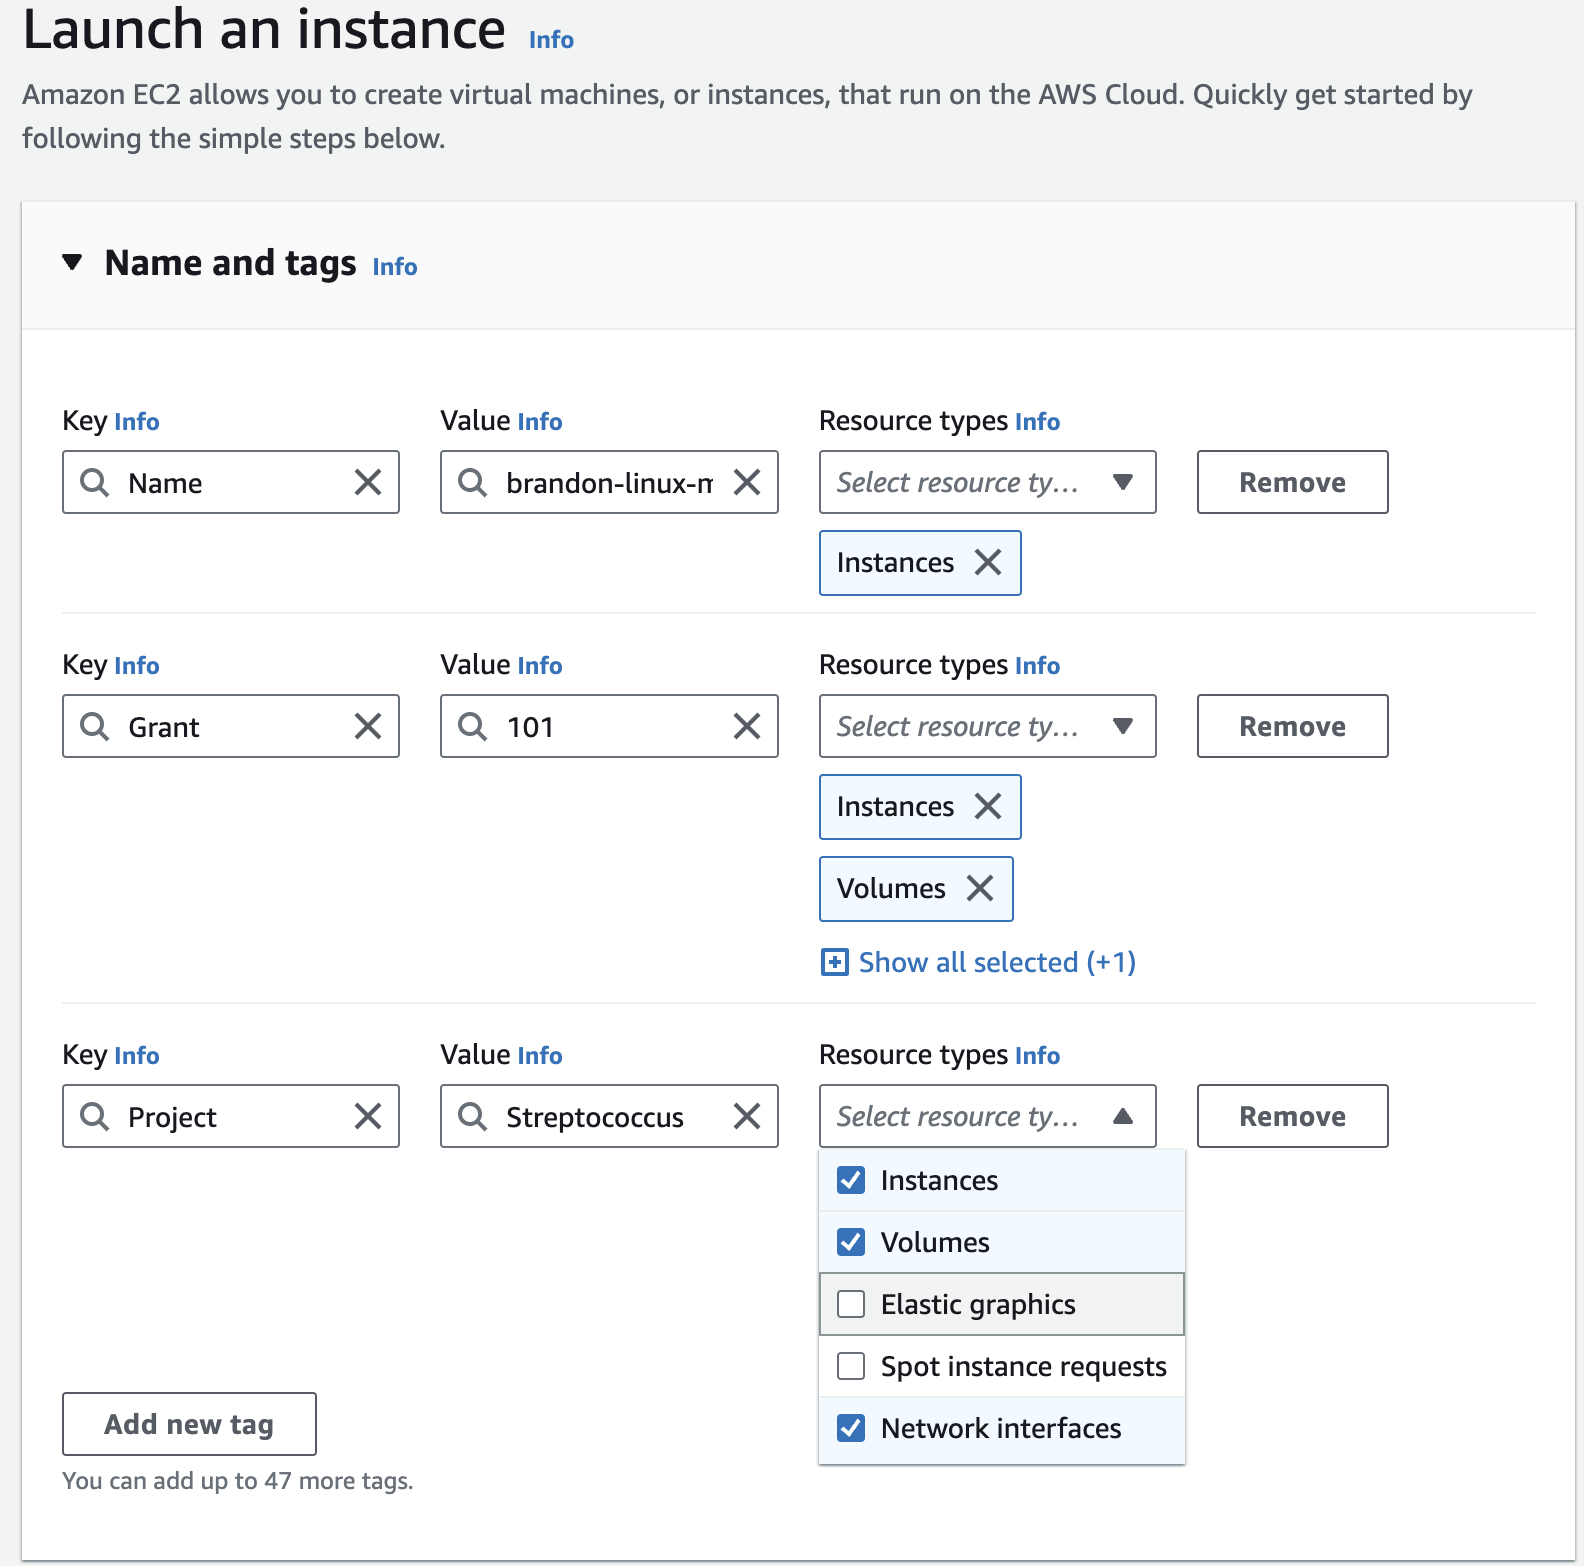
- Click on “Add additional tags” and “Add Tag”. You will find the “Name” you provided for your instance. Now enter the key and value. These keys, more correctly known as a tags, will appear in the console once the instance launches. It makes it easy to keep track of running machines in a complex environment. Create additional tags similar for the ones you used for the key pair previously - give a user and grant key to this machine, and enter the same values. When ready, select Instances, Volumes, Network interfaces under the Resource types.
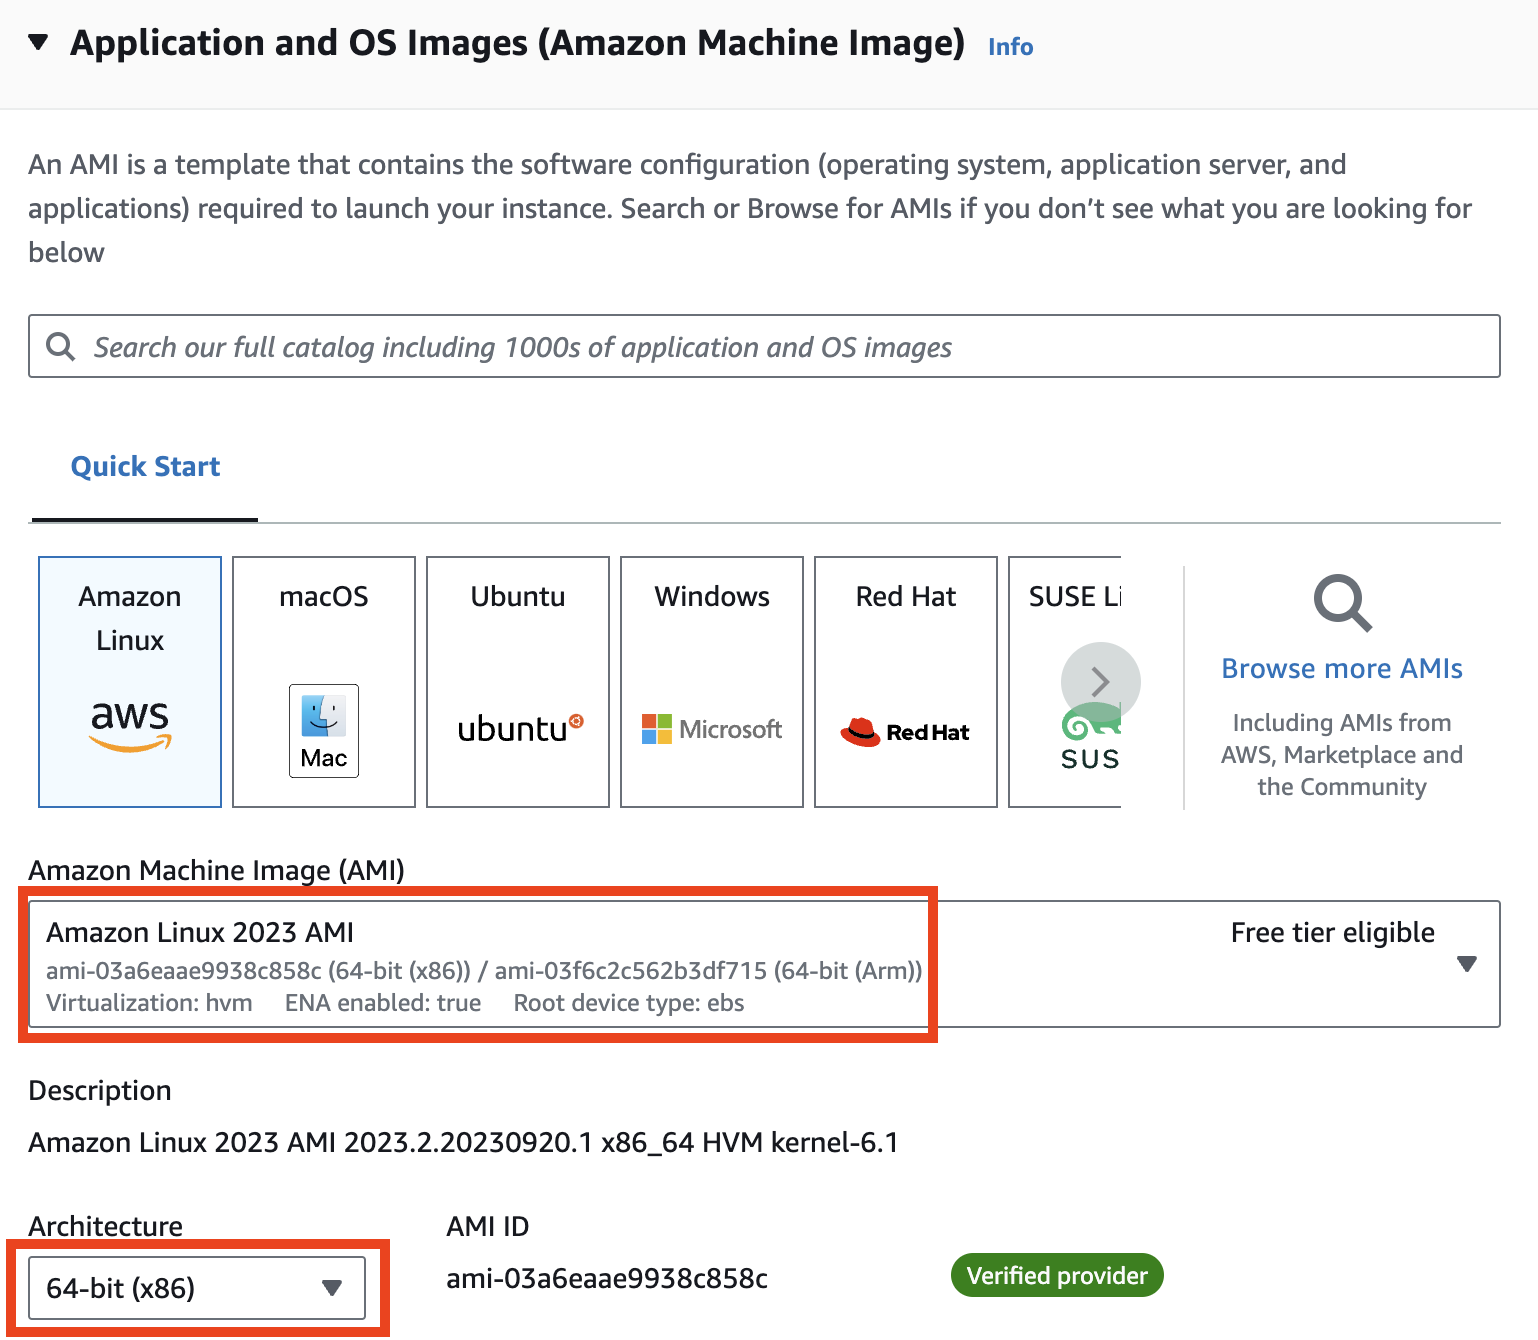
- Now select the first Amazon Linux 2023 AMI and check 64-bit (x86) under the Architecture drop-down list.
NOTE: The ami-xxxxxxxxx label and specific versions of the installed package may be different than in the image below.
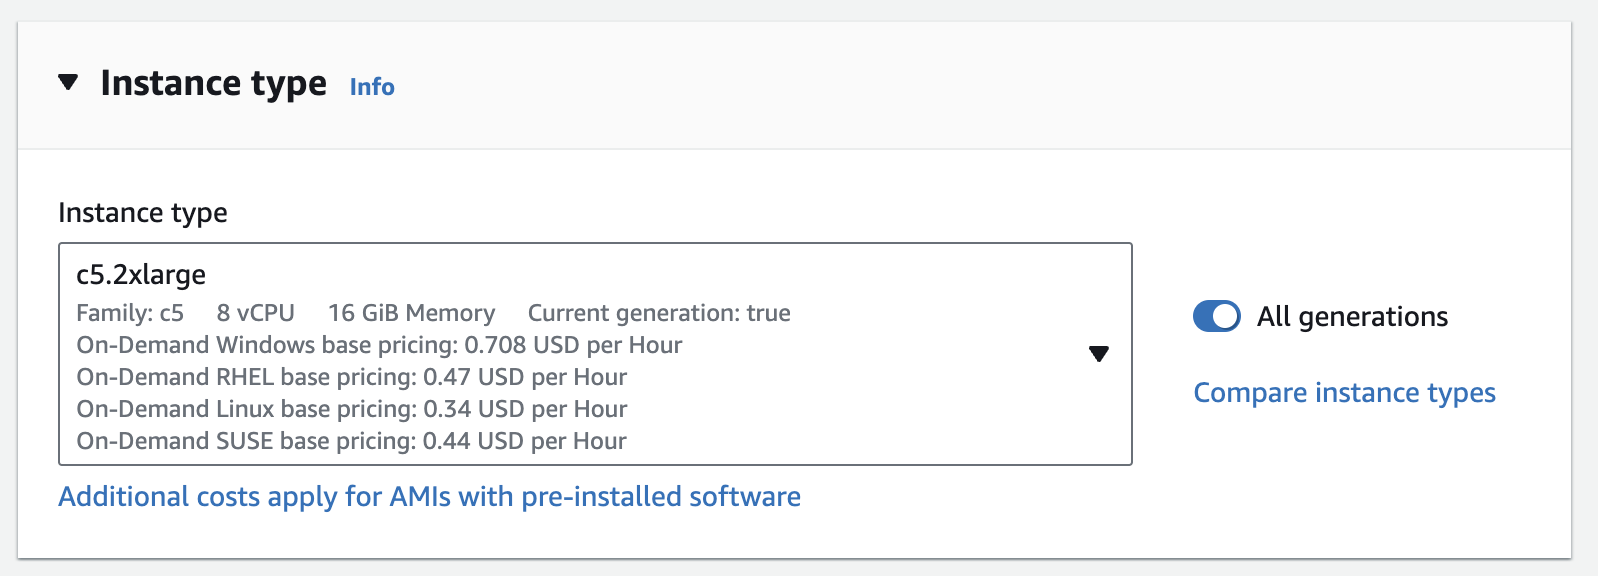
- Under Instance type, click on the drop-down arrow and type c5.2xlarge into the search bar.
Note: This is a somewhat large instance; in general, you should pick these instances based on an analysis of how much RAM and CPU you will need for your job / analysis.
- Under Instance type, click on the drop-down arrow and type c5.2xlarge into the search bar.
Note: This is a somewhat large instance; in general, you should pick these instances based on an analysis of how much RAM and CPU you will need for your job / analysis.
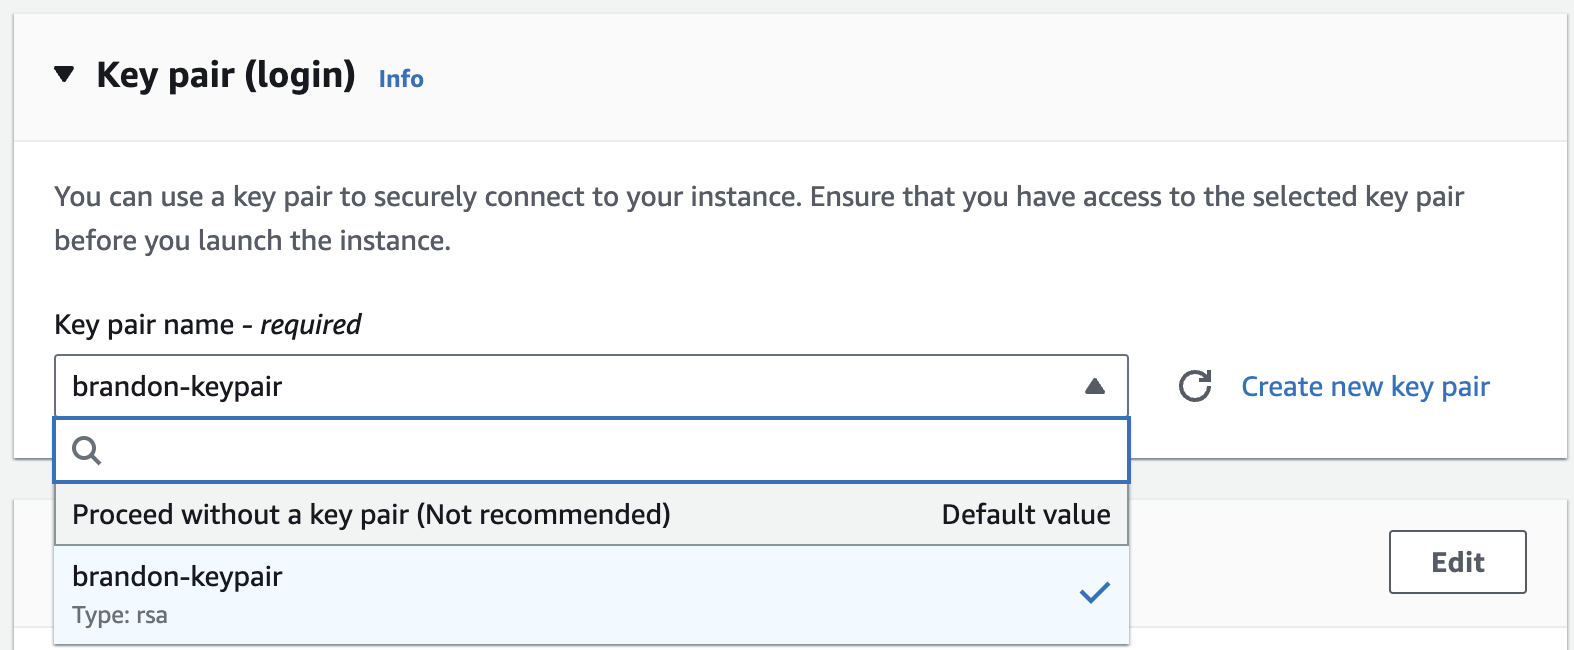
- Select the key pair that you created in the beginning of this lab from the drop-down list under Key pair (login).
앞에서 본인이 만들었던 키페어를 선택합니다!
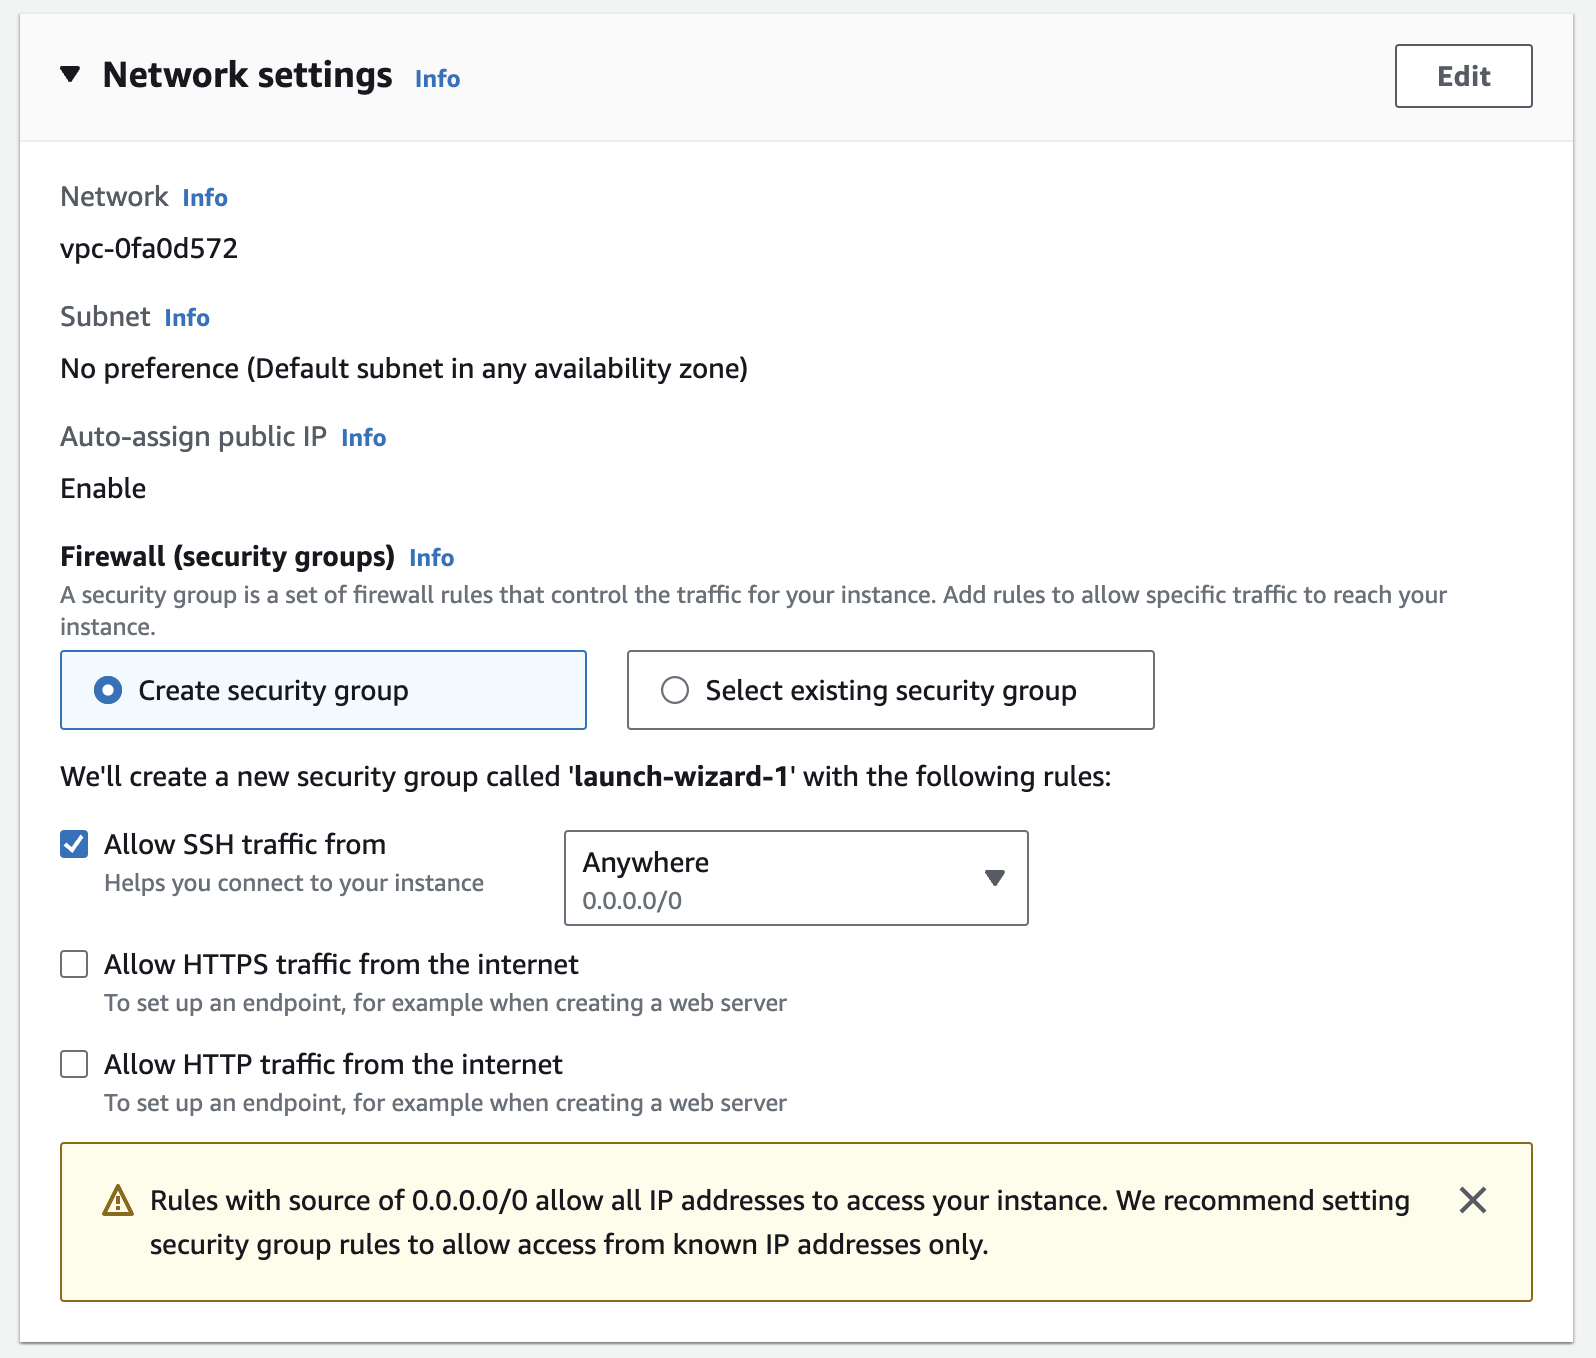
- Next click on Edit against Network settings. You will be prompted to provide Subnet and Security group details. The security groups will be your firewall rules.
a. Note that the Subnet field can be configured to launch the instance in a specific Availability Zone; while we are keeping the default for this workshop, this gives you control over the location of your machine.
b. Provide a name for your new security group. NOTE: For the purpose of this lab use your “[Your initials]-sec-group”.
c. Confirm an existing SSH rule exists which allows TCP port 22.
d. To accept connections from anywhere, select the drop-down box under the Source type column and select Anywhere which will correspond to 0.0.0.0/0.
아래와 같은 내용입니다. 각자 내용은 조금씩 상이하지만 이번 실습에서 별도로 수정할 것은 없습니다.
본 예제에서는 launch-wizard-1 이라는 이름으로 보안 그룹 (Security Group)이 만들어지게 됩니다.
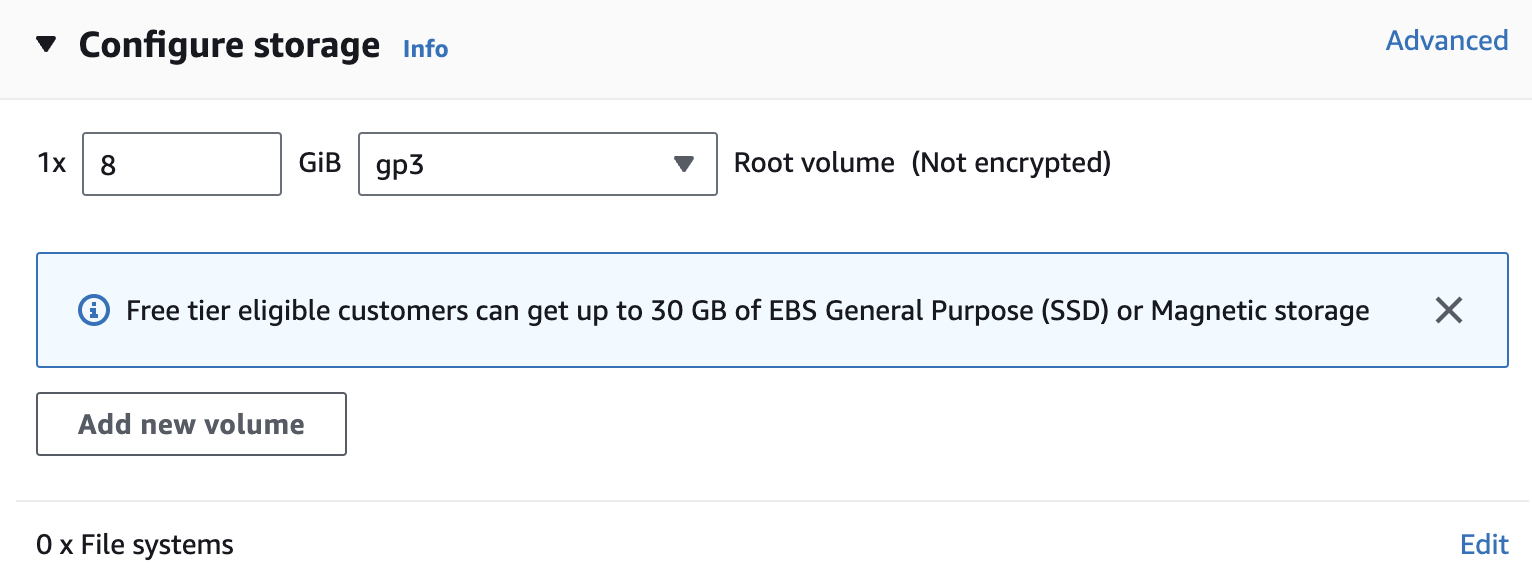
- Under Configure storage, you have the ability to modify or add storage and disk drives to the instance. For this lab, we will simply accept the storage defaults.
- Review your configuration under Summary and click Launch Instance.
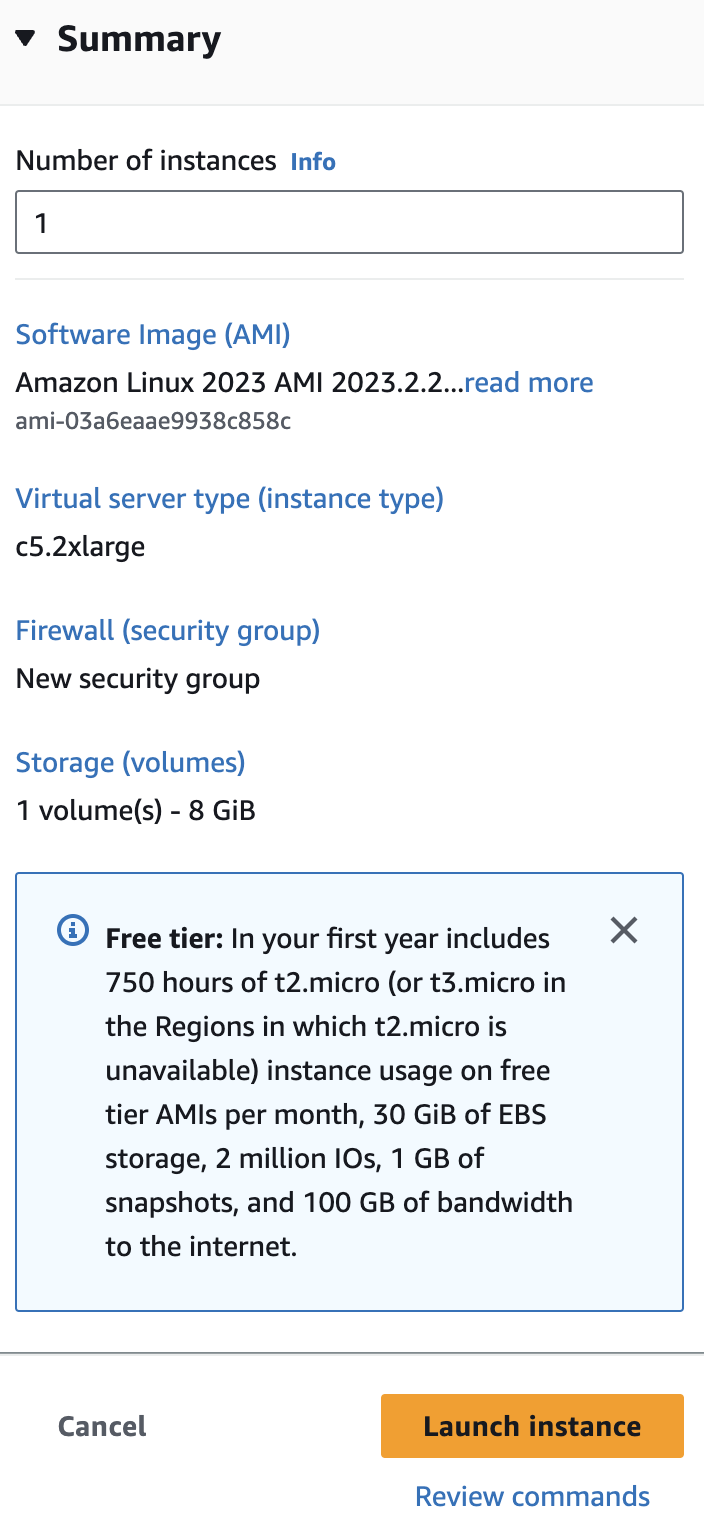
Your instance will now start, which may take a moment. You will be shown the Launch Status page with the message Successfully initiated launch of instance.
- On the lower right of the page click on View all Instances to view the list of EC2 instances. Click on your instance. It will go through an initialization process. Once your instance has launched, you will see your Linux server as well as the Availability Zone the instance is in, and the publicly routable DNS name.
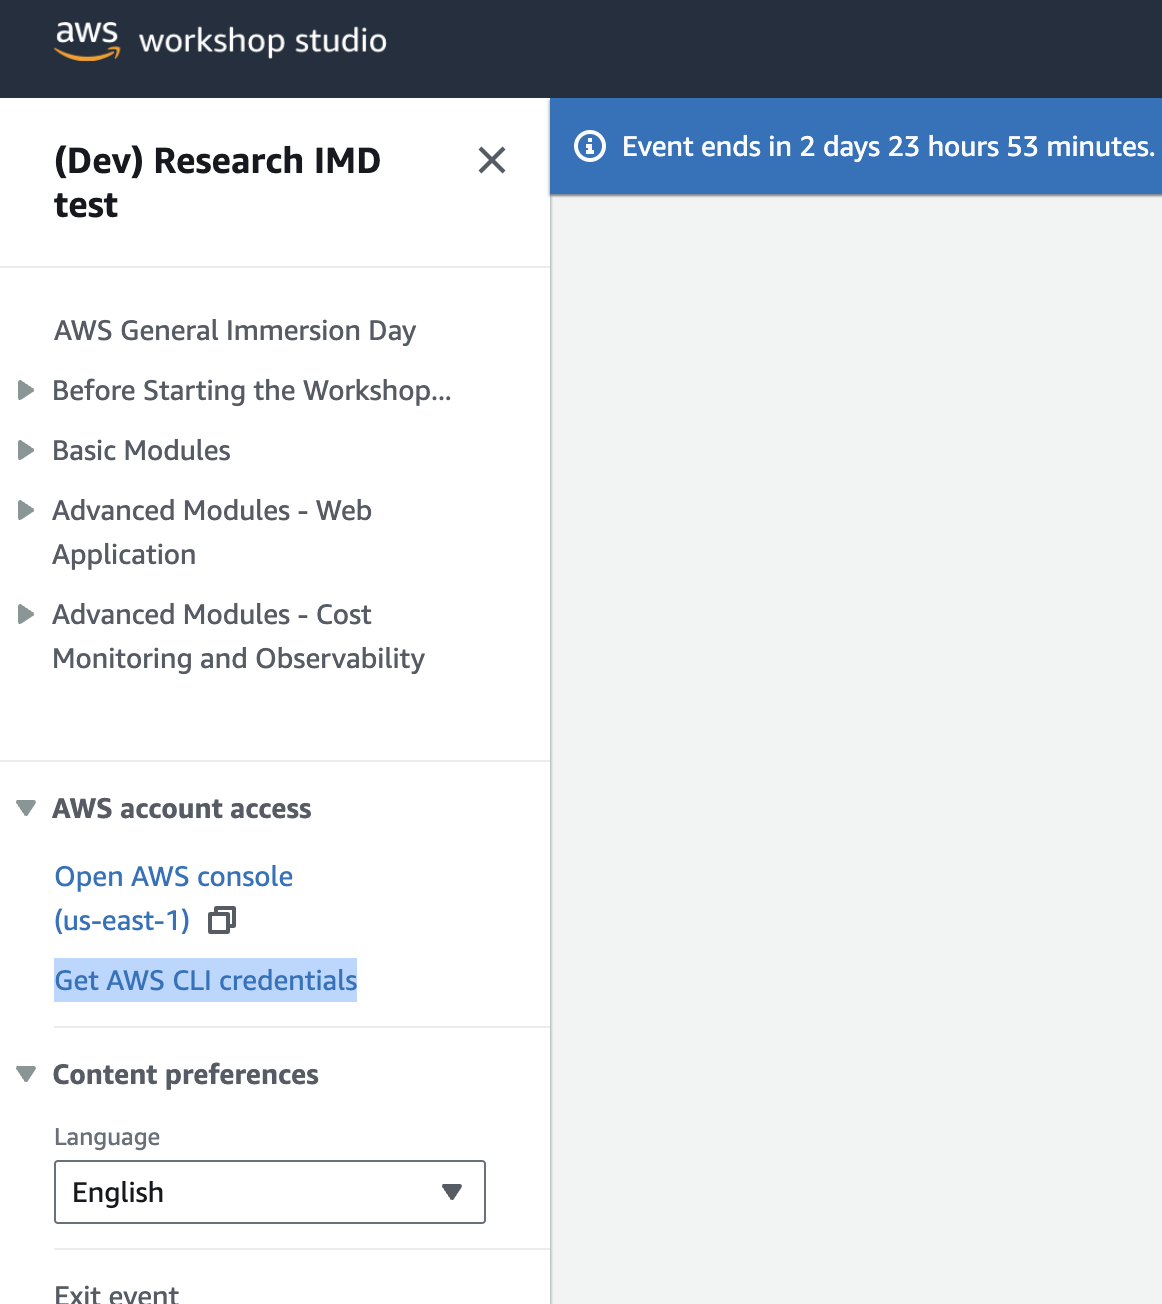
워크샵 스튜디오 환경에서 실습시 생성없이 바로 AWS CLI credential을 사용할 수 있음.