EC2 instance의 이미지 생성
Stop EC2 Instance
We will now stop the running instance. Before we proceed, it is a good idea to stop any running applications and ensure that data is saved. Stopping an instance is equivalent to turning off your computer/server.
NOTE: It is best practices, but not mandatory, to stop the instance before creating the image. However while creating the image the instance will undergo a reboot, so make sure there are no applications running.
- Before stopping, copy all the required data from /tmp to a more persistent storage as stopping the instance will clear out /tmp. Copy all the required files to the EBS volume we mounted previously, at /mnt/volume1, before proceeding.
Make sure to set the permissions to the directory prior to copying.
sudo chmod -R 777 /mnt/volume1/
cp -ax /tmp/fastq /tmp/outbreaks /mnt/volume1/
-
Login to the AWS Console, and in the AWS Management Console search bar, type EC2.
-
Choose EC2 to open the EC2 Dashboard.
-
In the left Navigation pane, Click on Instances to view all the instances that are Running, Stopped and Terminated.
-
Select your instance.
NOTE: The Instance State of the EC2 instance shows the machine is Running.
- Click on the Actions button and then click on Instance State, and finally click on Stop
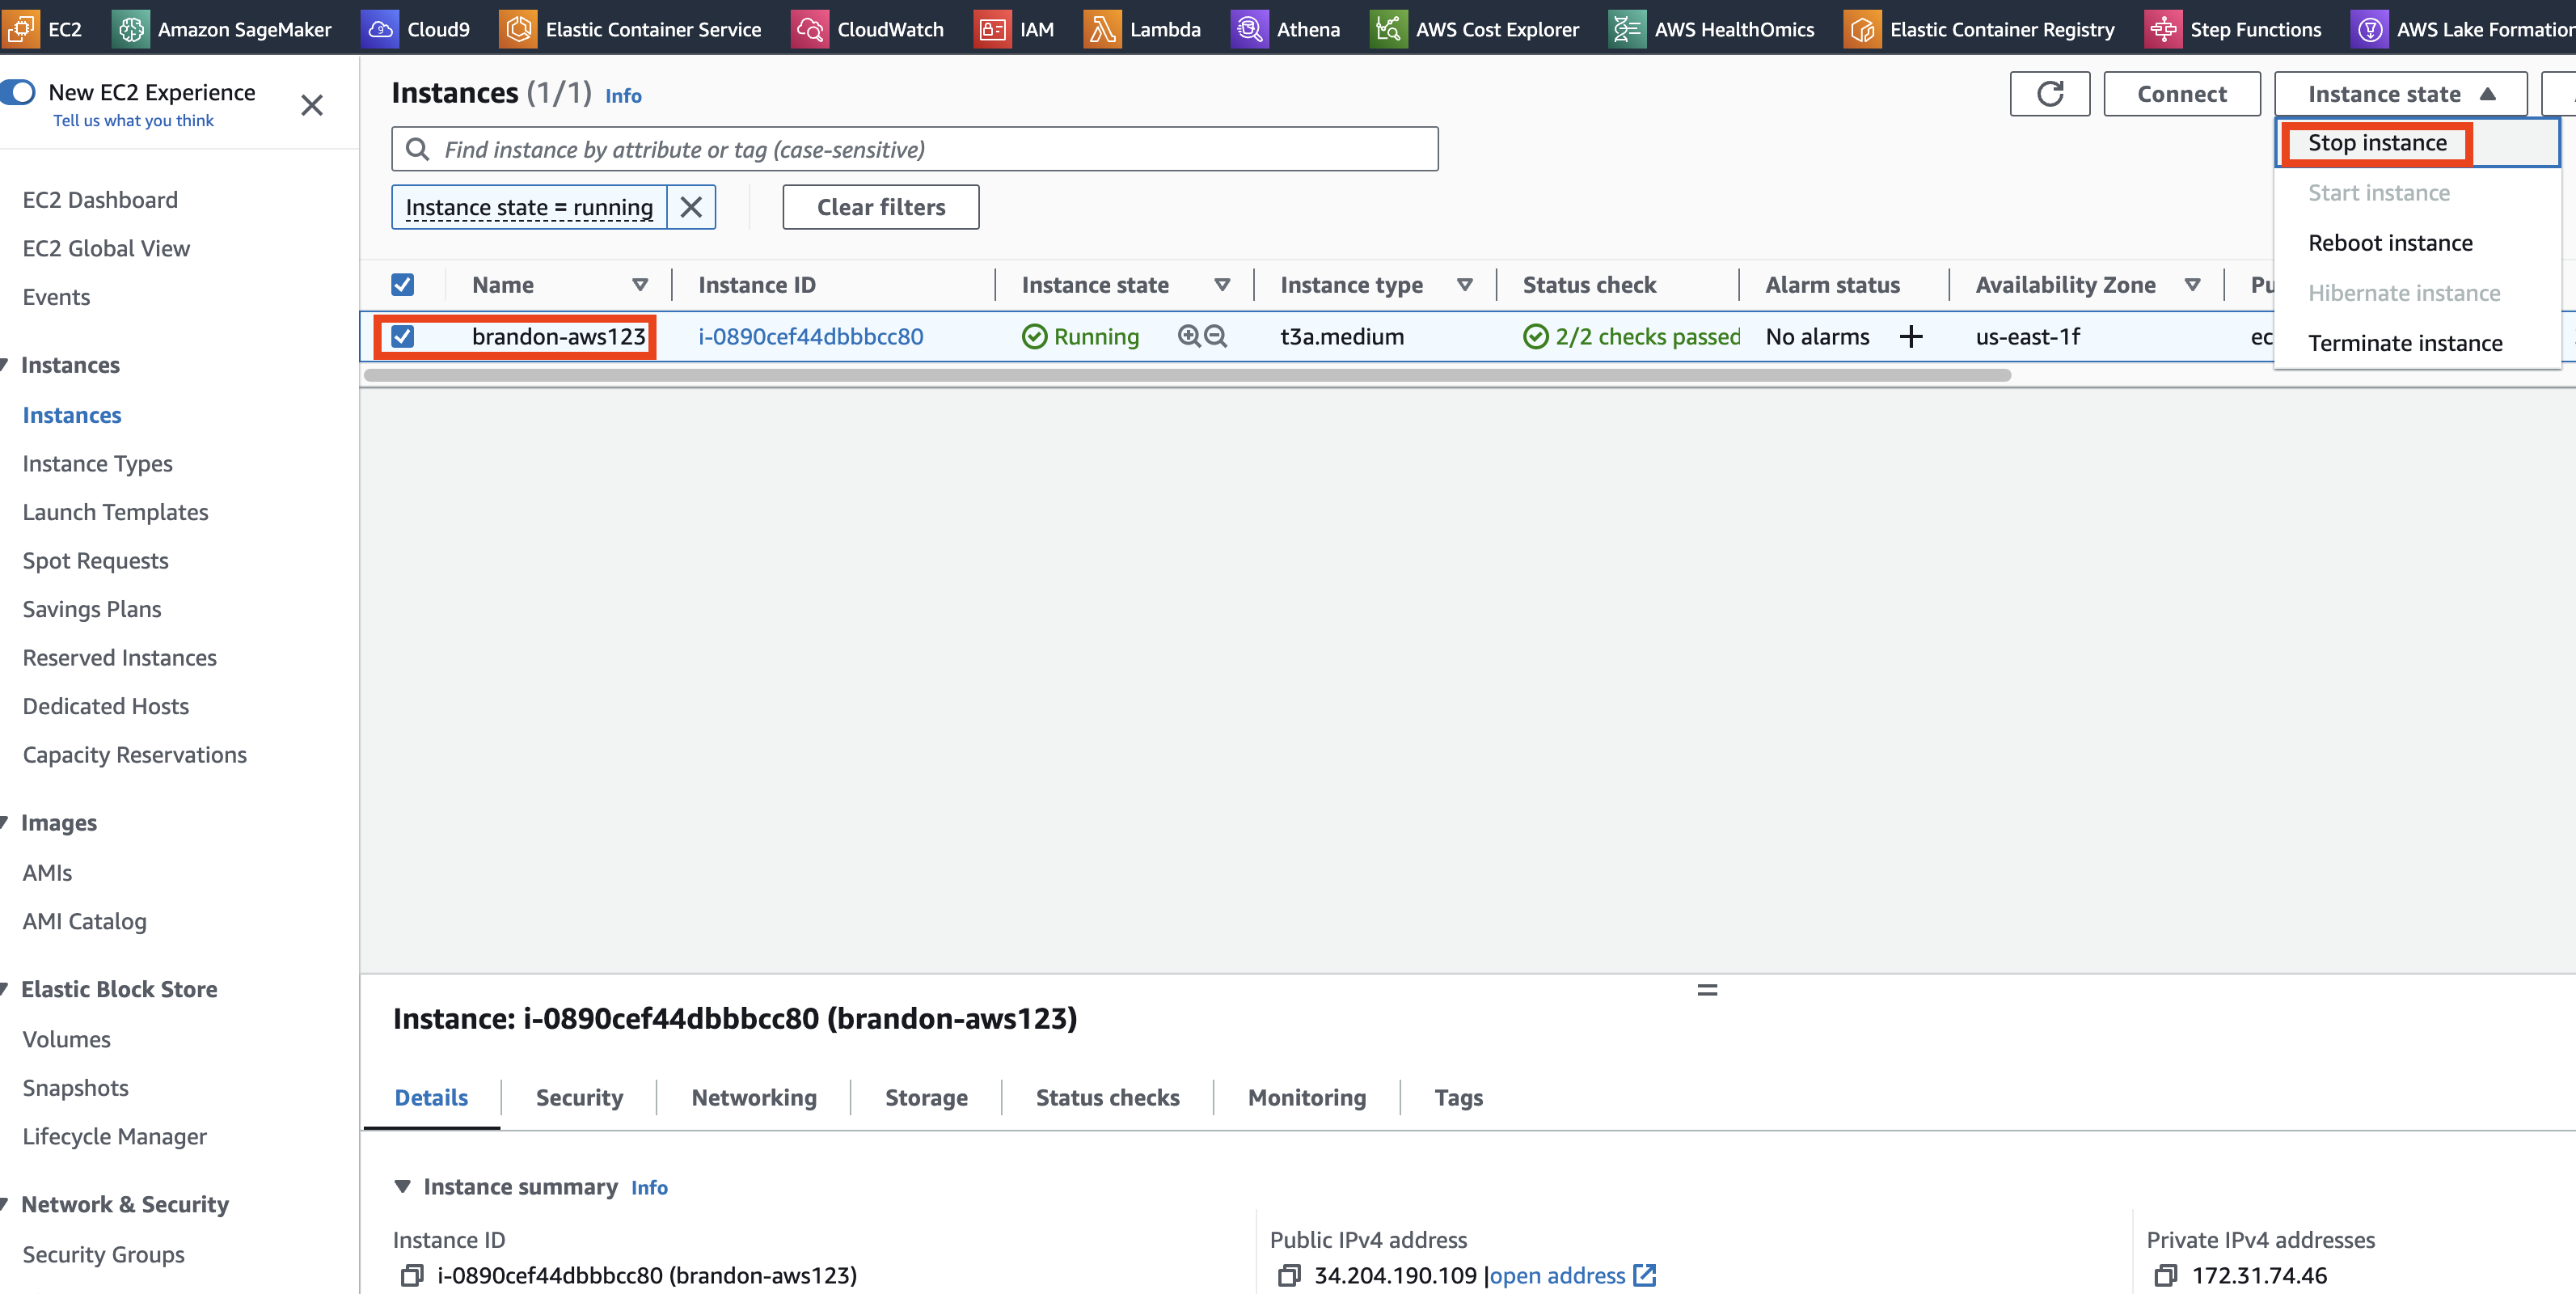
- On the dialog box click on Stop to confirm stopping the instance.

- Note that the instance will now attempt to stop, and after a short duration the Instance State will change to Stopped. You may have to refresh the window.
Create EC2 Image
We will now create an image of the EC2 instance.
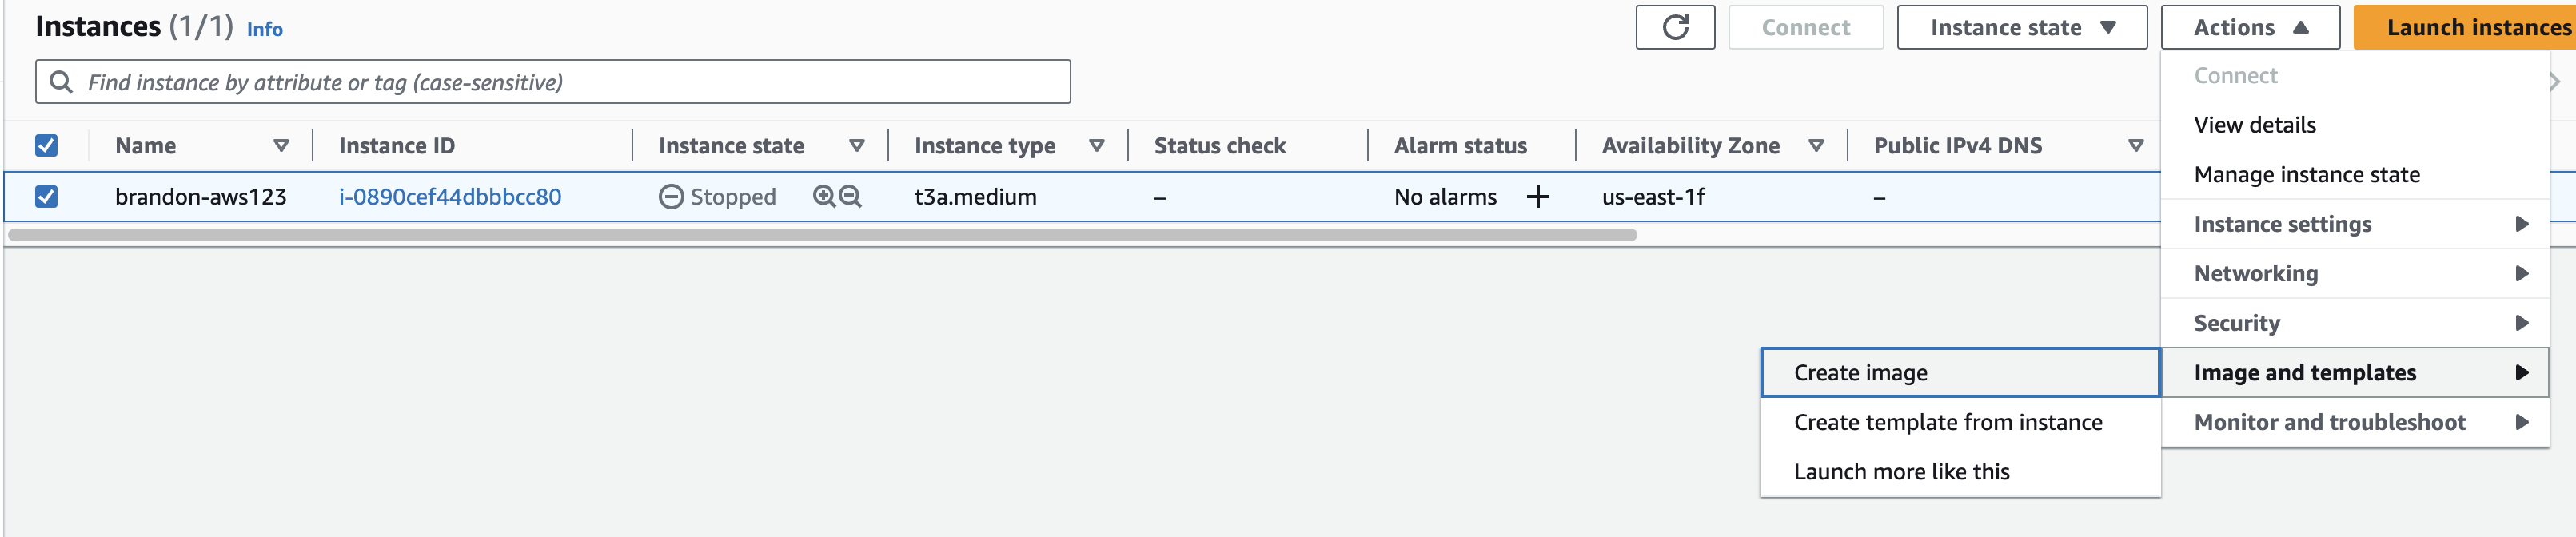
- Select the EC2 instance we stopped, click on the Actions button, click on Image, and click Create Image.
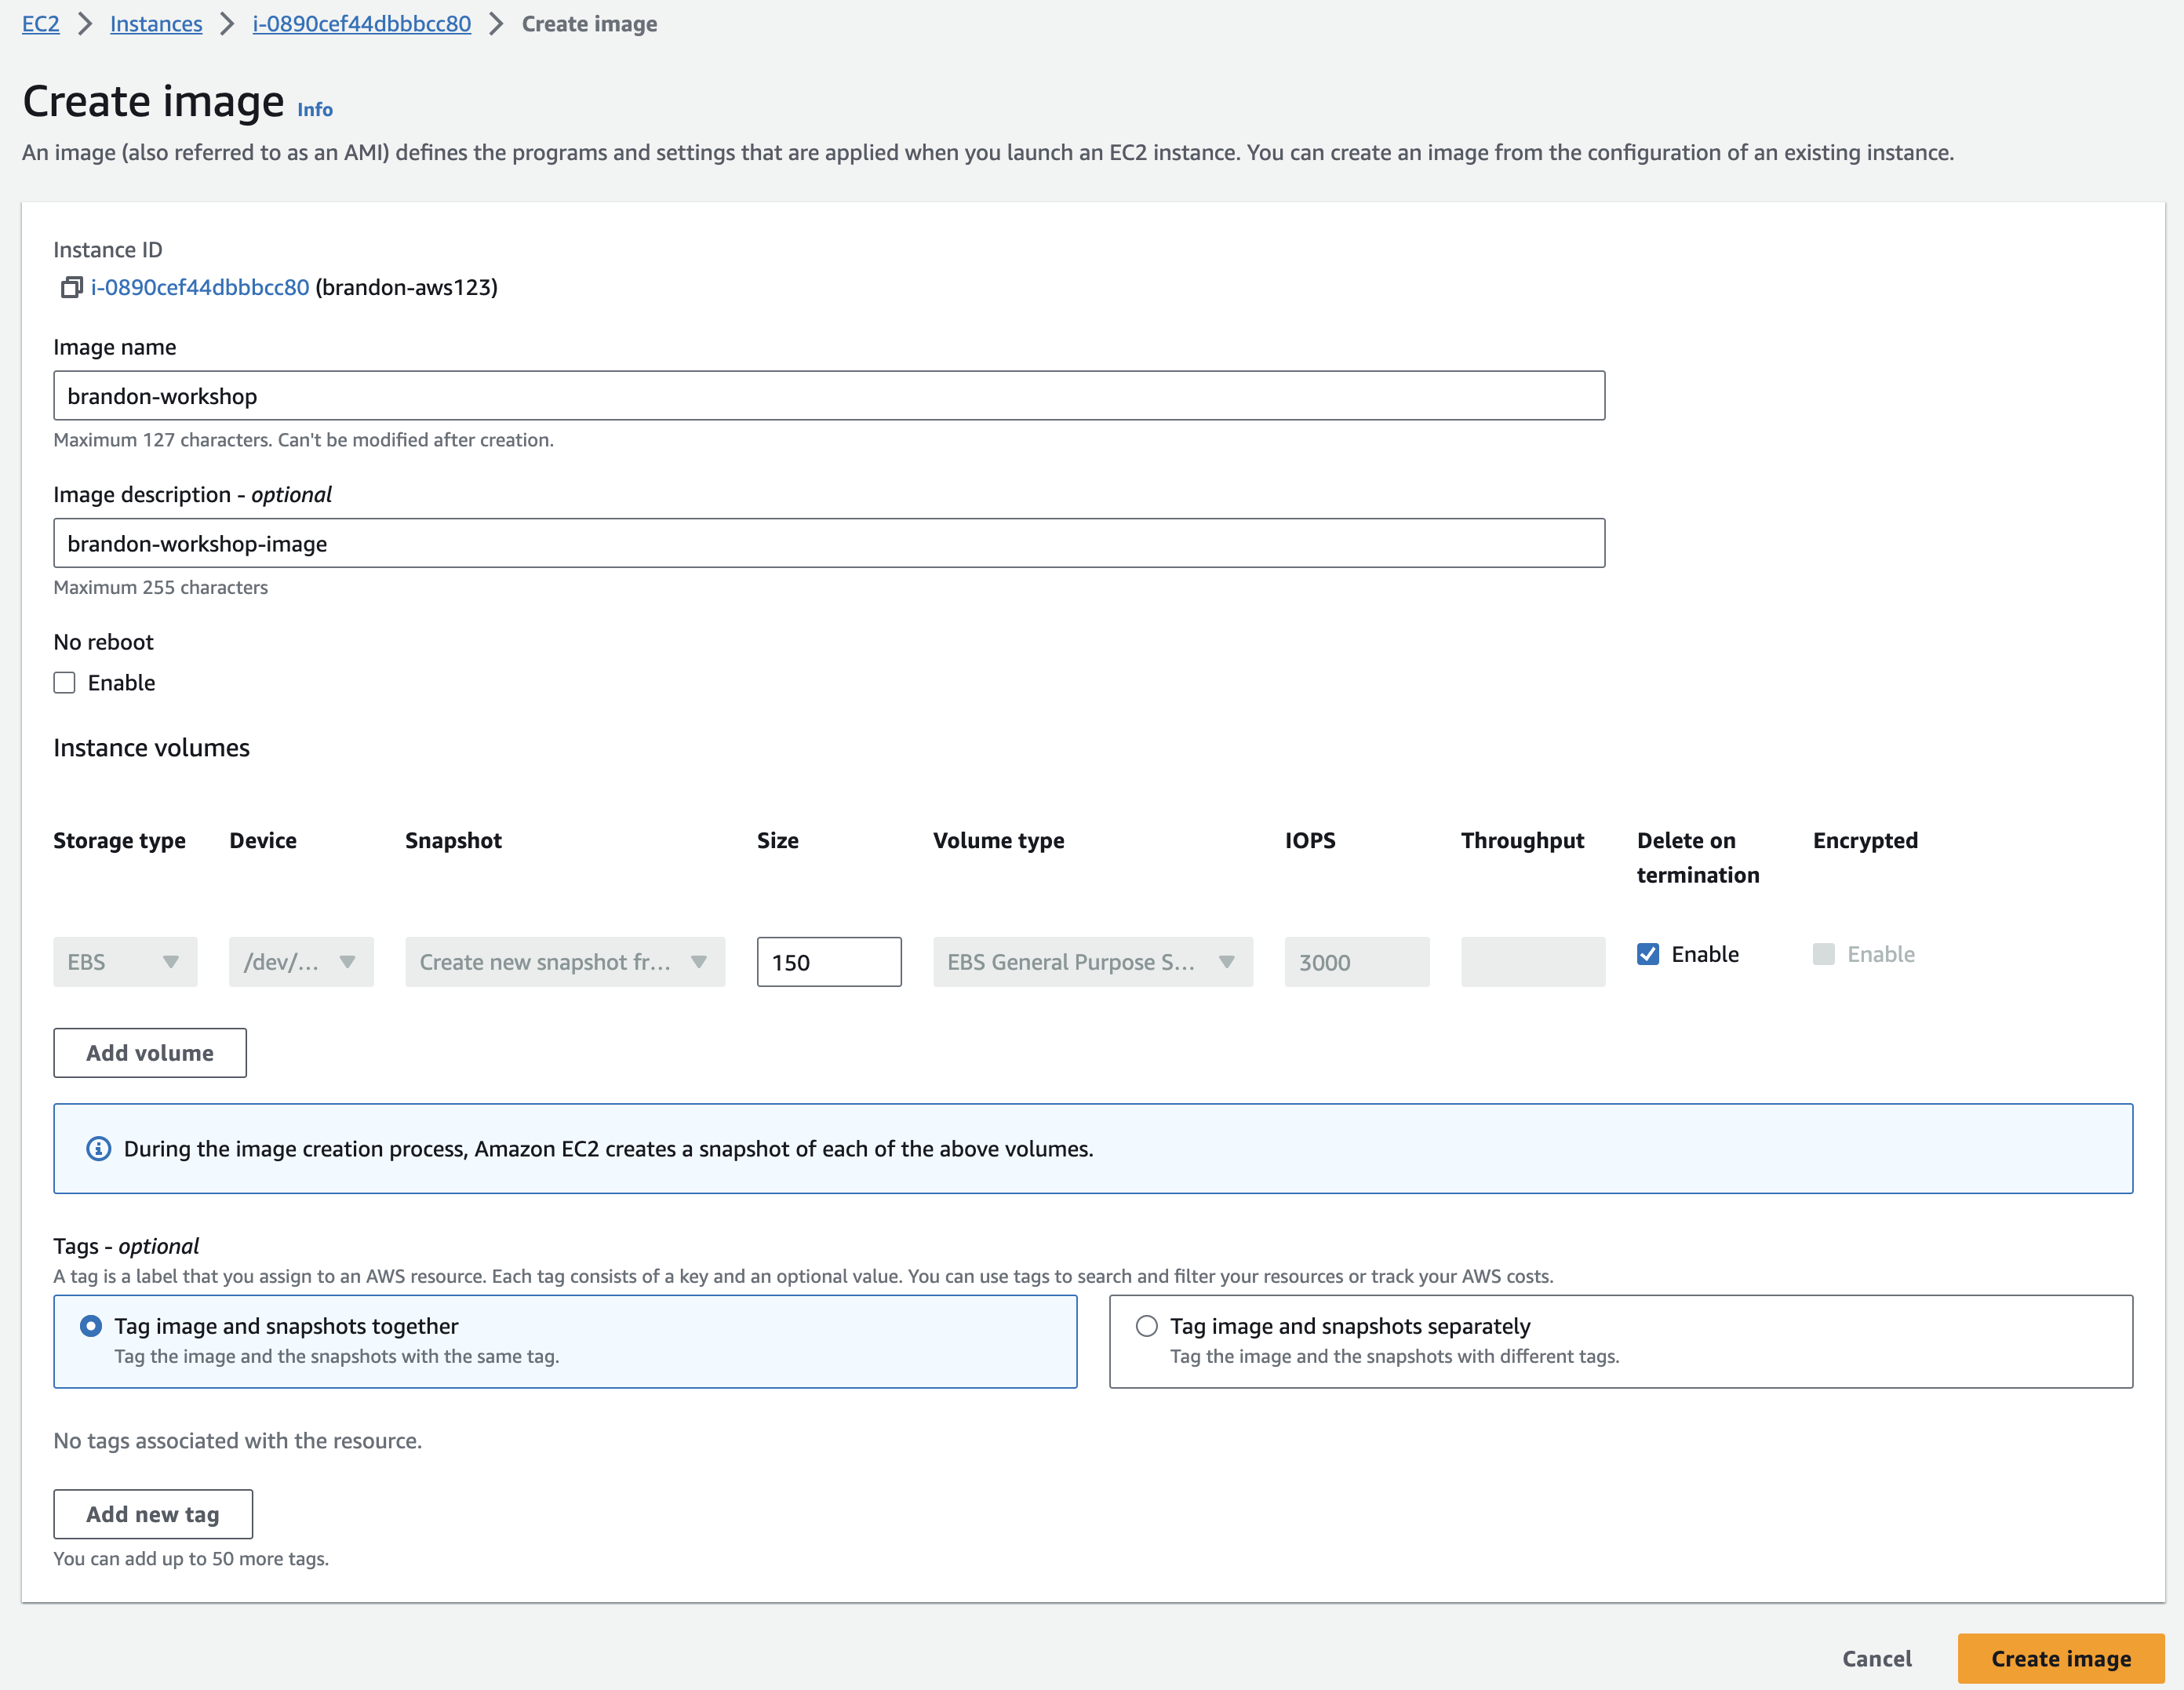
- On the Create Image page, provide an Image Name and Image description. Ensure you remove the extra EBS volume we had attached to the EC2 instance by clicking on the “x” button (see image below) . Click on Create Image to start the Image creation task.
An image creation task is started in the backgroud and you will see a message stating “Successfully created …” on the top of the EC2 Dashboard page when it’s ready to go.
NOTE: In case you had not stopped the instance and were still logged in, the instance would have rebooted and your ssh session would have ended. You will need to connect again (verify the IP address).

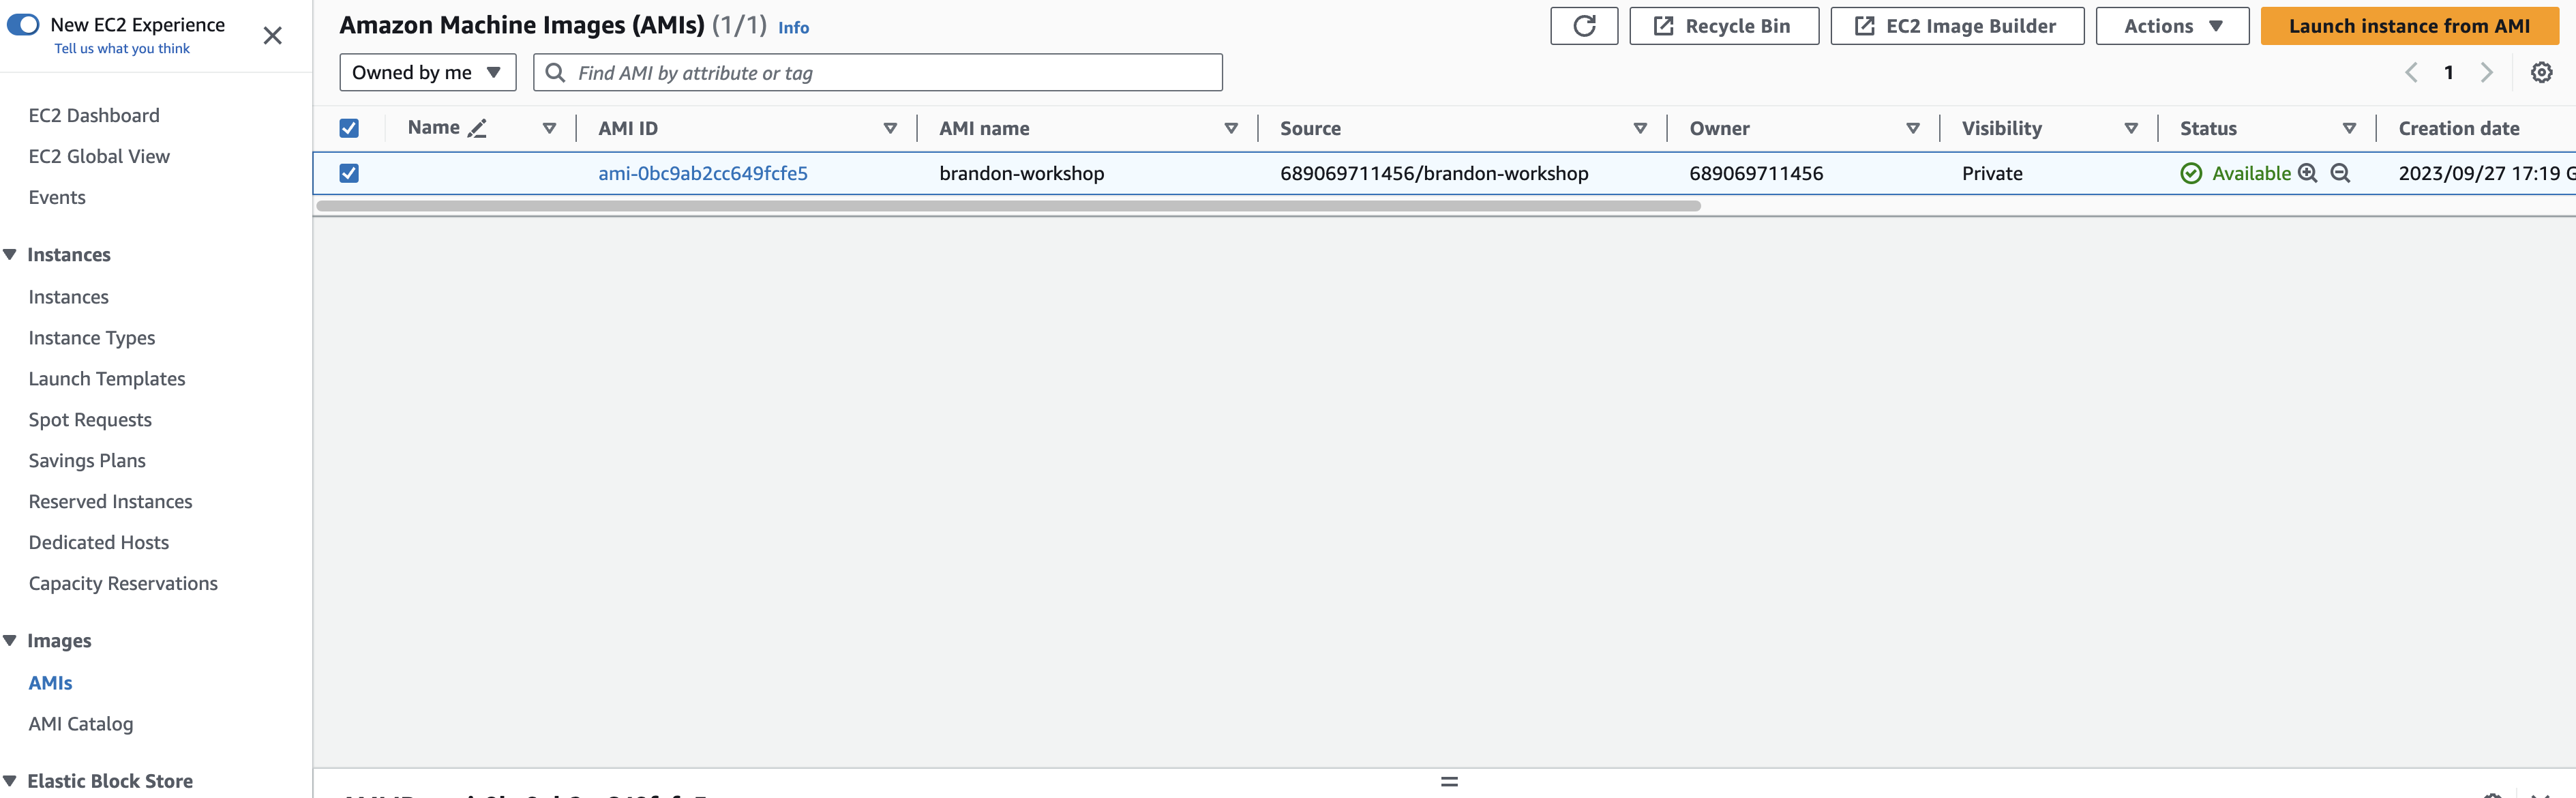
- Pause for a minute to let the Image creation task progress. To check if the image has been created click on AMIs under the Images section in the left Navigation pane to view all the AMI’s created earlier as well as the new one in progress.
You will see that the new AMI is either being created or already created and ready for use with the name you’ve given.
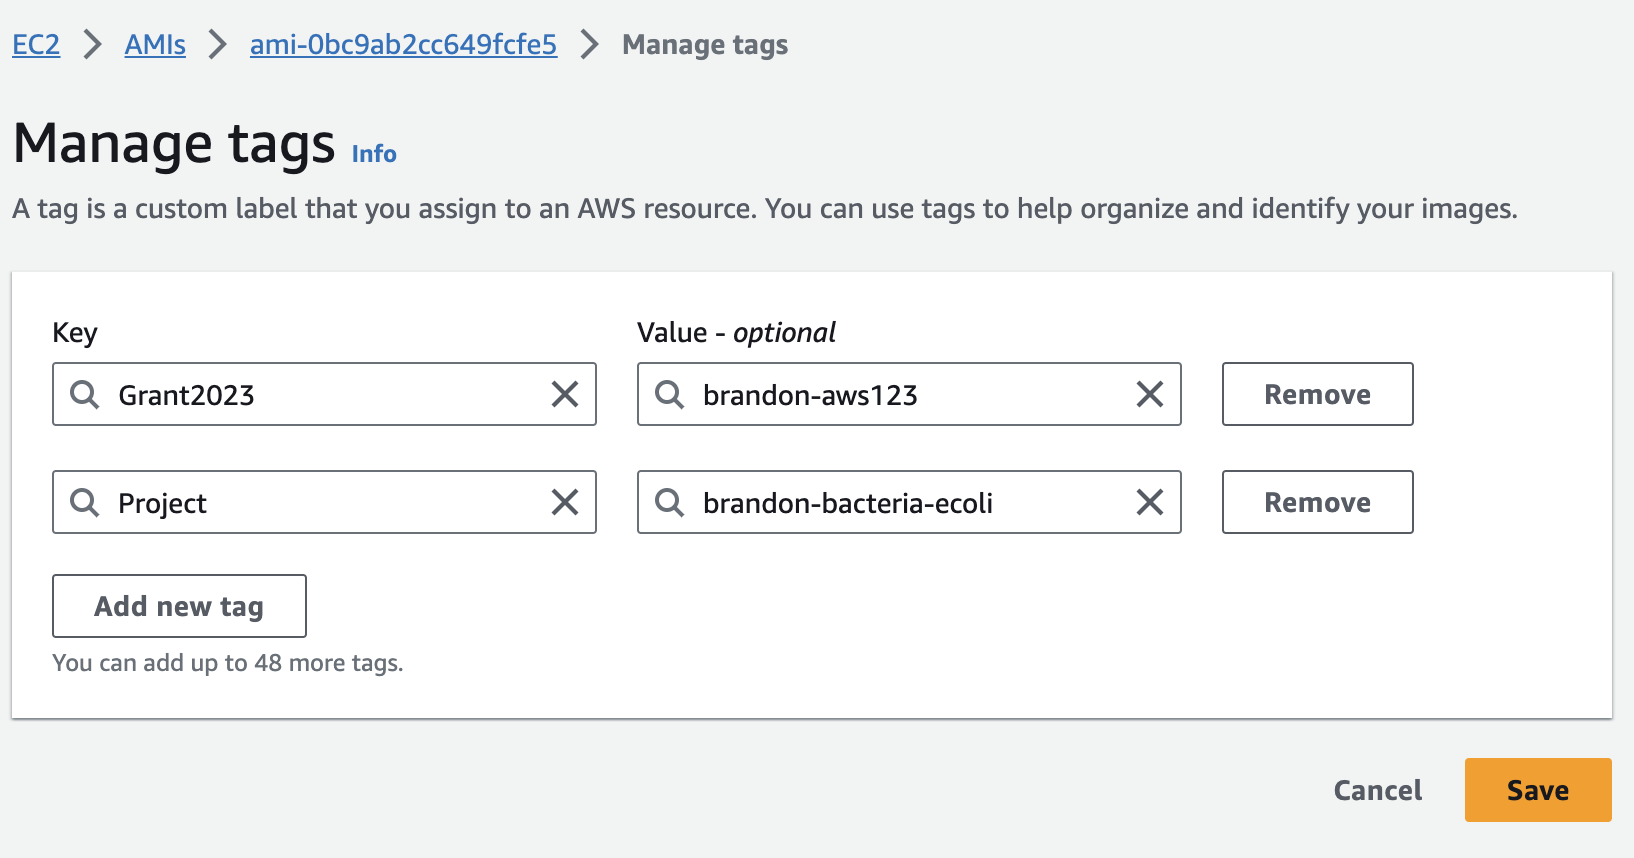
- Select your new AMI instance, click on the Actions button, then Manage Tags. Make sure to tag your image with a Name, User, and Grant tag, as before. For this instance, you can use the Name value “[your-initials]-AMI”.