
EC2 instance 종료와 Volume snapshot 저장 (작업중)
Costs are an important consideration while running workloads on the cloud. Being cognizant about how services incur costs helps in savings, adoption of efficient workflows, and use of sophisticated services that are better tailored for your current workload. It is a good practice to understand how the usage of specific features and services can lead to saving costs.
In this section of the workshop we will provide a brief introduction to costs associated with services on AWS as well as demonstrate how costs could be saved for specific services taking services like EC2 and EBS.
Exploring EC2 Instance Lifecycle
An Amazon EC2 instance transitions through different states throughout its lifecycle.
To view the current instance state of an EC2 Instance:
-
In the AWS Management Console search bar, type EC2.
-
Choose EC2 to open the EC2 Dashboard.
-
In the left navigation pane select Instances under the Instances section.
-
To see the current instance state, select your EC2 Instance and observe the value under the Instance state column. The status will indicate Running, Stopped or Terminated.

Below is a diagram of an EC2 instance lifecycle. Note that the instance state affects the costs while using EC2. For more information see Instance Lifecycle
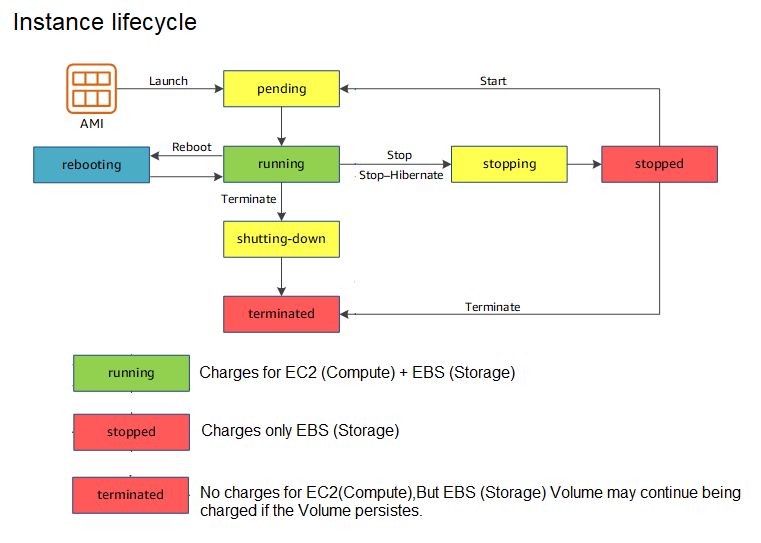
Very briefly, an EC2 instance will accumulate cost while it is running. When you stop the EC2 instance, you no longer accumulate costs associated with it.
However, you will always be charged for the storage on your machine. Whether it’s the storage on the root drive or EBS volumes attached to your root, these costs do not stop when your machine is stopped. They will only cease when you permanently delete these volumes. Furthermore, you pay for the entire storage present on the disk, not just what you use. Make sure to select resources appropriate for your project.
Detach the additional EBS Volume
-
In the AWS Management Console search bar, type EC2.
-
In the left Navigation pane click on Instances under the Instances section.
-
Select your EC2 Instance and in the Instance Details pane below, select Storage to view the Block Devices and then click on the Volume ID of your additional EBS Volume attached previously (e.g. /dev/sdh; the device name may be different in your case).
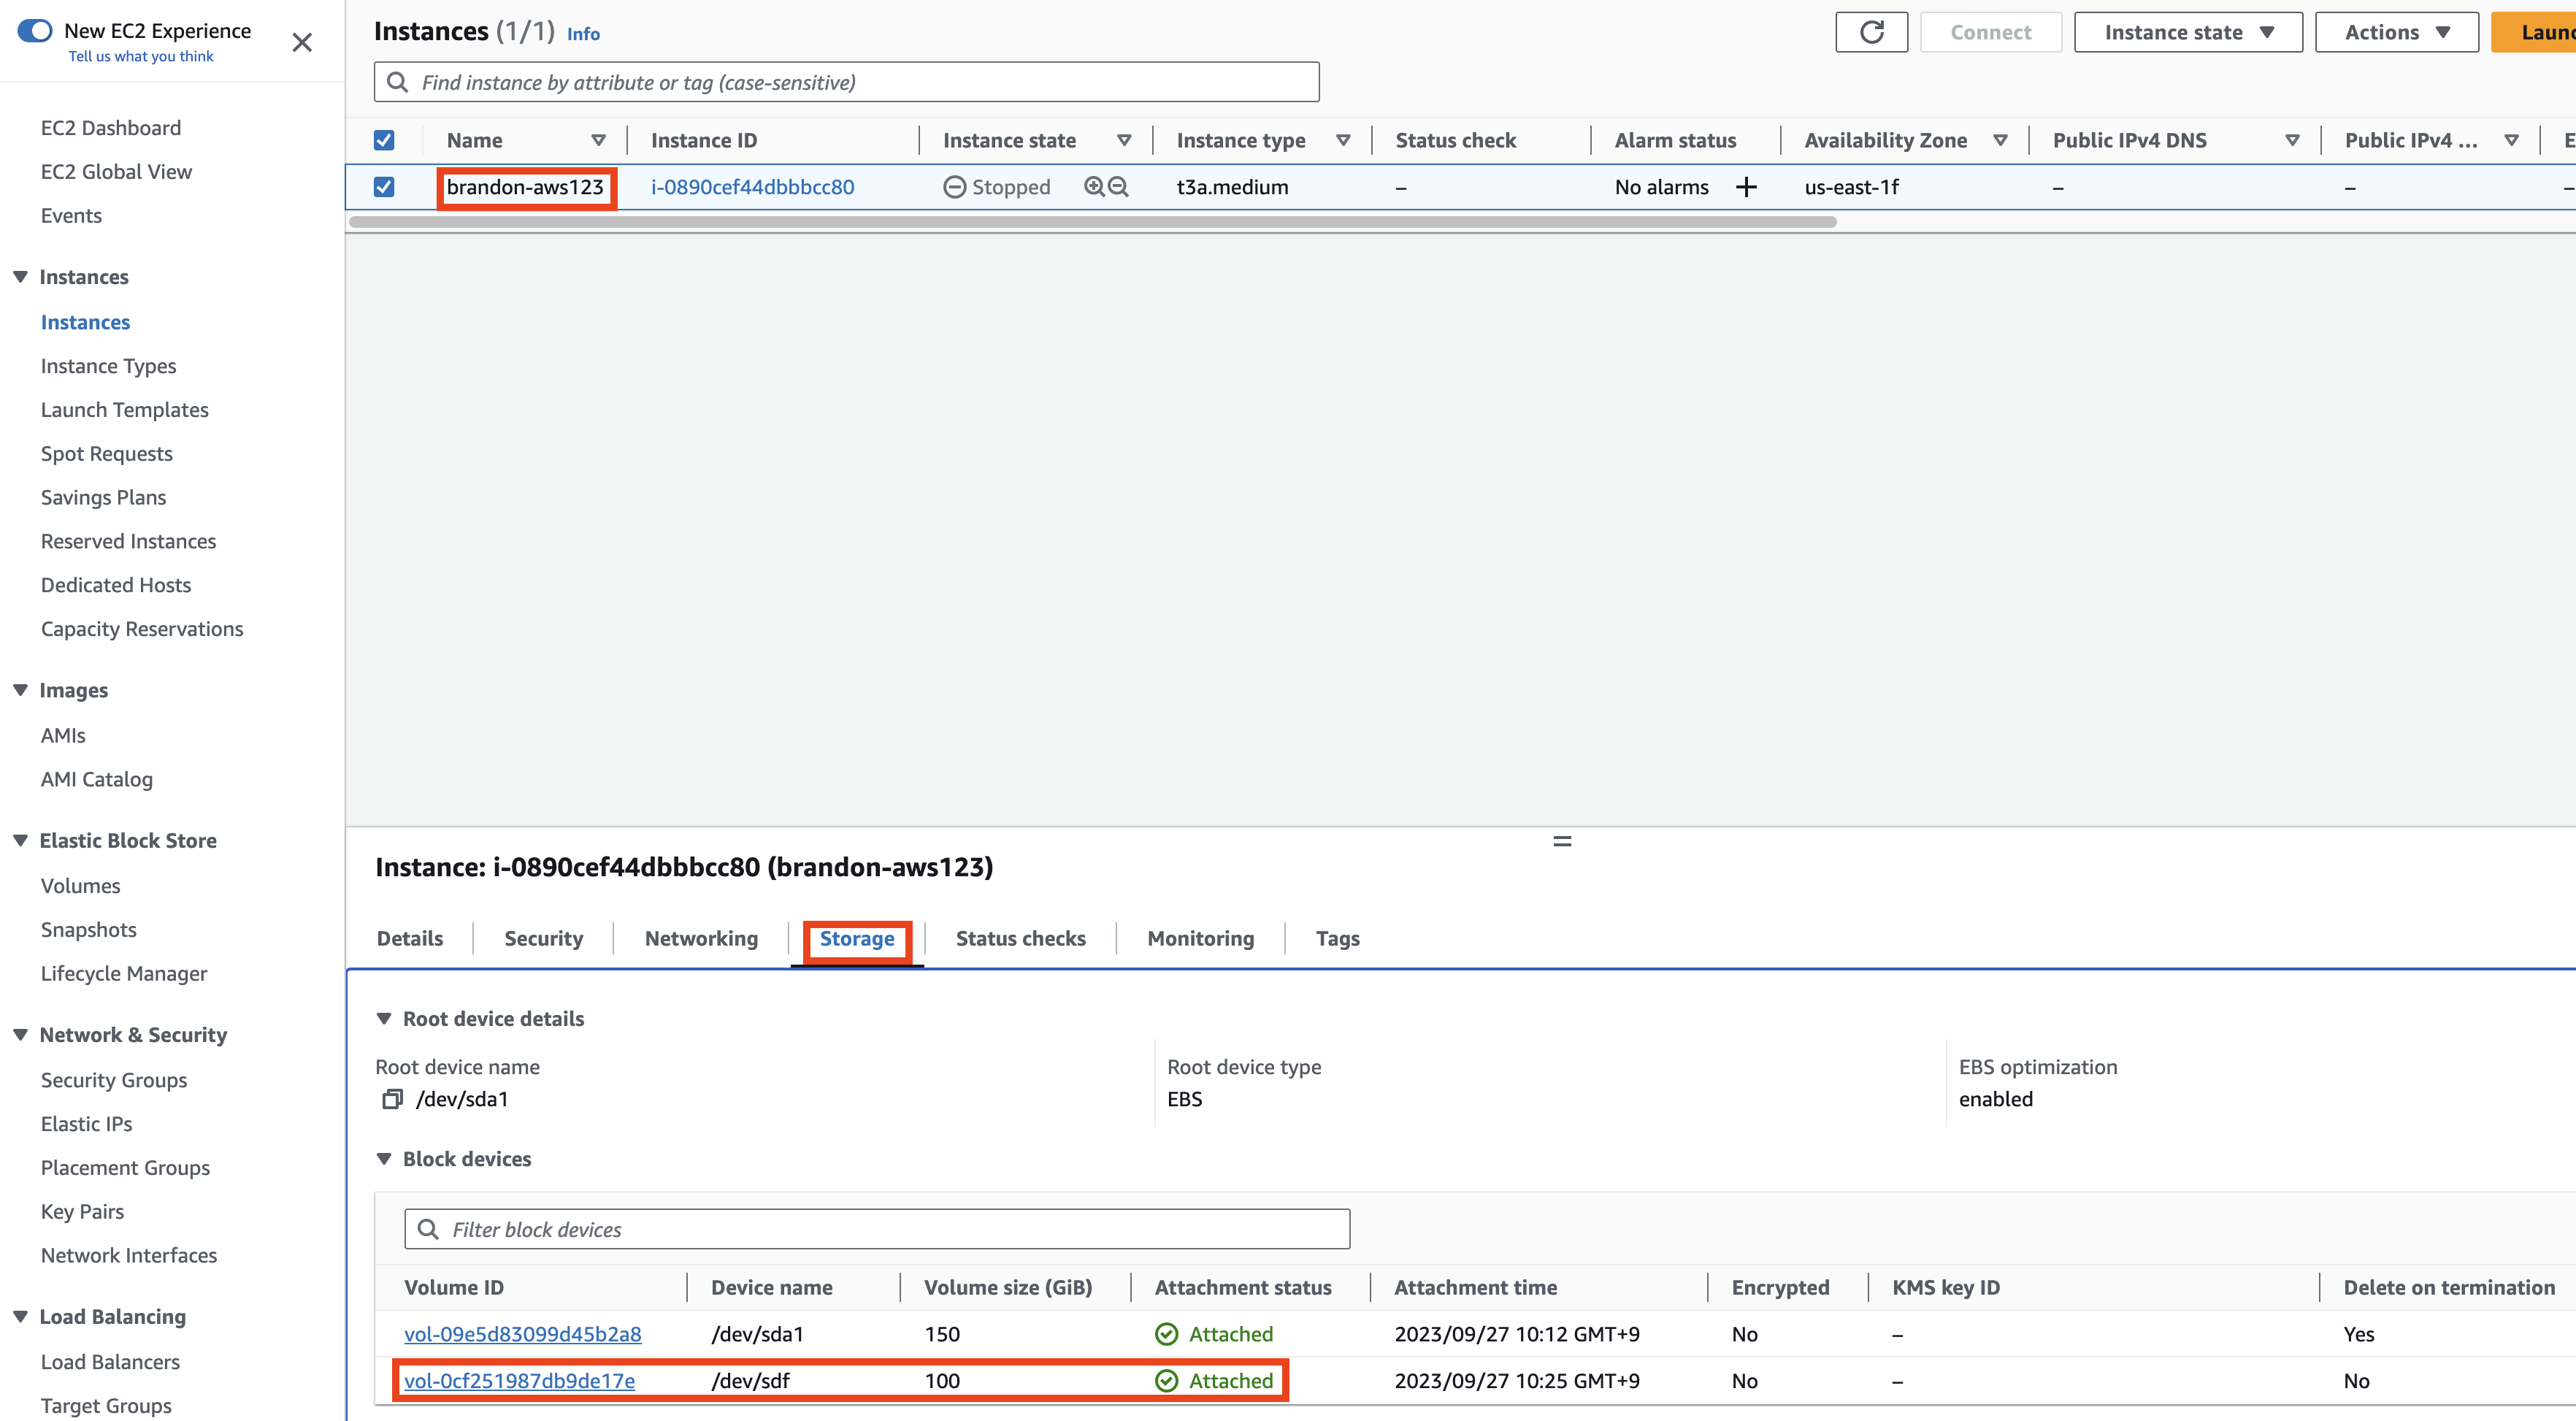
This will open the Volumes page showing the specific Volume details.
- Click on the Actions button and further click on Detach Volume to detach the volume from the EC2 Instance.
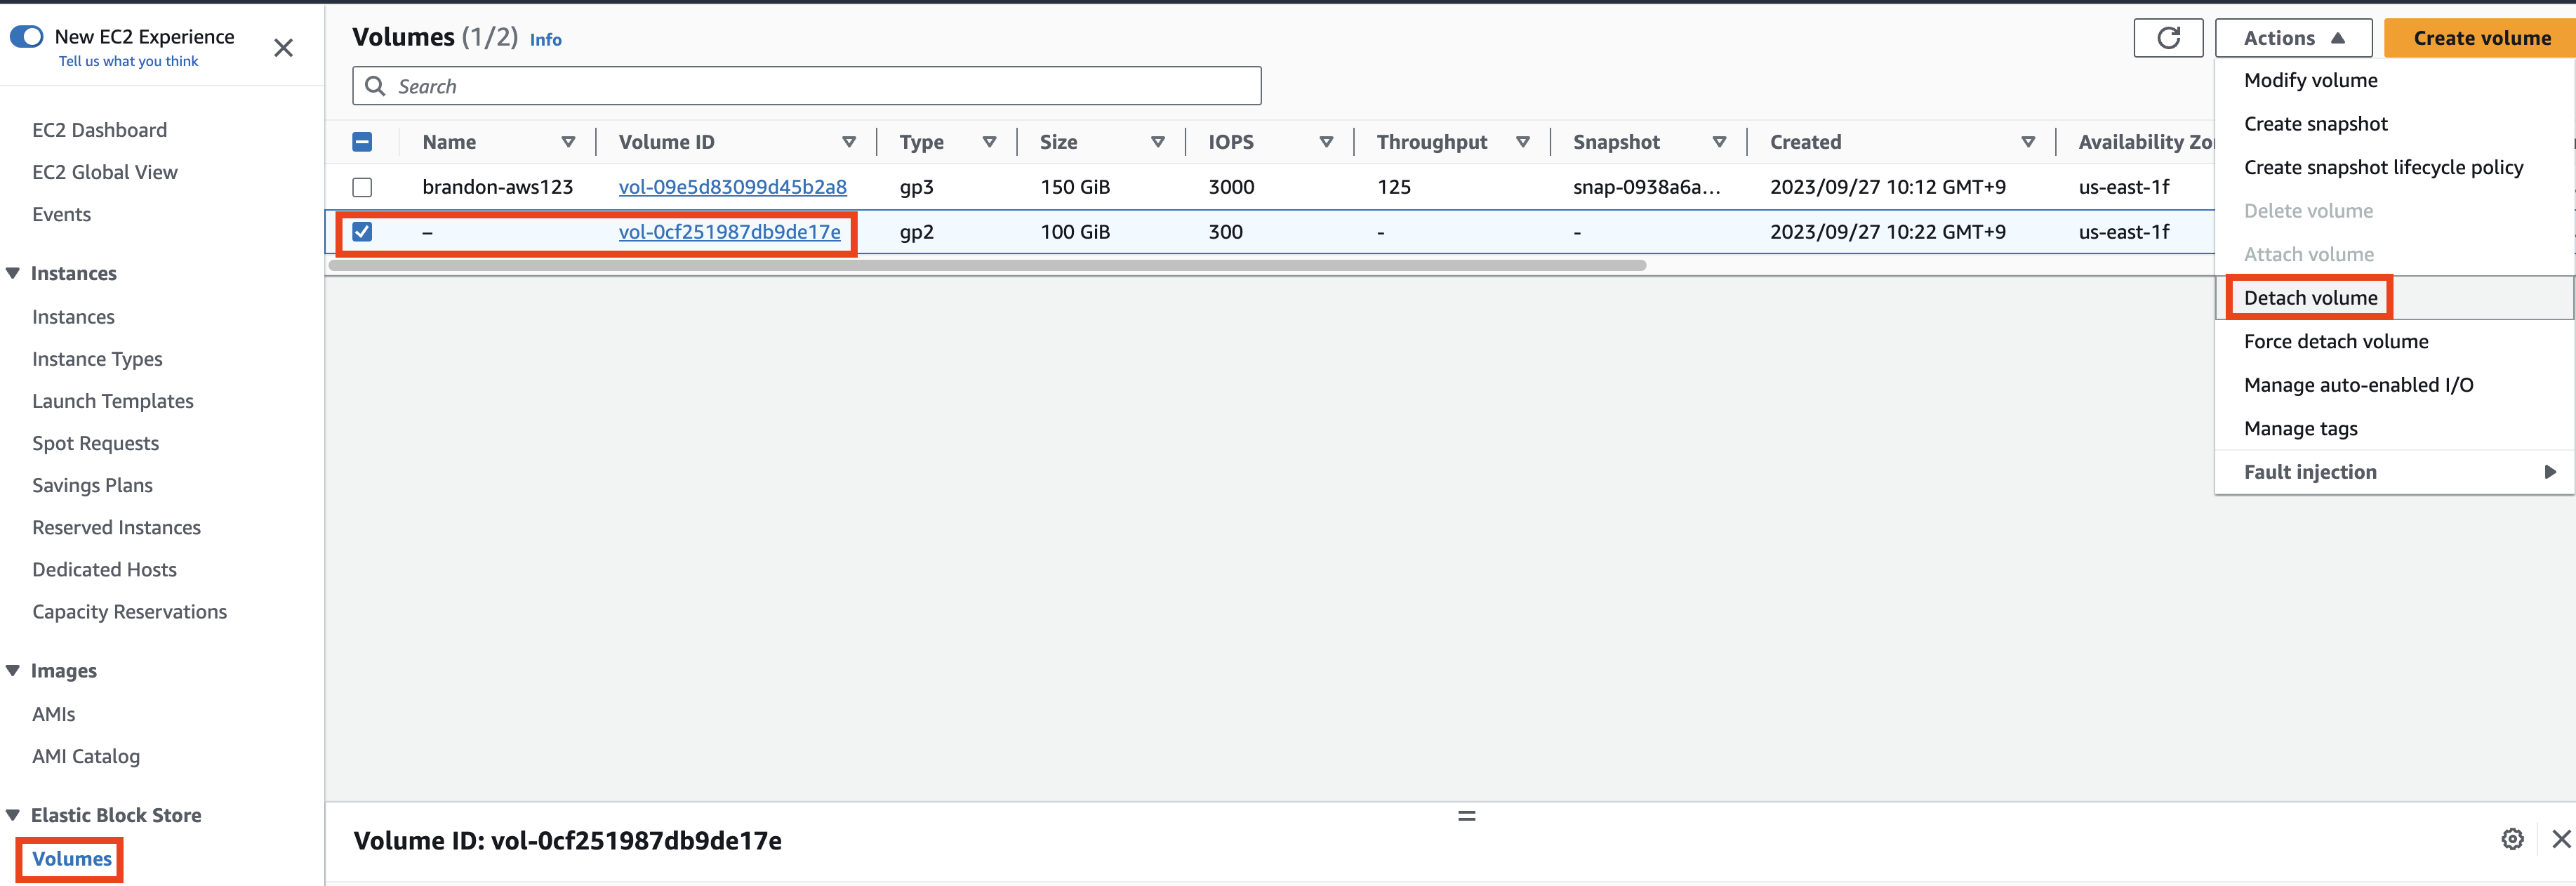
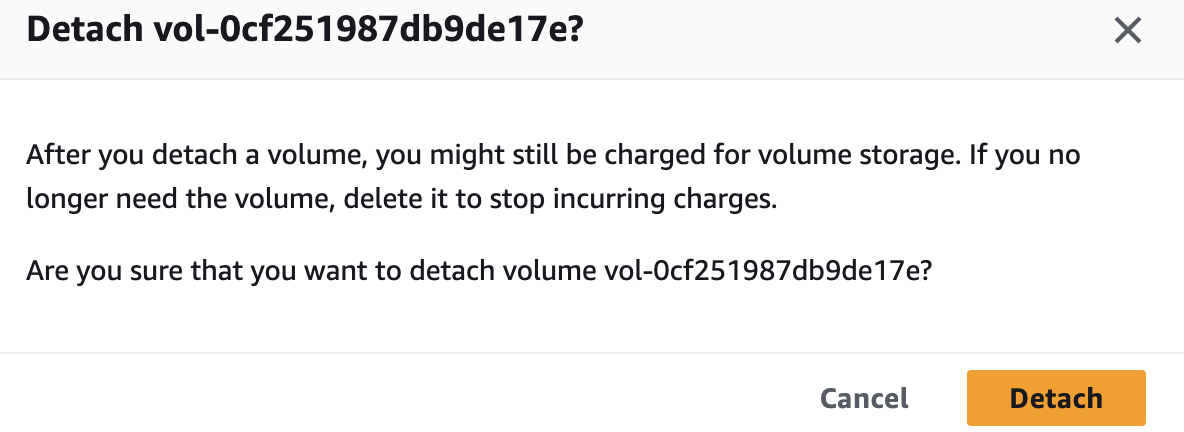
- In the Detach Volume dialog box, click Detach; the volume will now be detached and in a few moments the Status of the volume will change to available, indicating that it could be attached to another instance if required.
 Create snapshot of detached Volume
- lick on Actions, then select Create Snapshot.

- In the Create Snapshot screen, provide a Description for the Volume; this will be an identifier to search for the Snapshot of the Volume.
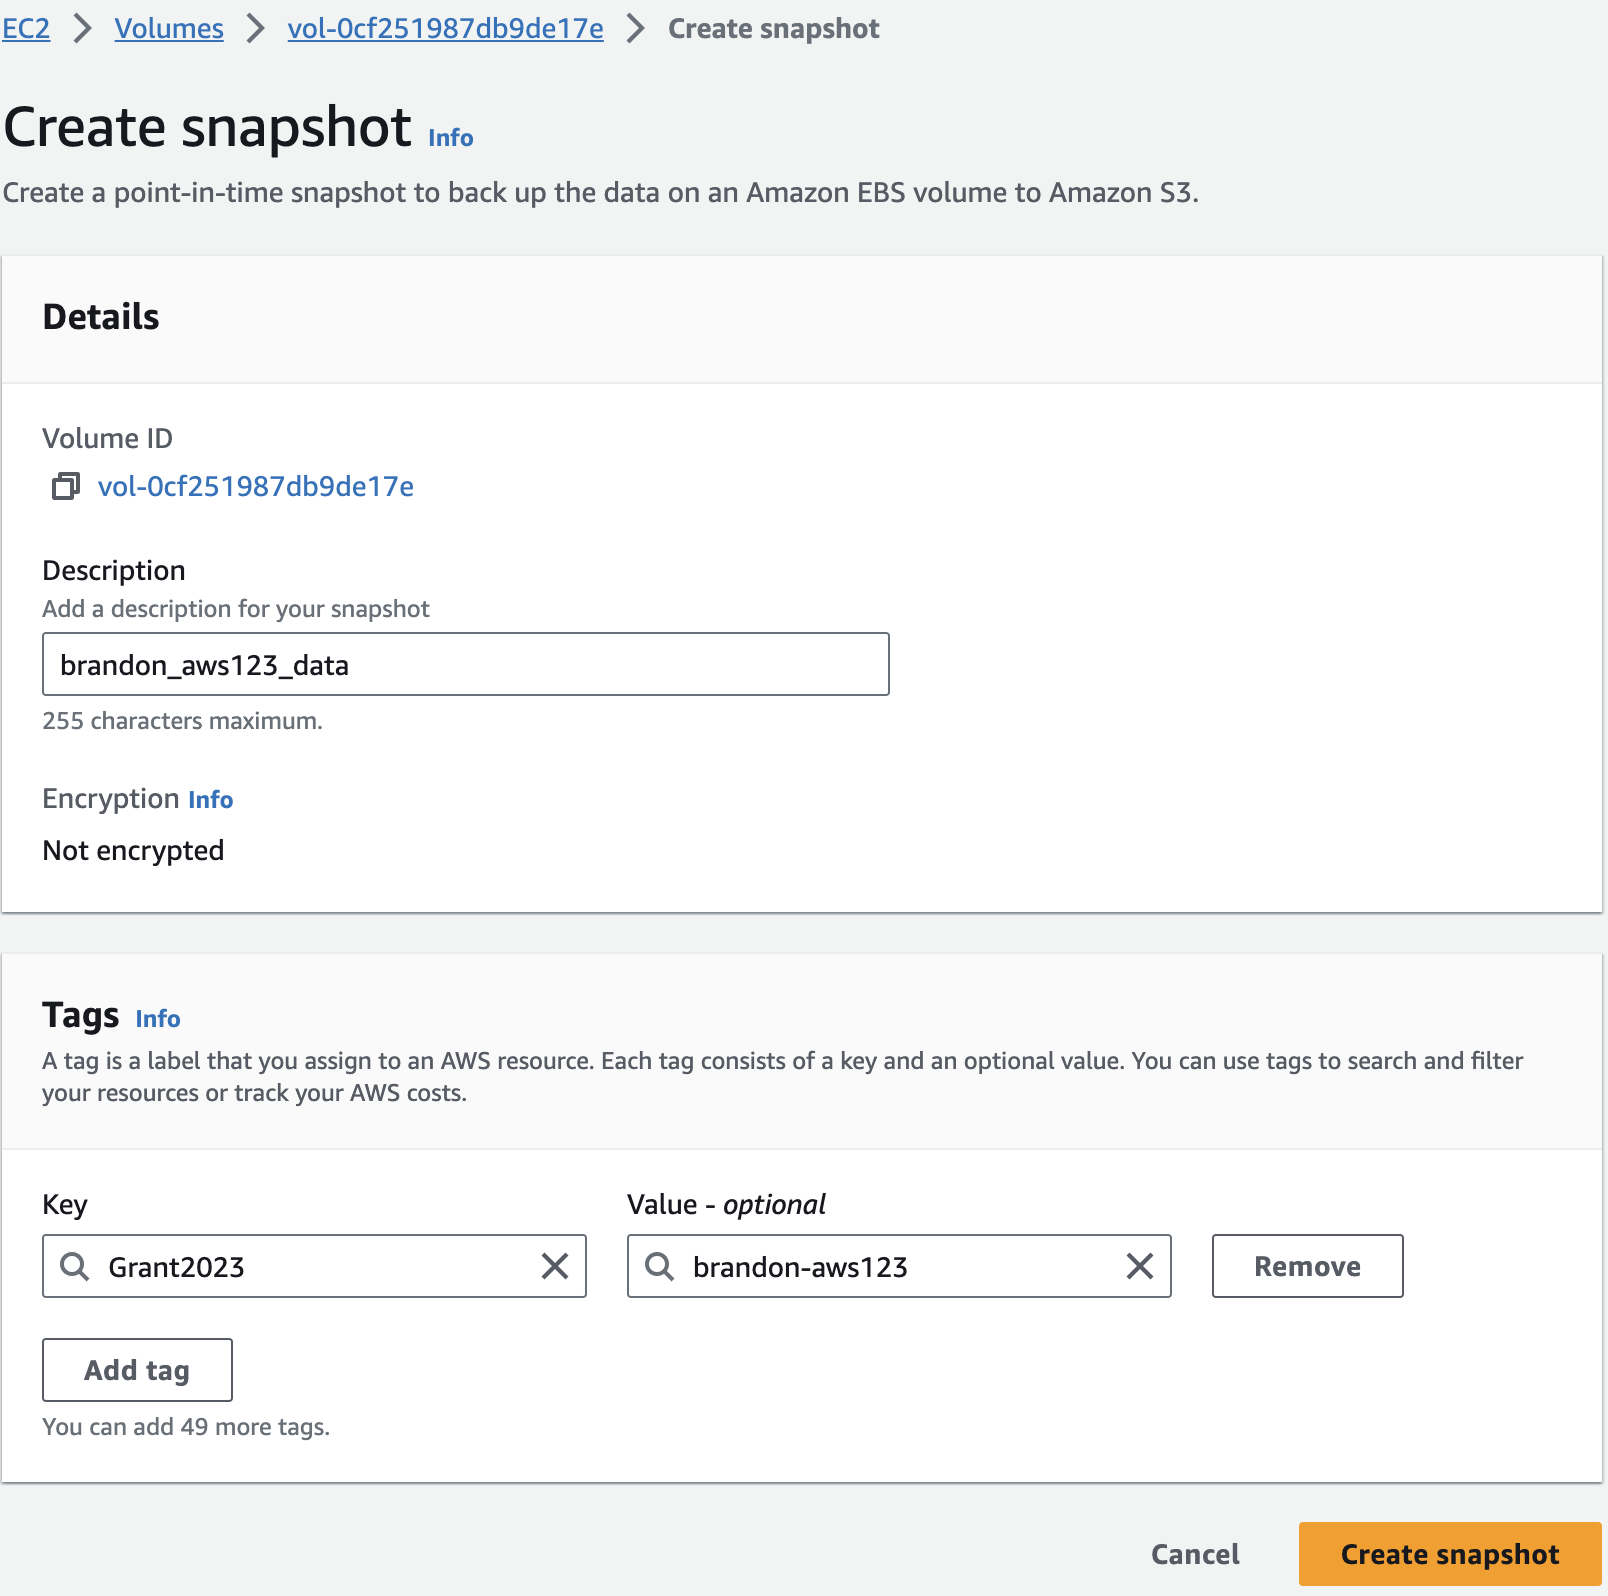
- Click on Add Tag to provide a unique name tag for better identificaiton of the snapshot. Enter “Name” in the Key field, and “[your initials]-snapshot” for the Value field. Add the “User” and “Grant” tag you’ve previously used as well.
-
Click on Create Snapshot.
-
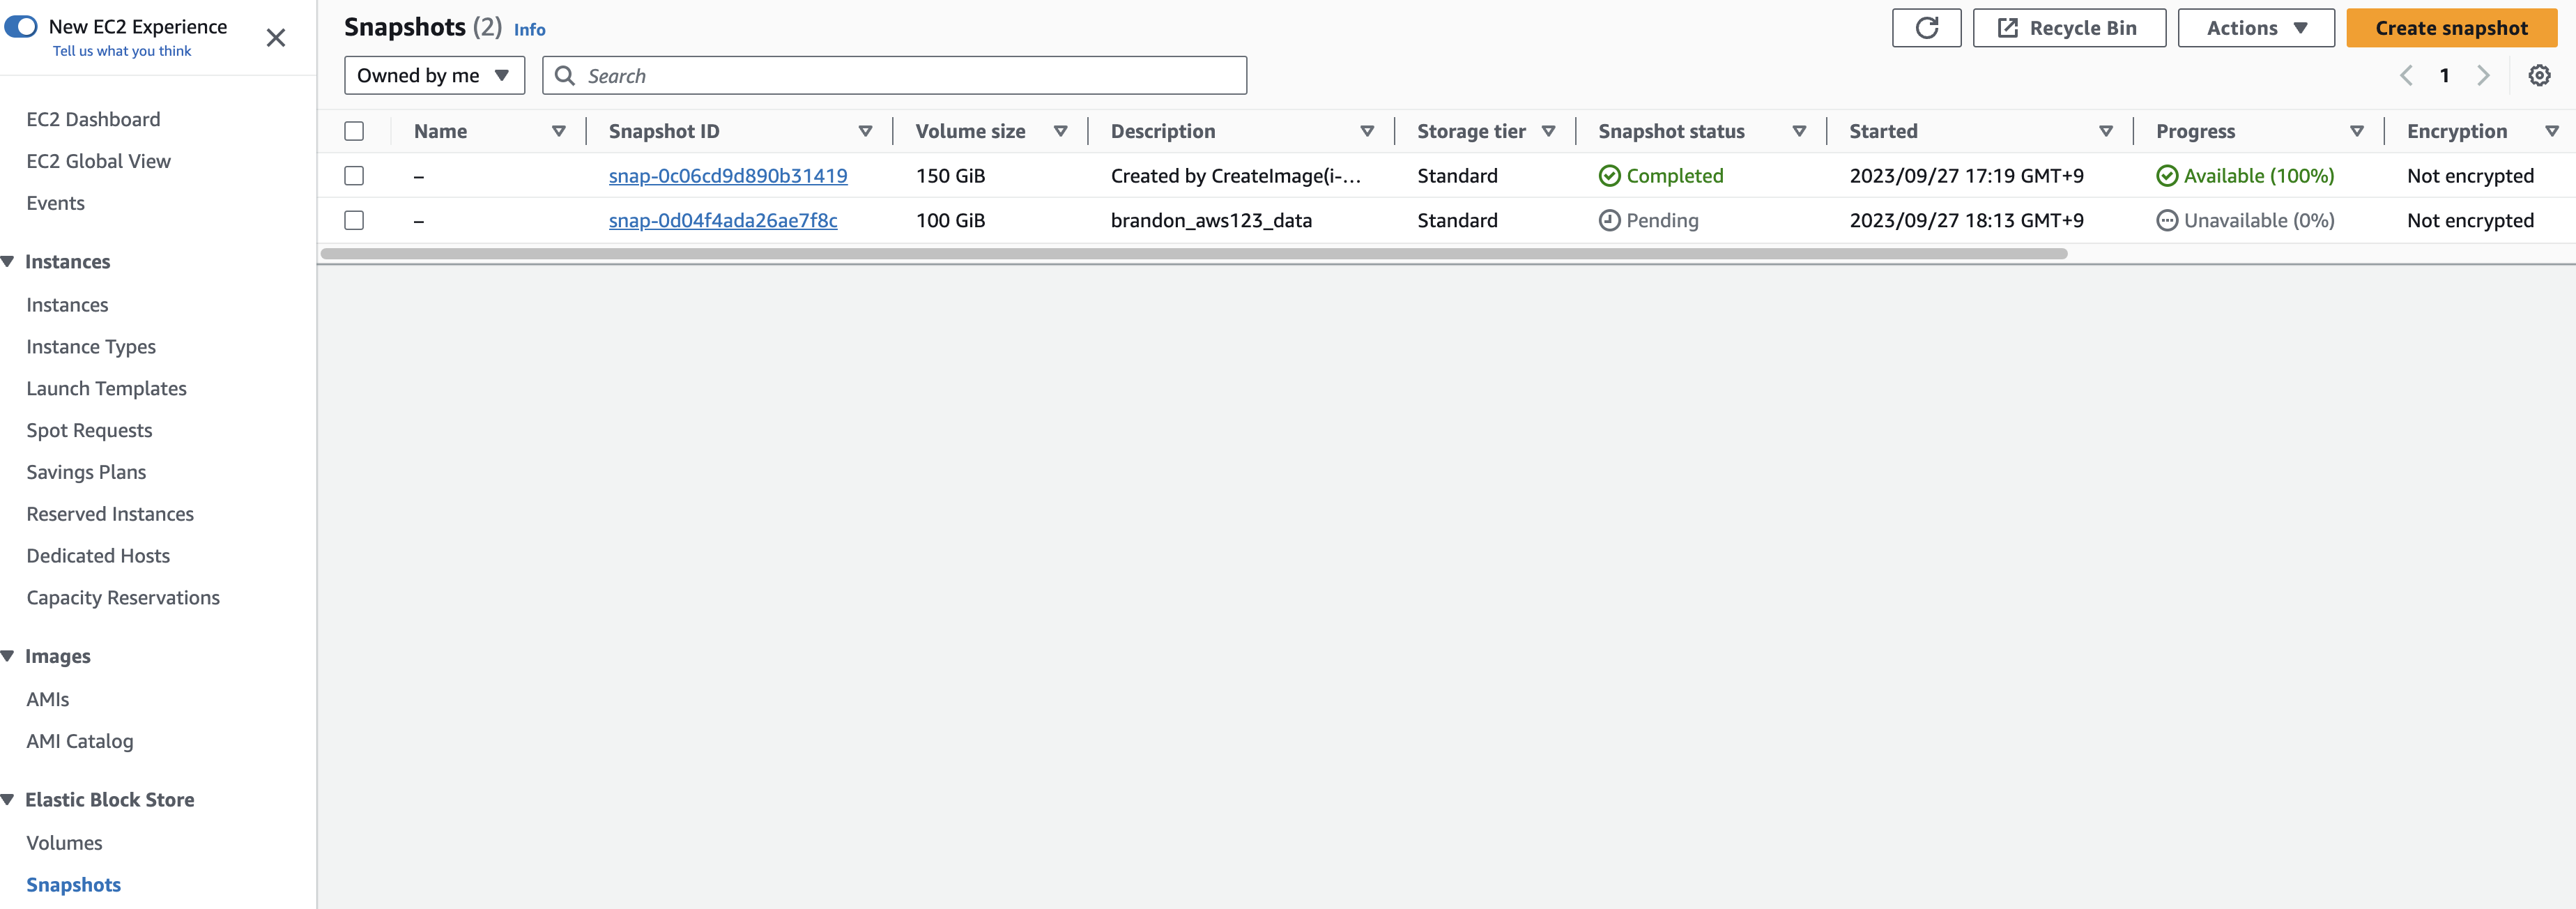
A Snapshot creation task will be started, and a message indicating the same will be displayed in a green bar on the top of the screen.
-
Click on Snapshots under the Elastic Block Store section in the left Navigation pane to view all the snapshots created.
Delete the detached Volume
Now that a Snapshot has been taken of the volume, we will delete the volume itself.
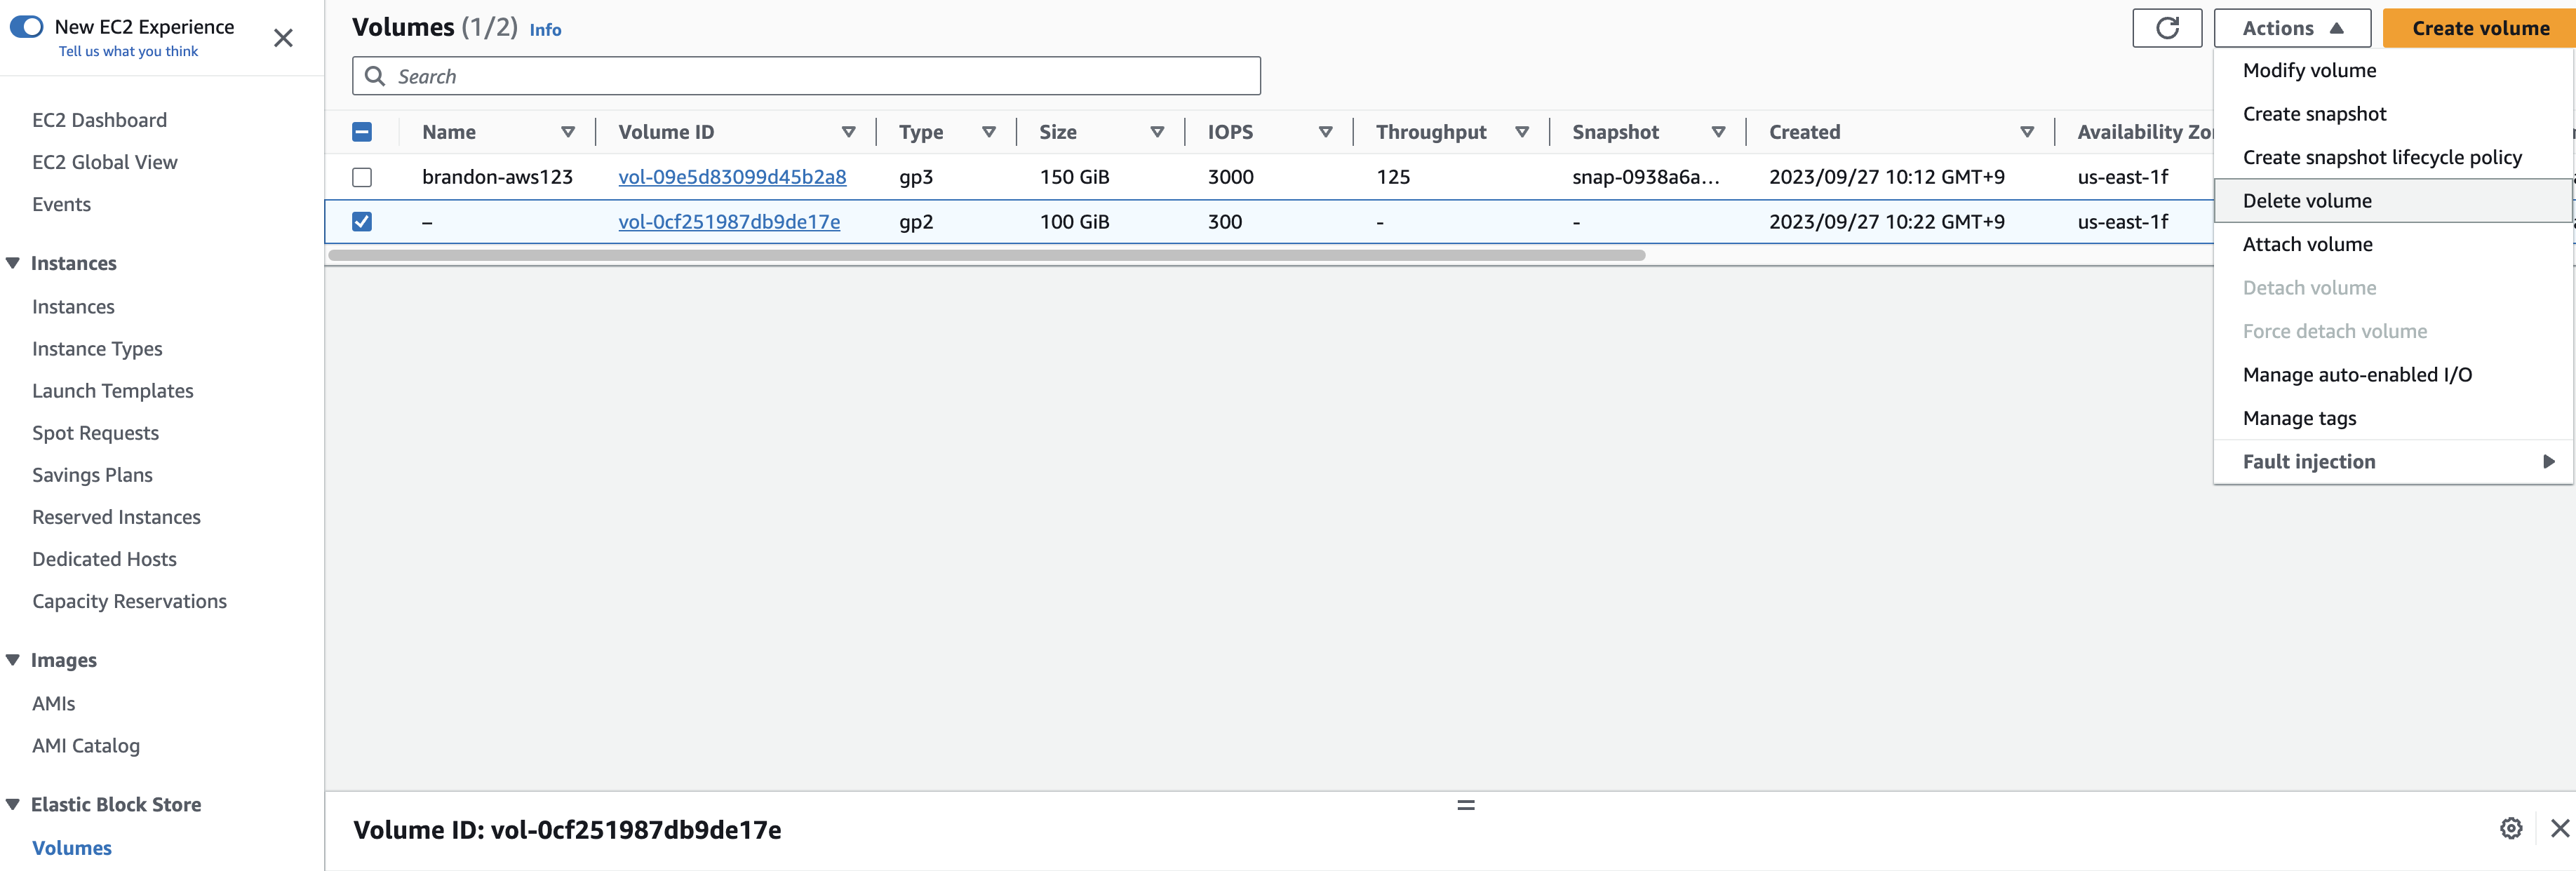
- Click on Actions and select Delete Volume.
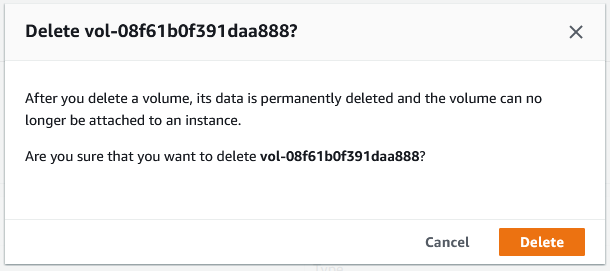
- On the Delete Volume dialog click on Delete to confirm the delete. The EBS Volume will now be deleted. This volume no longer exists on AWS, and you will no longer be charged for it.
Terminate EC2 Instance
We will now Terminate the EC2 Instance.
NOTE: Ensure your previous EC2 Image was successful; we’ll be using it in the next portion of the workshop. In this segment, you will be terminating your EC2 Instance. This is permanent and irreversible. However, using this EC2 Image, it is possible to spin up an identical machine. In general, be very cautious when terminating machines.
- Select the EC2 Instance from the list of instances. Click on Instance State > Terminate Instance.

- On the Terminate Instance dialog, observe the note “Associated resources may incur costs after these instances are terminated” and click Delete EBS Volume. Read the additional note. To proceed, select Yes, terminate. This is an important safeguard, and never click this automatically!

The instance will now be terminated.
- After a minute view the Instance State of the instance, it will indicate Terminated.