Quickstart Hail (Eng)
CloudFormation stack preparation
1. Prepare the AWS credentials and apply them in the terminal.
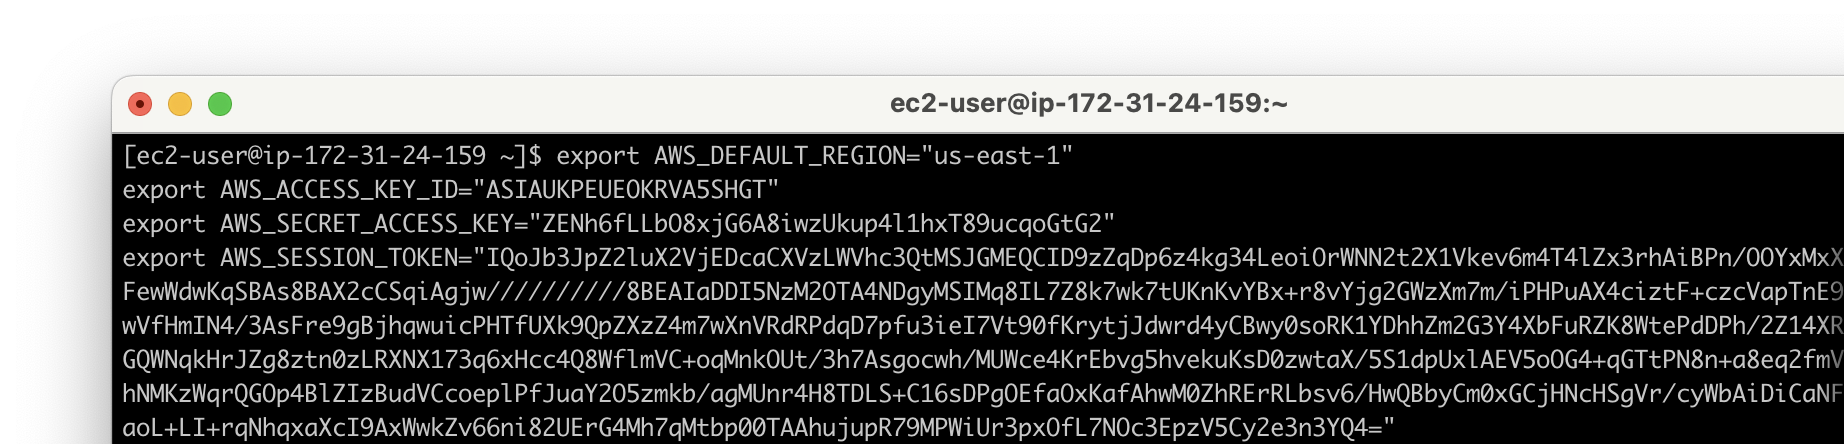
export AWS_DEFAULT_REGION="us-east-1"
export AWS_ACCESS_KEY_ID="{ACCESS_KEY}"
export AWS_SECRET_ACCESS_KEY="{SECRET_ACCESS_KEY}"
export AWS_SESSION_TOKEN="{SESSION_TOKEN}"
2. Create an S3 bucket in the region where you want to launch this CloudFormation stack.
At this time, I recommend creating a bucket name using your own initial. As you know, the bucket already exists, it cannot be created.
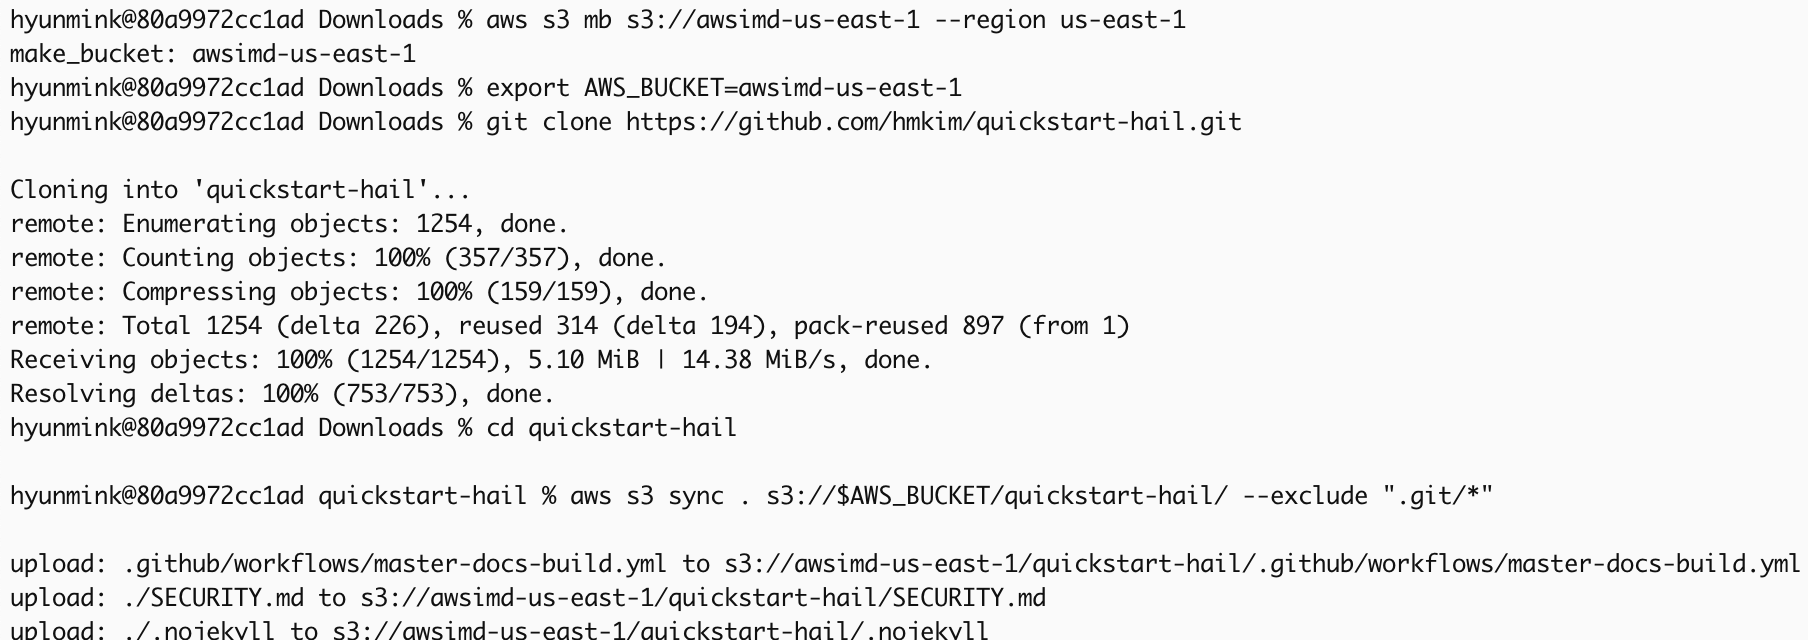
aws s3 mb s3://{bucket name}-{region} --region {region}Download and unzip the content from this repository, then place the downloaded content into the S3 bucket you created earlier.
export AWS_BUCKET={bucket name}-{region}
git clone https://github.com/hmkim/quickstart-hail.git
cd quickstart-hail
aws s3 sync . s3://$AWS_BUCKET/quickstart-hail/ --exclude ".git/*"
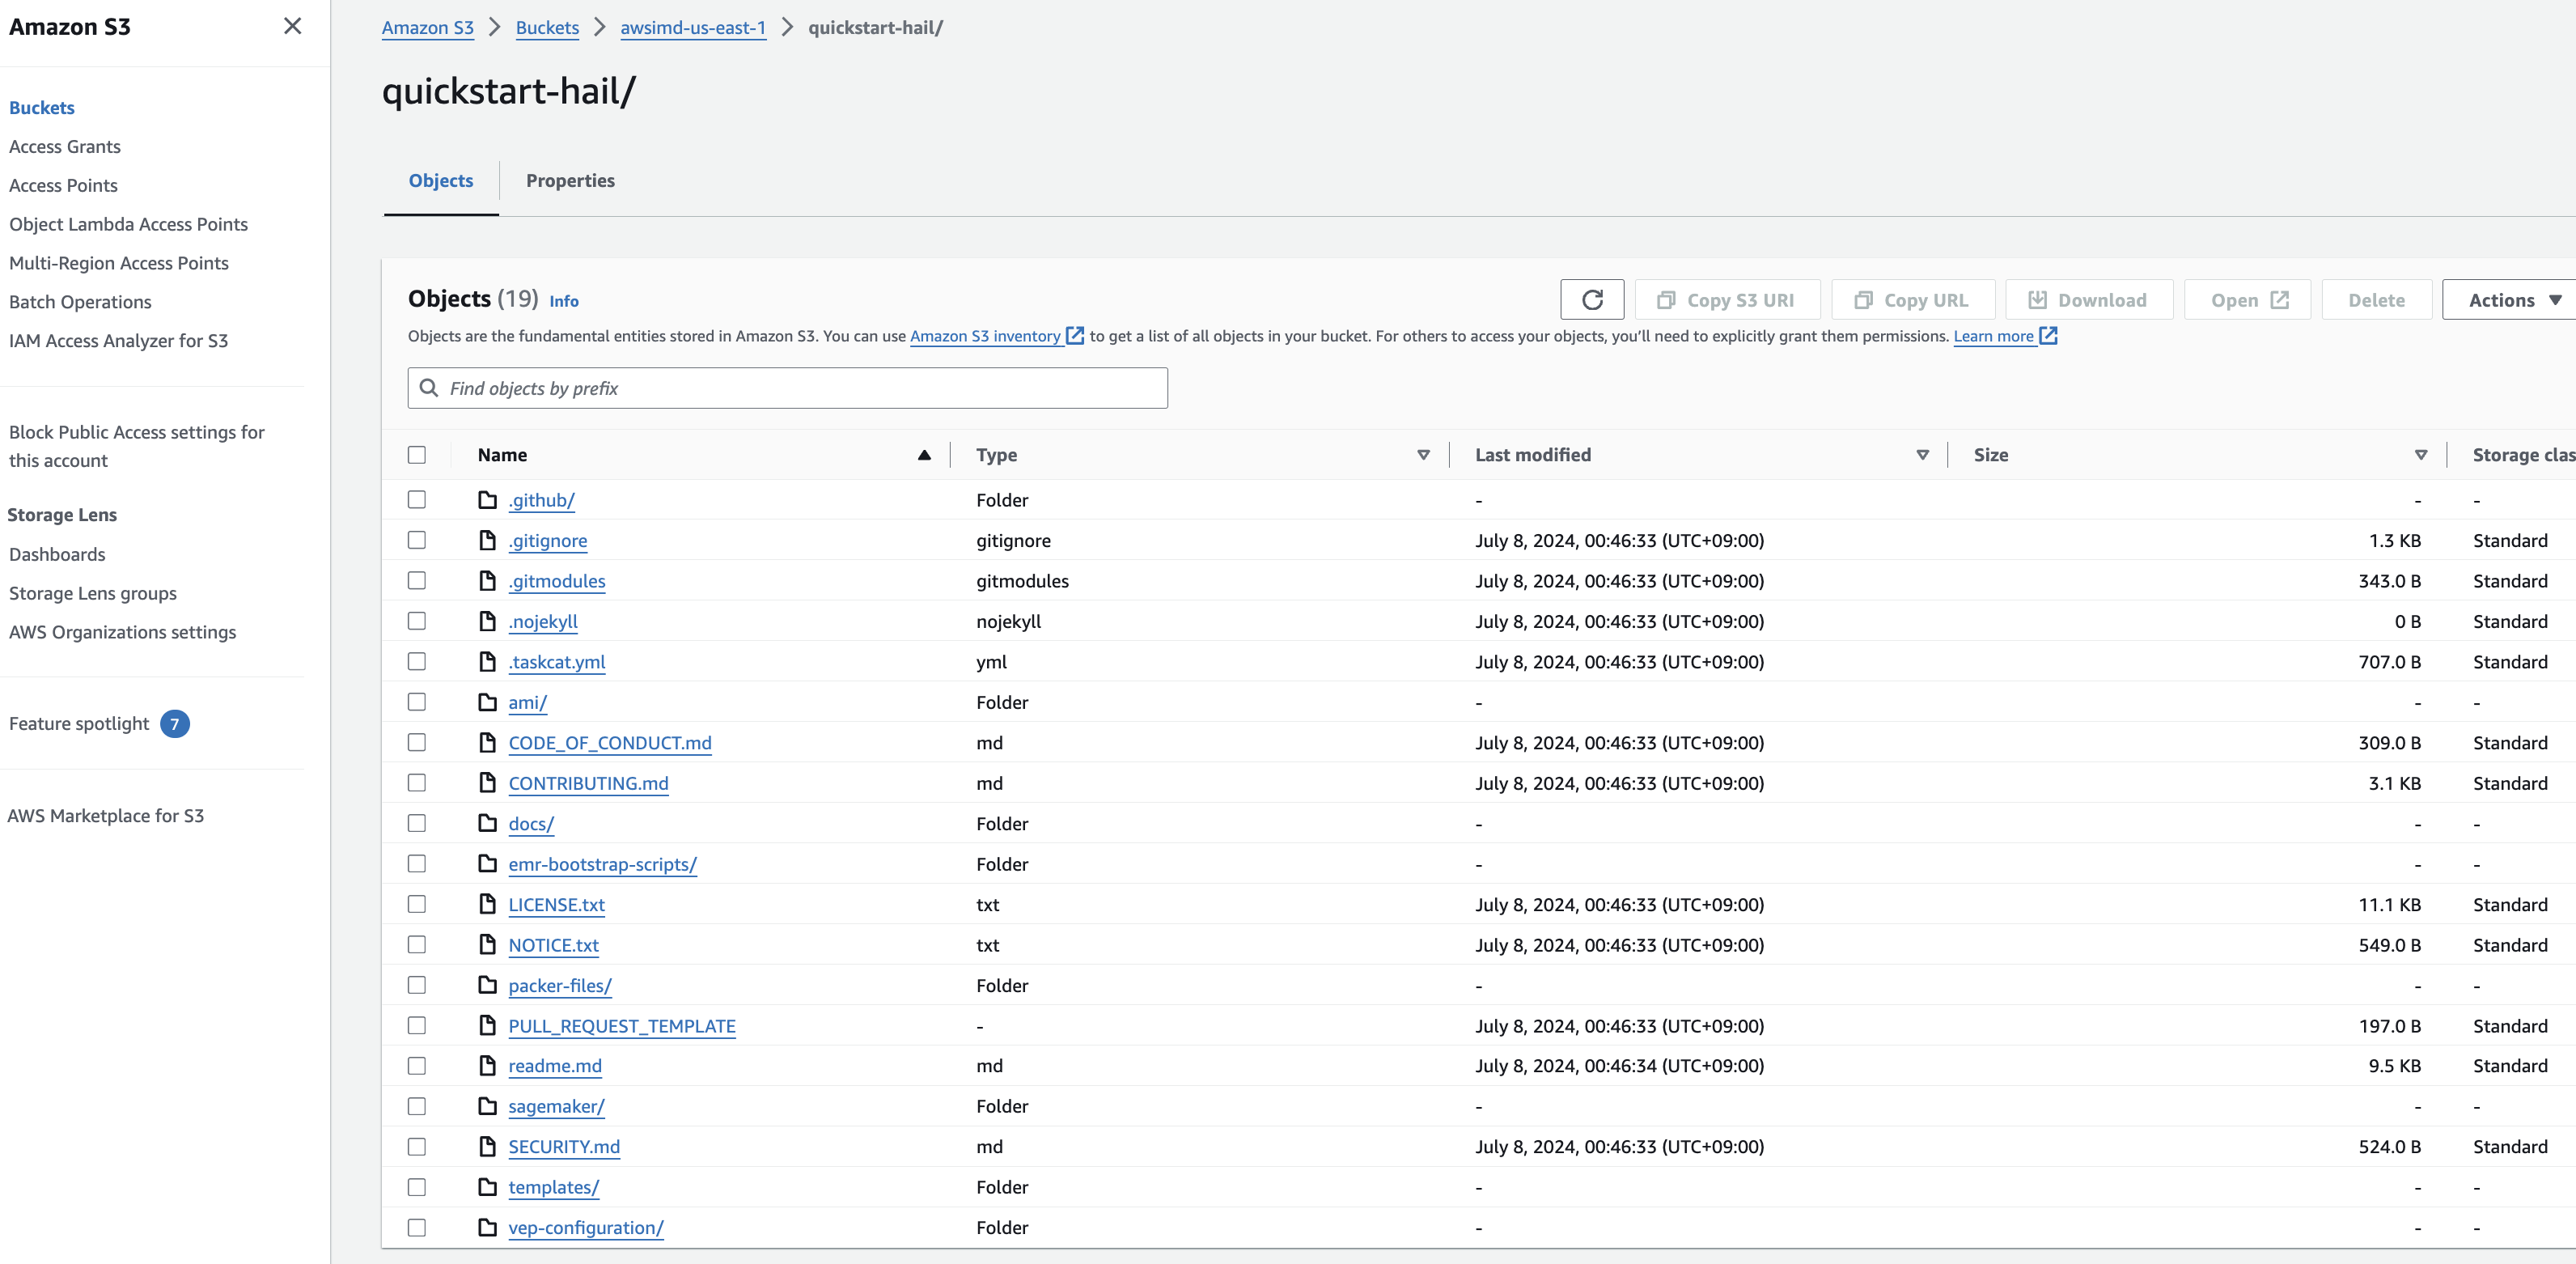
3. Connect to the Amazon S3 console and check the bucket and directory.
Run the CloudFormation stack
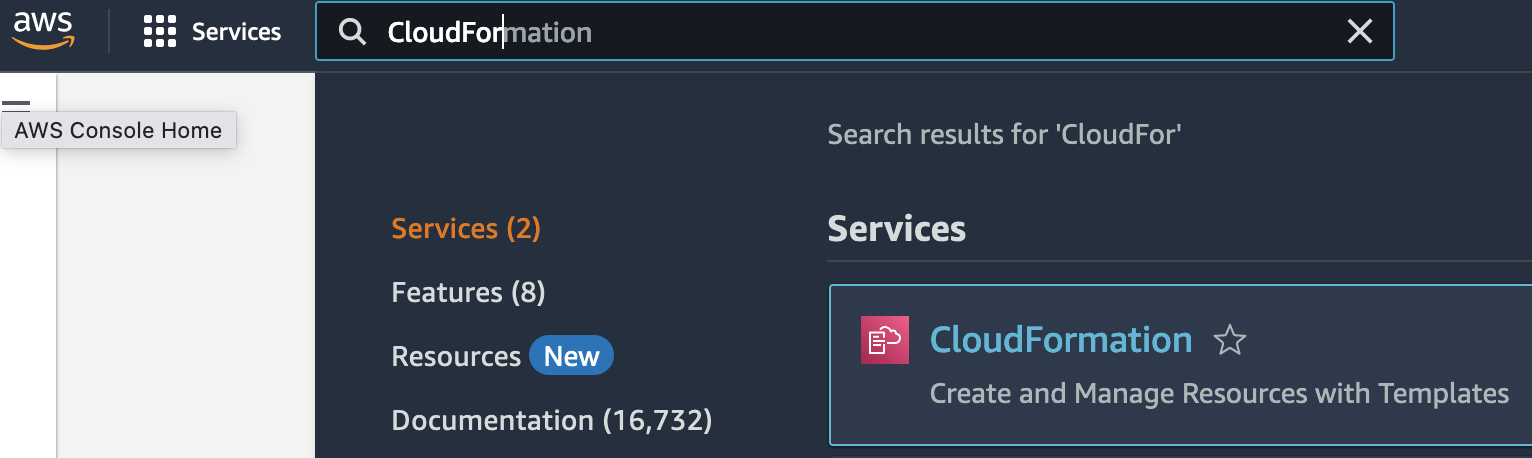
1. Go to the CloudFormation console.
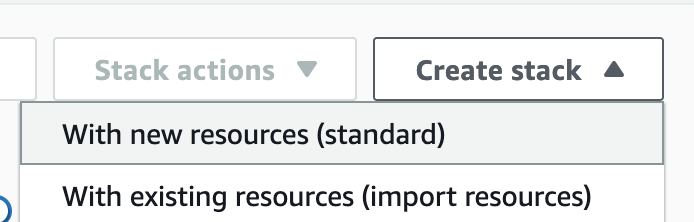
2. Creates a new stack. At this time, select With new resources (standard).
3. Go to the Amazon S3 console, select hail-launcher.template.yaml in the template directory you uploaded earlier, and click Copy URL. The path is as follows:
{bucket name} > quickstart-hail > templates > hail-launcher.template.yaml
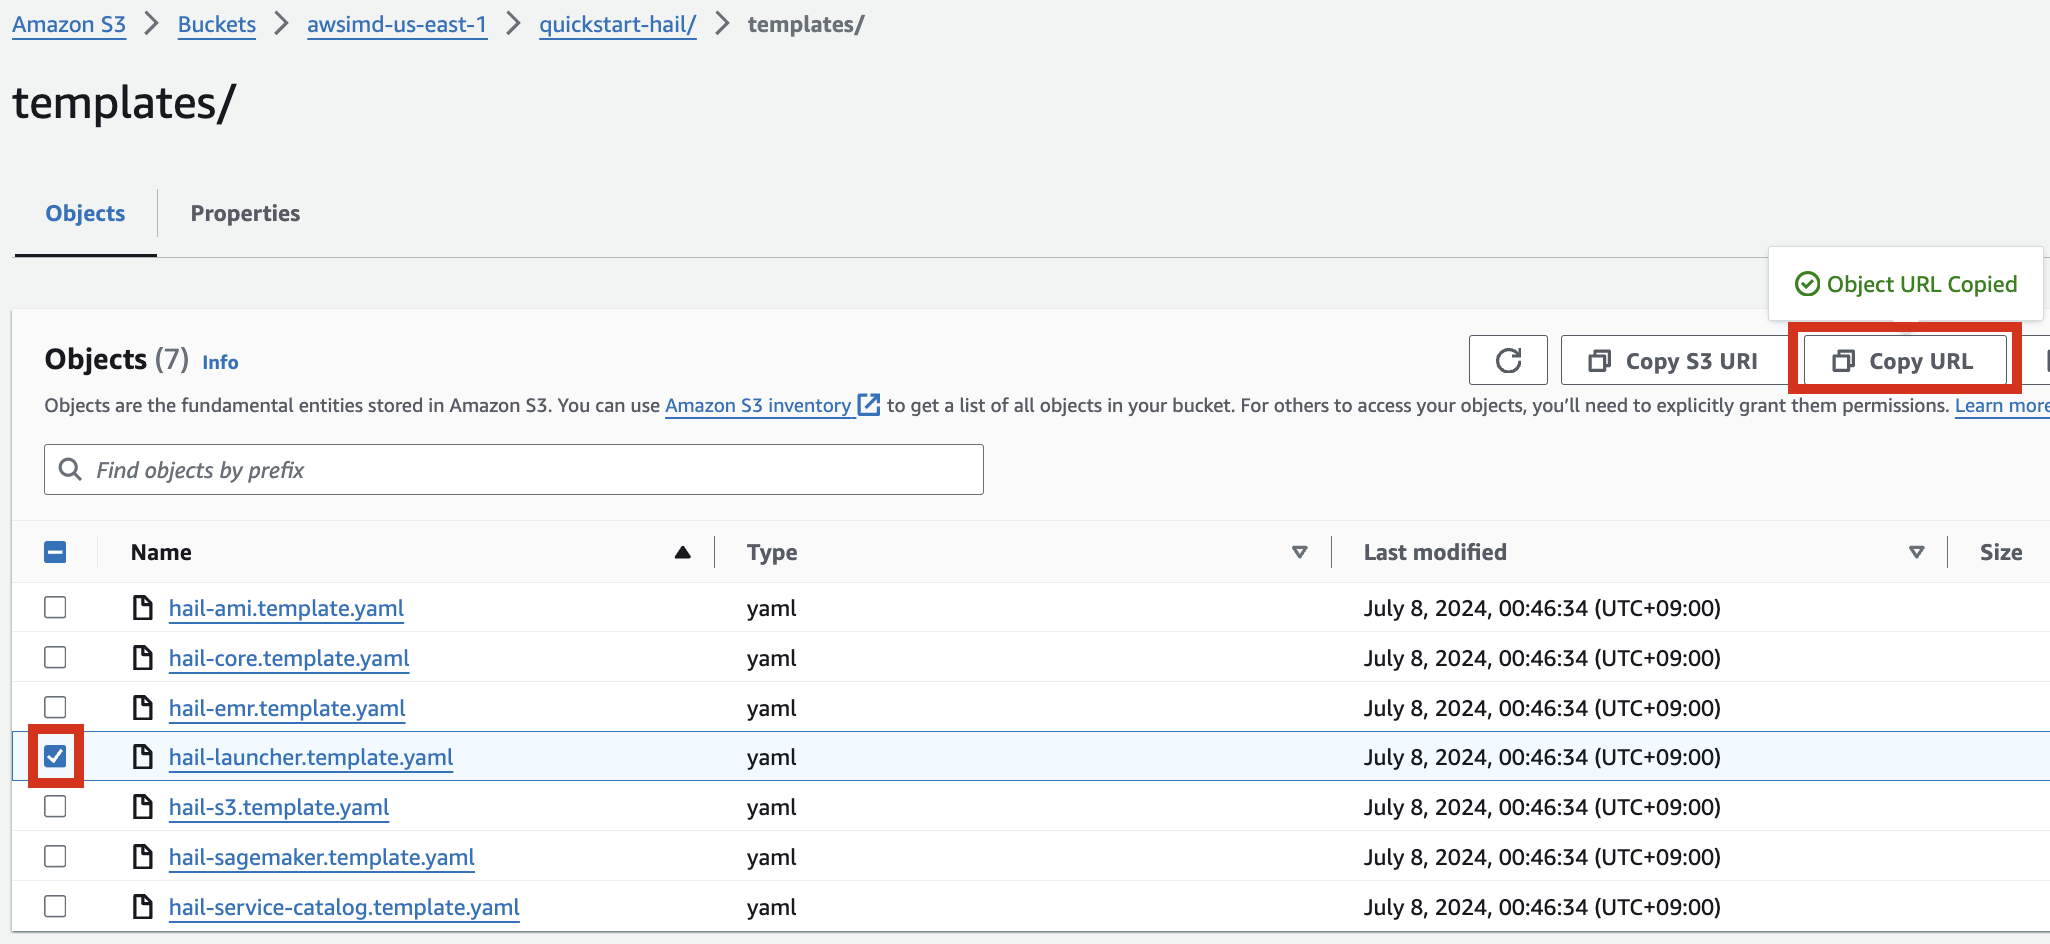
When creating a CloudFormation stack, enter this URL and create the stack.
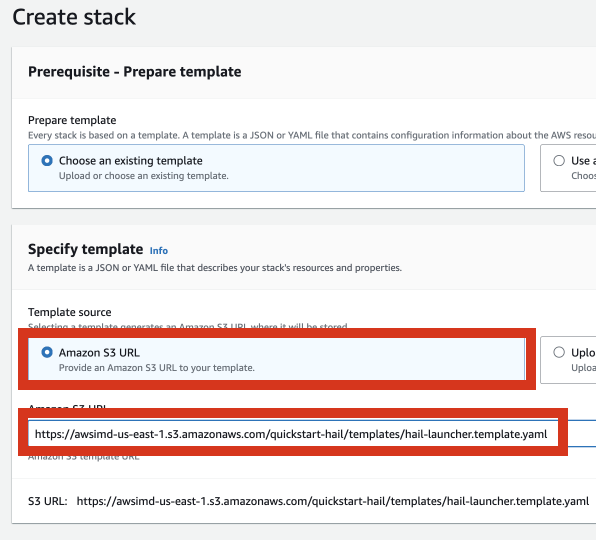
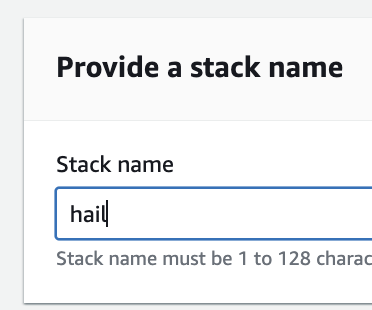
4. Proceed with entering information to create a stack.
Type an name for the stack.
Select a VPC. Select one subnet within the same VPC. For this exercise, select public.
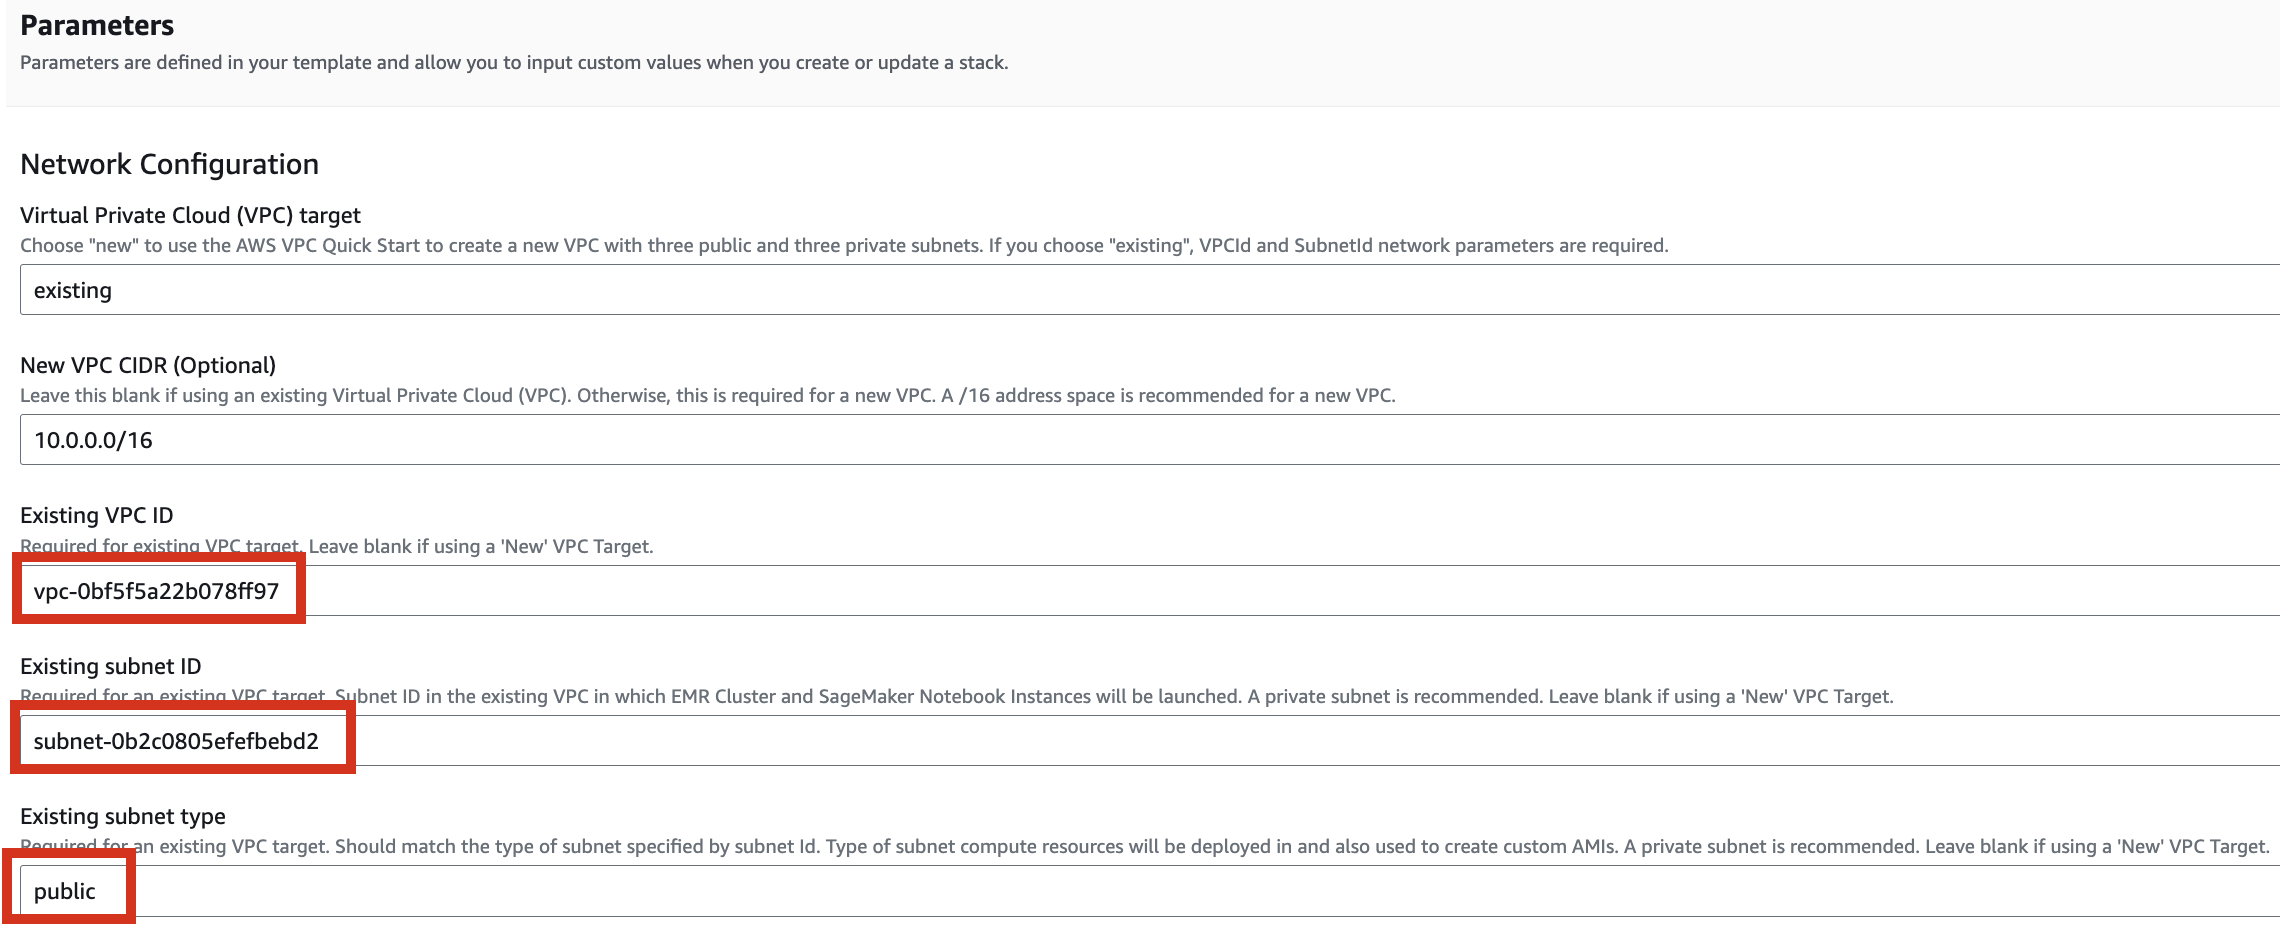
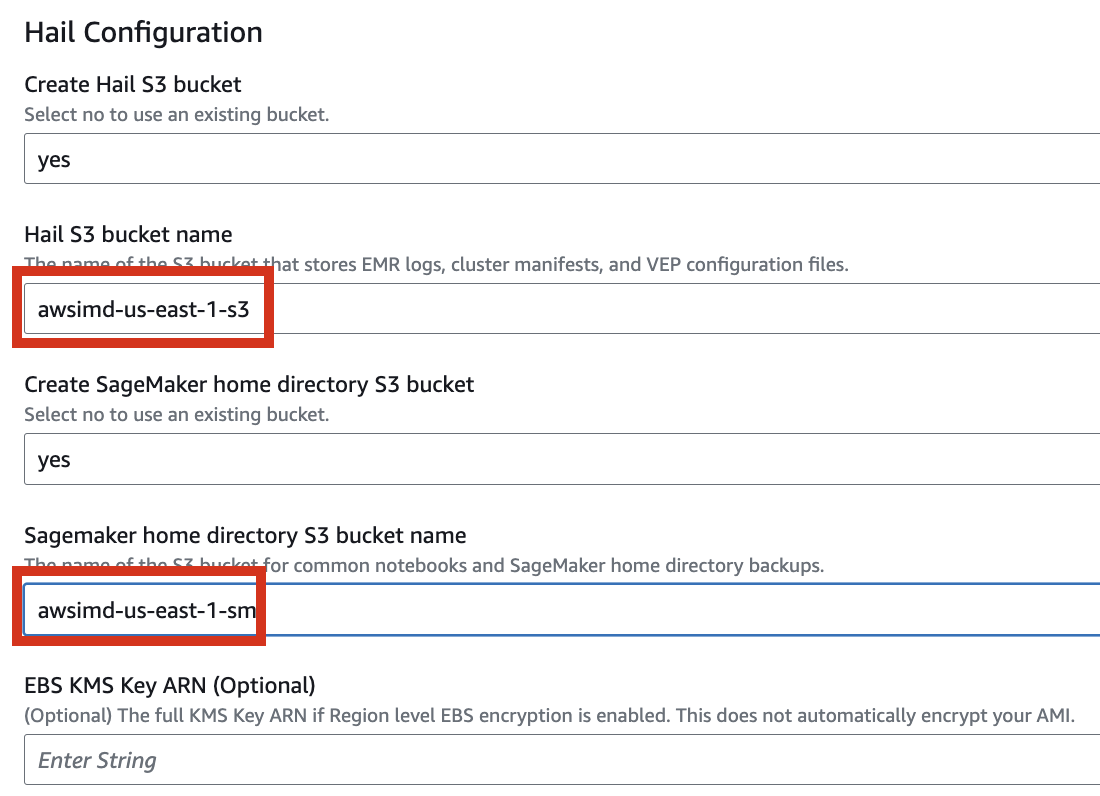
Let's set it up to create additional buckets as needed.
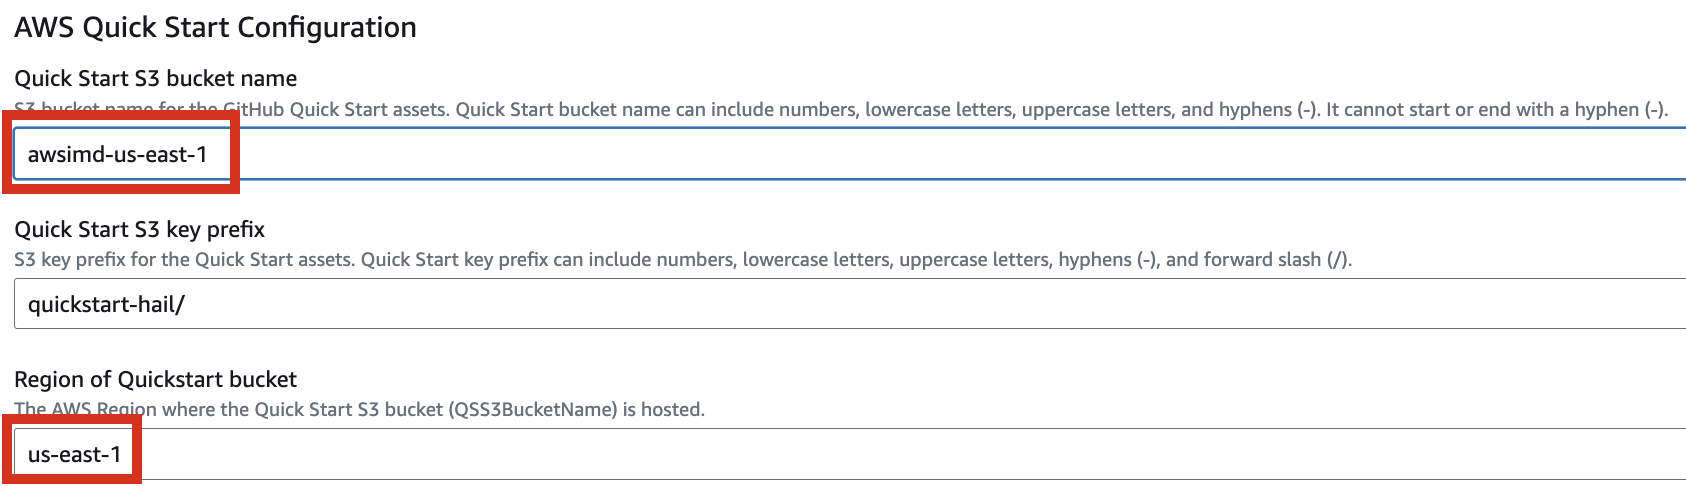
Enter the name of the existing bucket where the quickstart-hail folder was uploaded, and check the region.
5. Finally, press the Next button to create the stack.


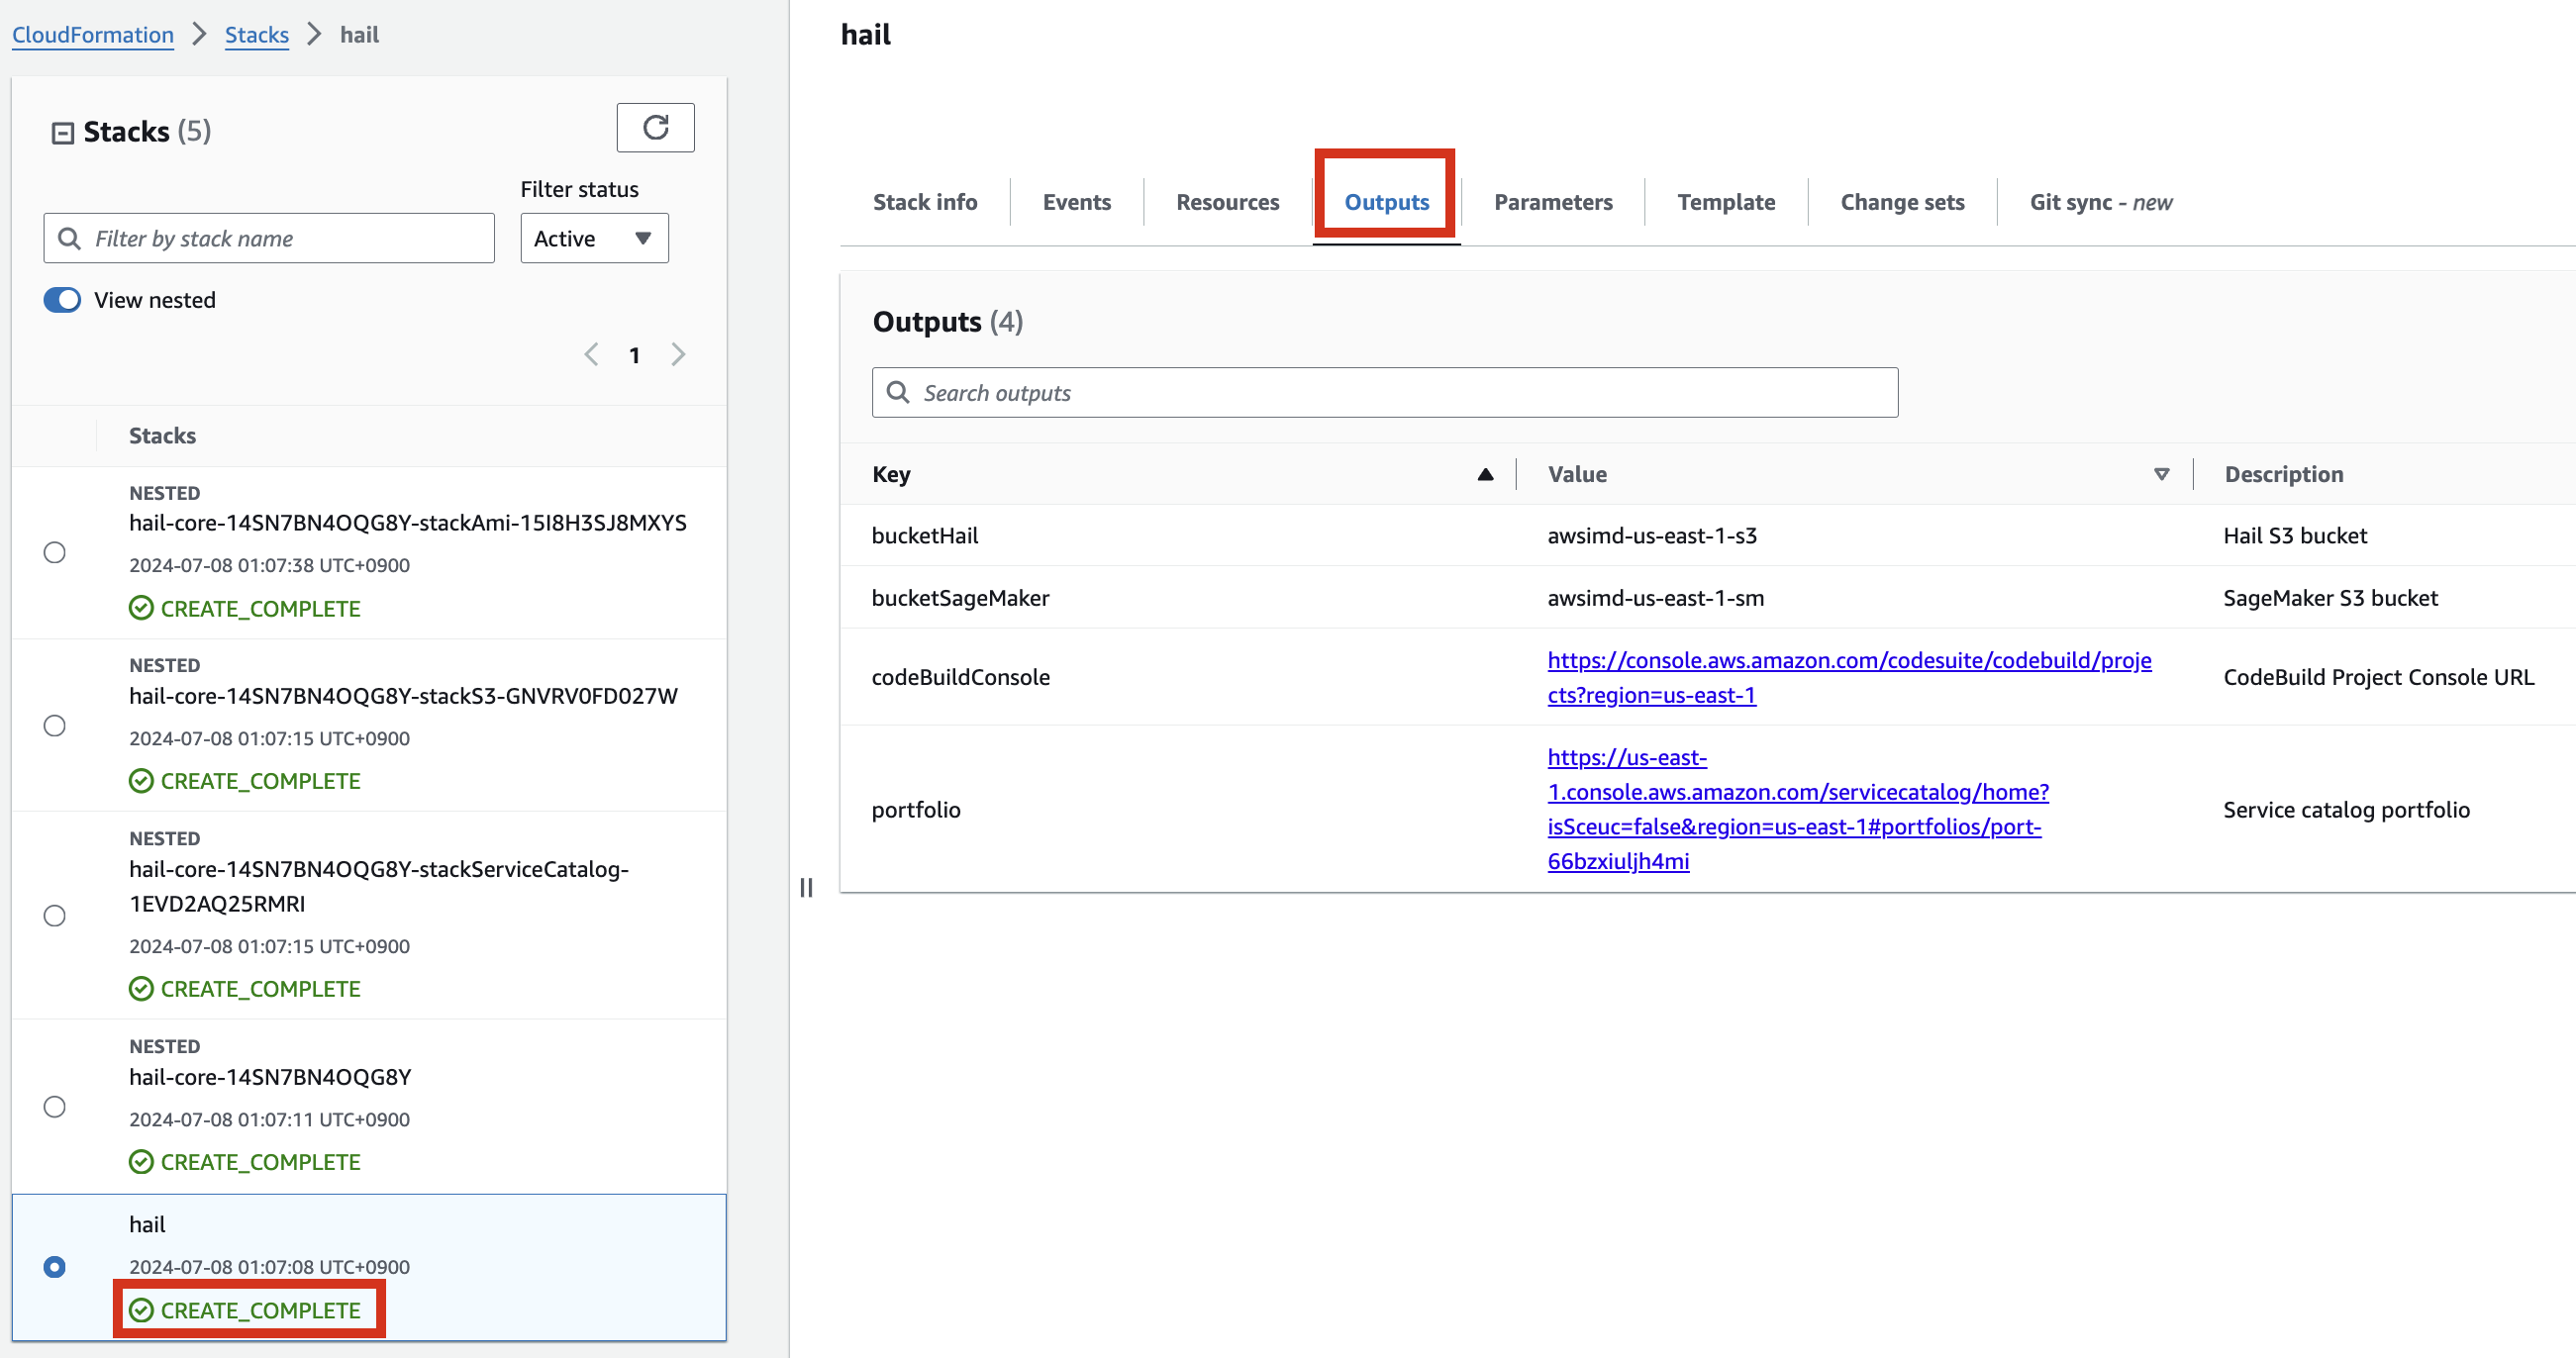
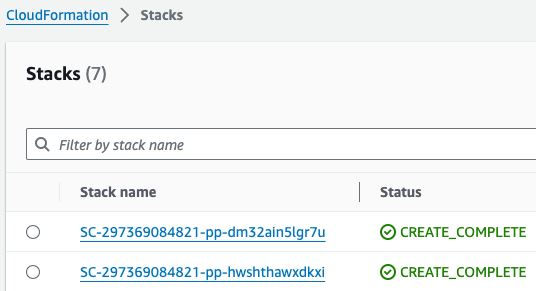
6. Check stack creation in CloudFormation.
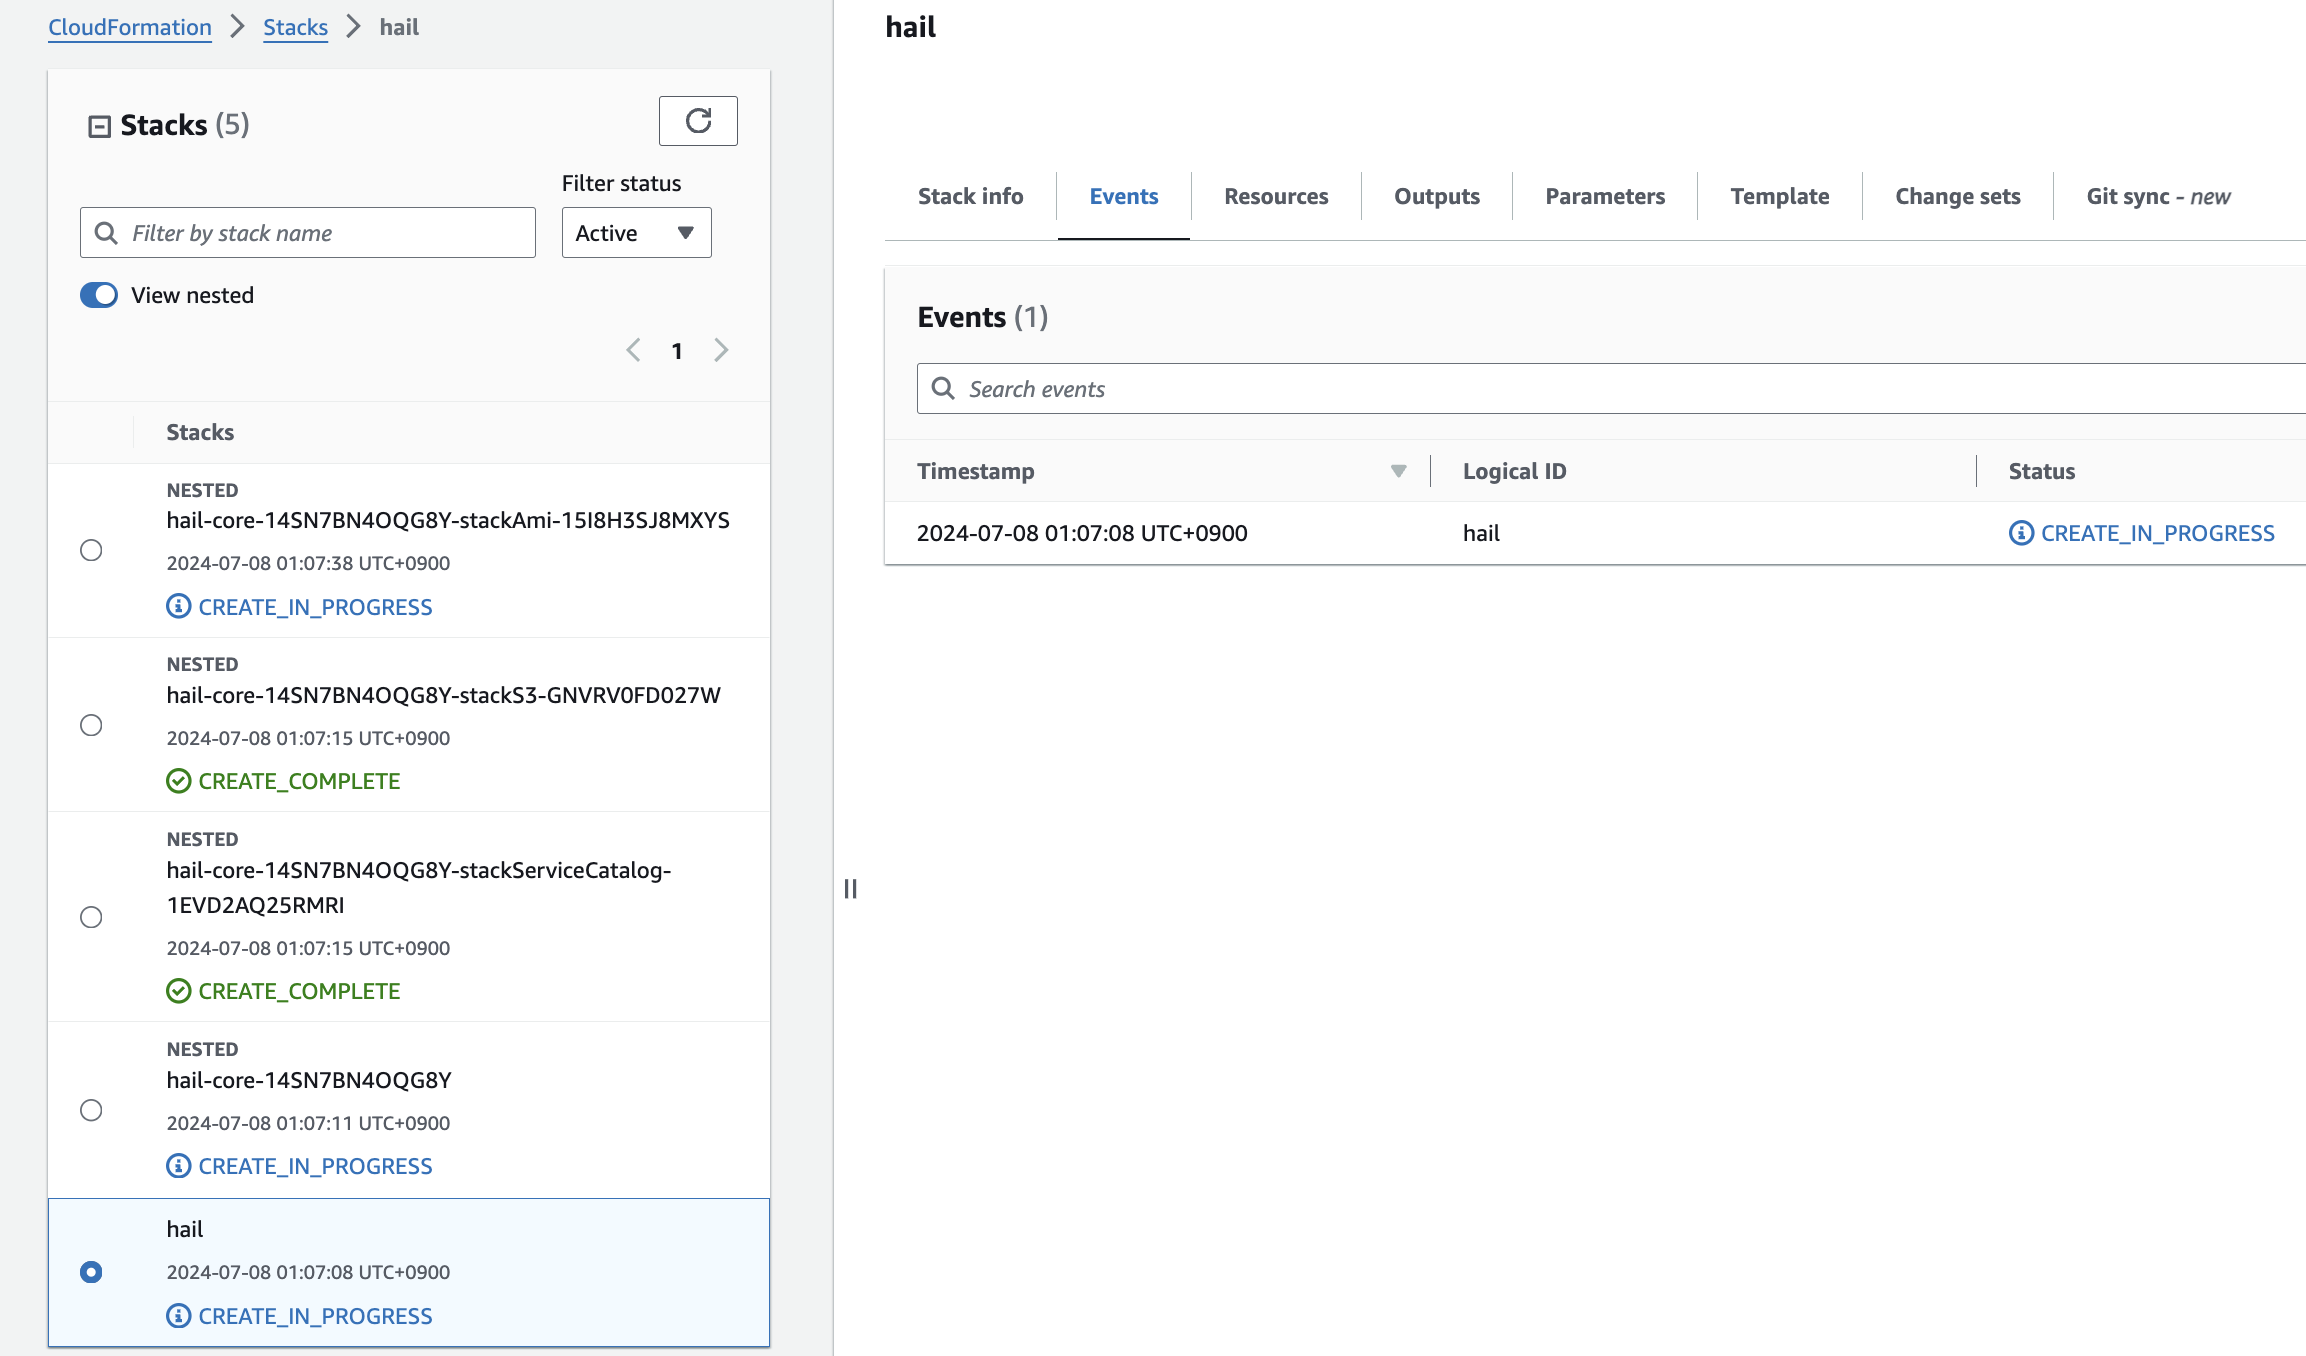
If the following portfolio appears in the output along with the CREATE_COMPLETE message in the top stack, you can confirm that it was executed correctly.
Create an AMI for Hail and VEP
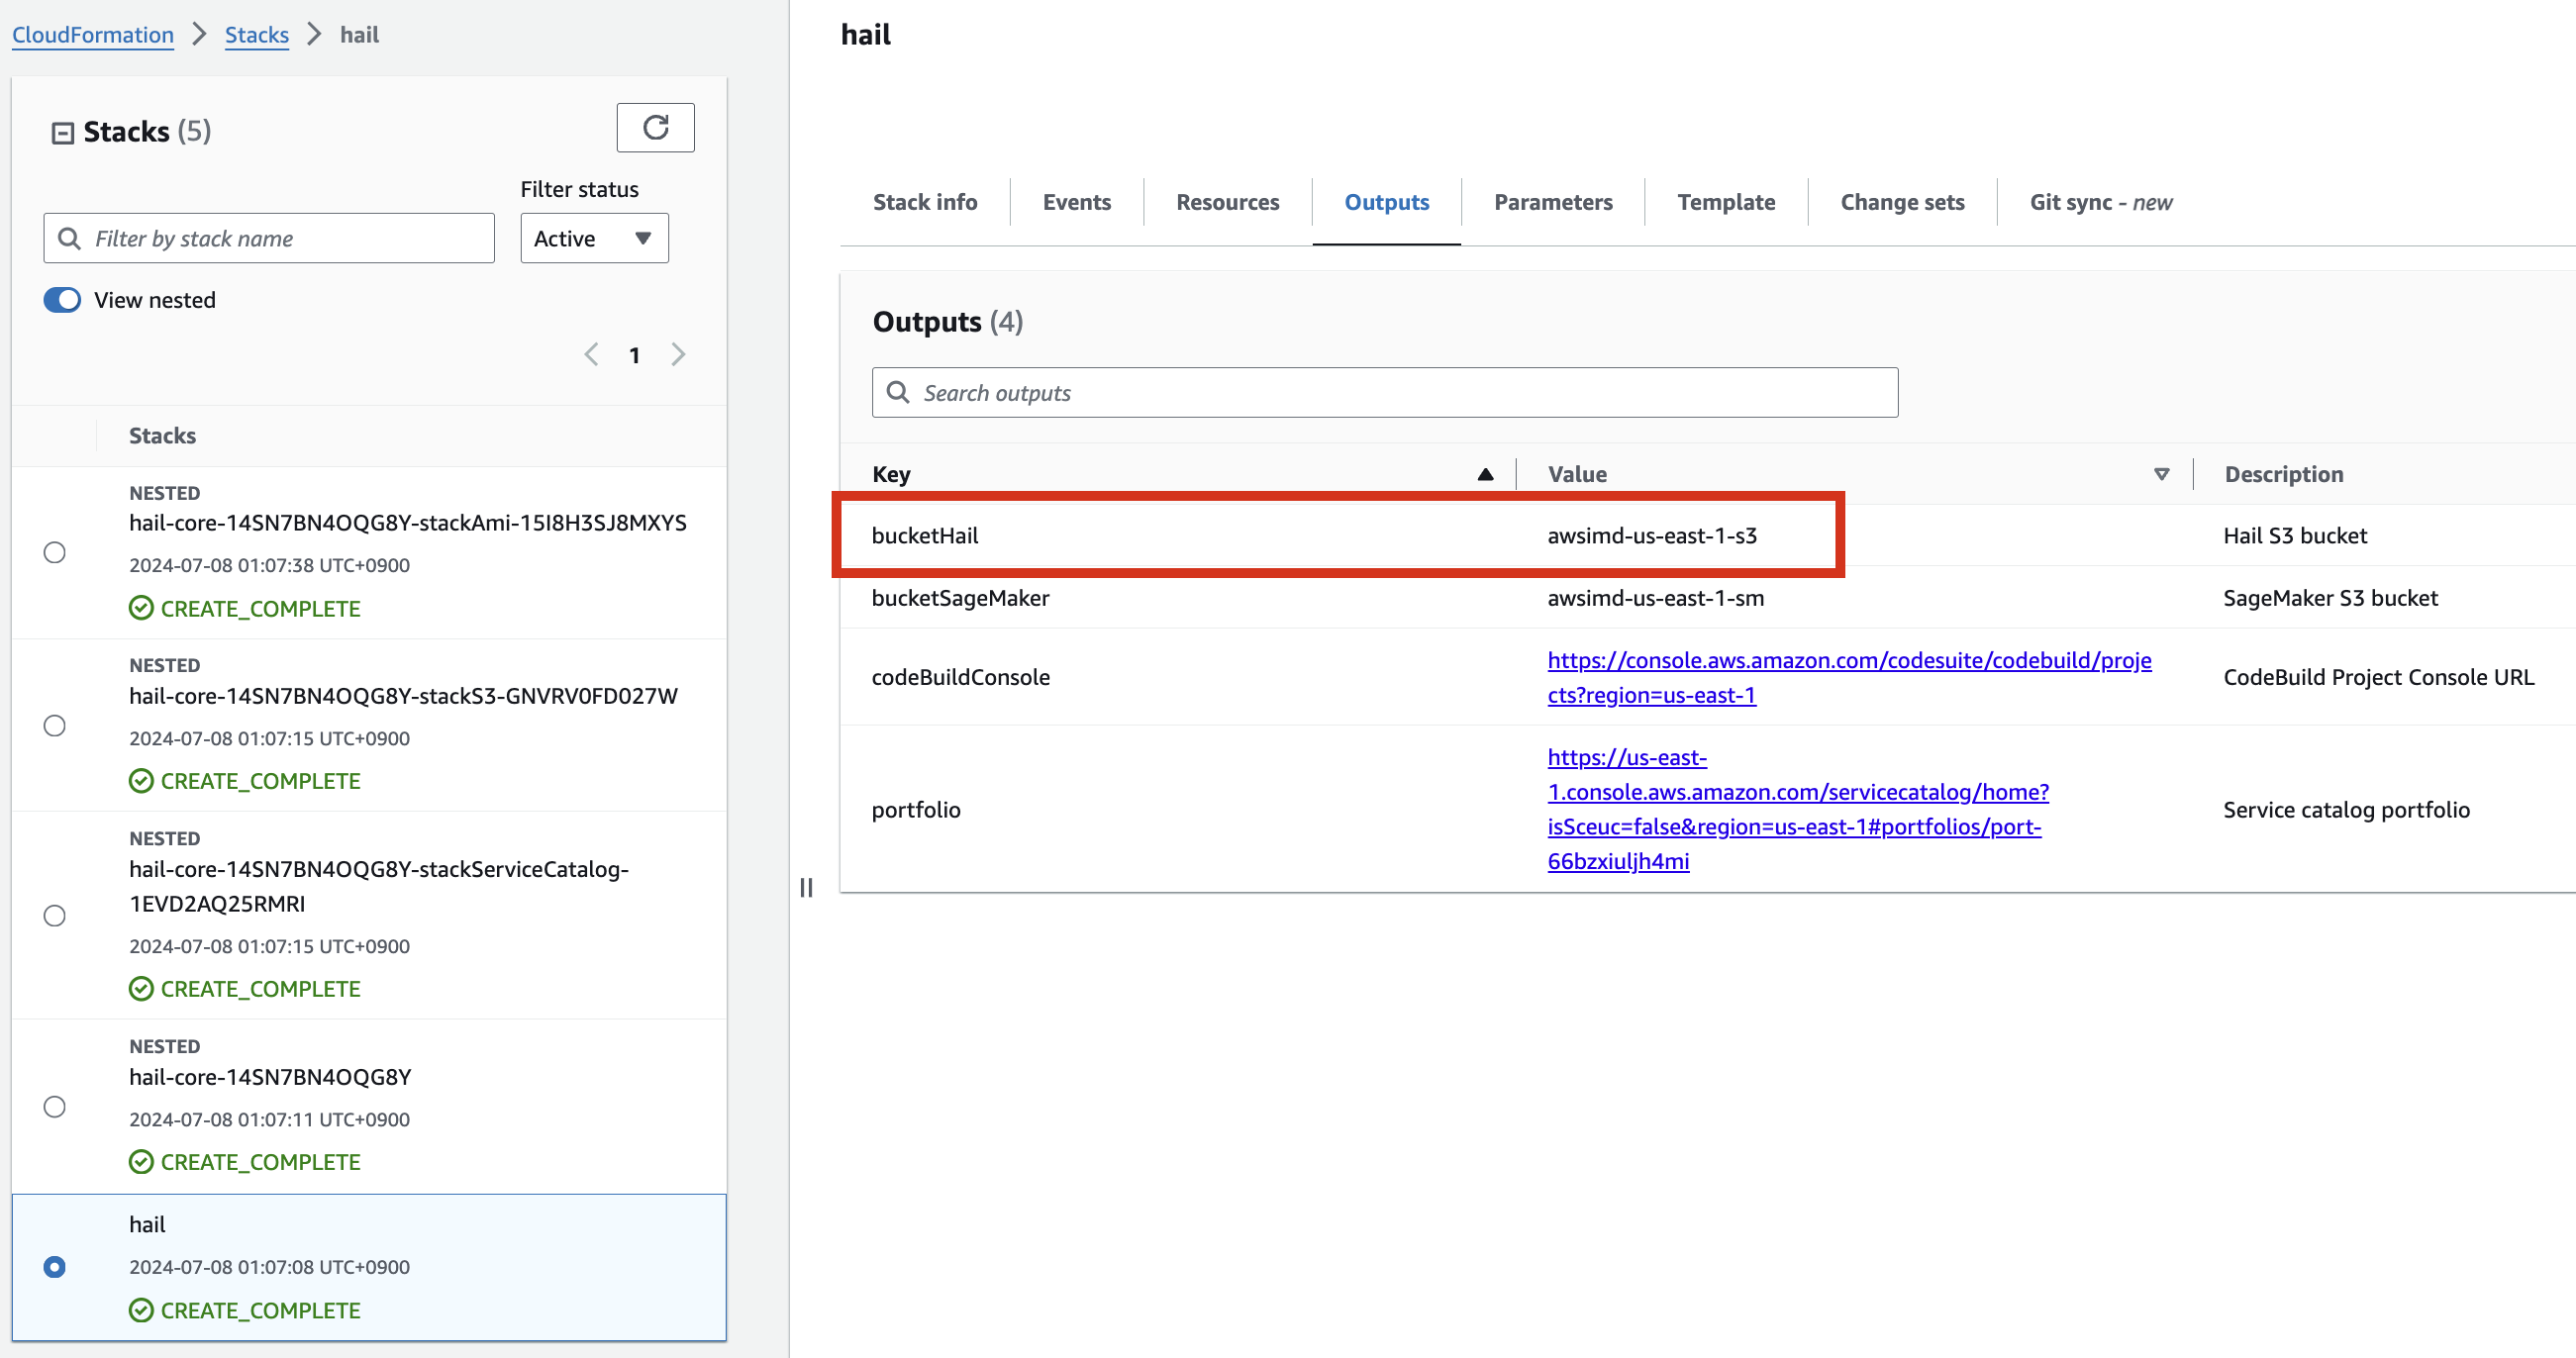
VEP 데이터 사전 다운로드 및 버킷 내 저장
VEP의 경우 미리 다운로드하여 앞에서 스택을 통해 생성 또는 입력한 버킷 (여기서는 CloudFormation의 Outputs 중 bucketHail 값을 사용했습니다.)에 위치시켜 놓을 수 있습니다.
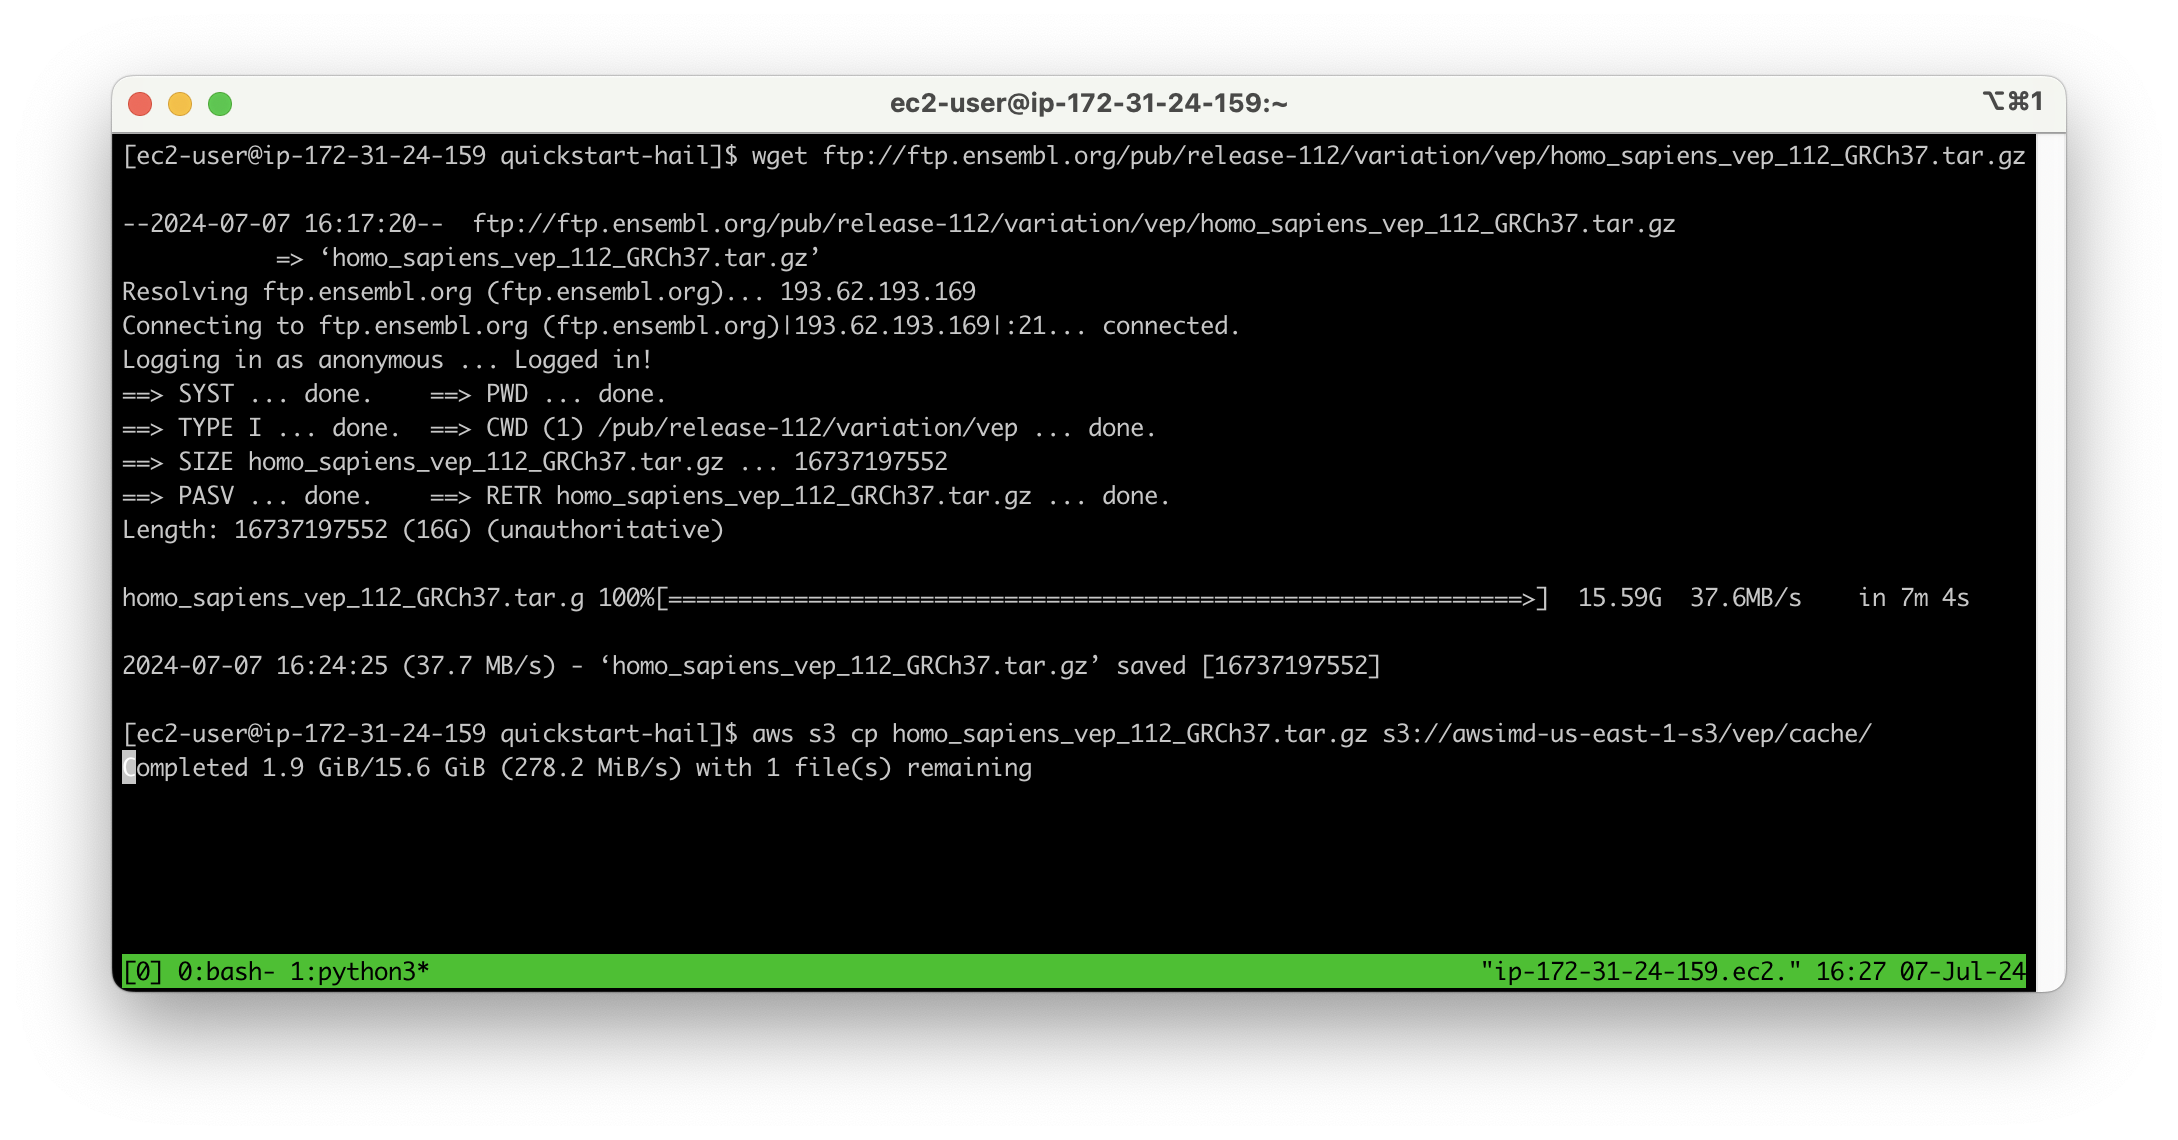
wget 명령어를 사용한 VEP 데이터 다운로드
wget ftp://ftp.ensembl.org/pub/release-112/variation/vep/homo_sapiens_vep_112_GRCh37.tar.gz
이후 버킷에 업로드합니다.
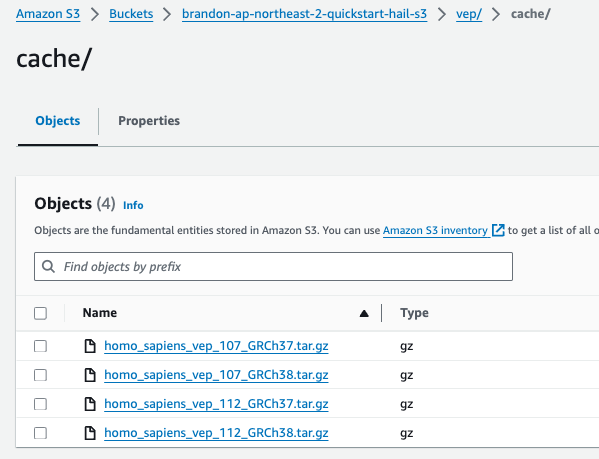
aws s3 cp homo_sapiens_vep_112_GRCh37.tar.gz s3://{버킷명}/vep/cache/
AMI 빌드
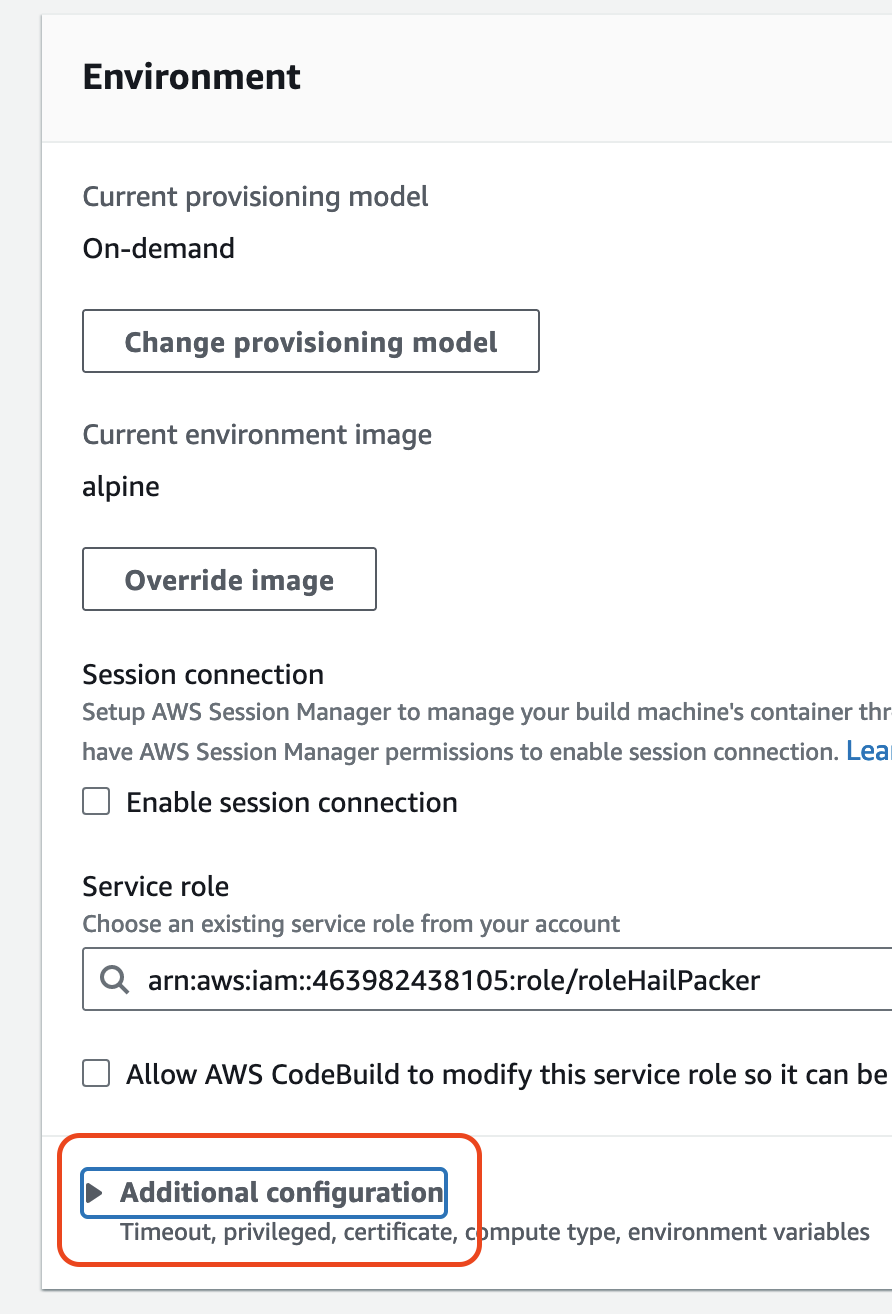
- CodeBuild 콘솔로 진입하여 각각 새로운 AMI 빌드를 시도합니다. Start build > Start with overrides를 선택합니다.

- Environment 섹션의 Additional configuration 을 확장해서 필요한 값을 입력합니다.

| HAIL_VERSION | 0.2.105 |
|---|---|
| HTSLIB_VERSION | 1.20 |
| SAMTOOLS_VERSION | 1.20 |
-
만일 hail-vep (VEP와 함께 설치) 옵션으로 빌드할 경우라면..
HAIL_VERSION 0.2.105 HTSLIB_VERSION 1.20 SAMTOOLS_VERSION 1.20 VEP_VERSION RODA_BUCKET <VEP 다운로드 받은 버킷명> 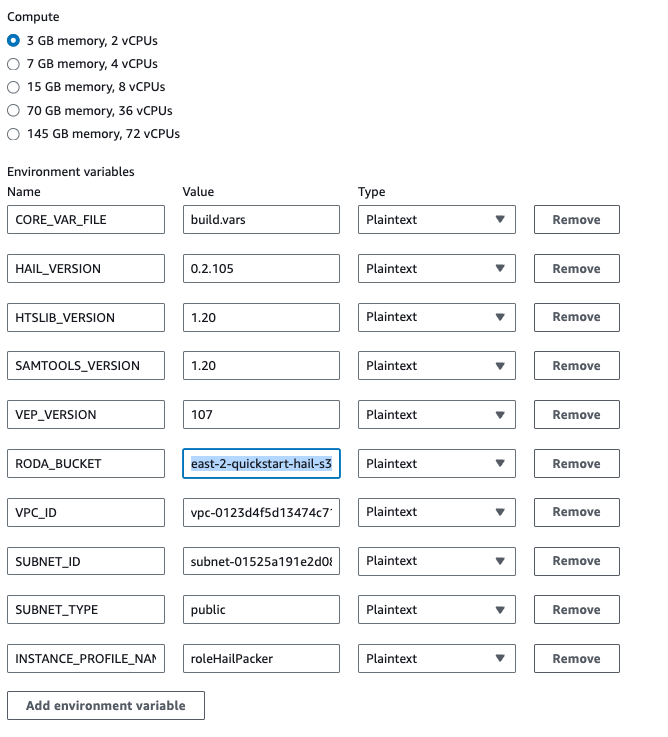
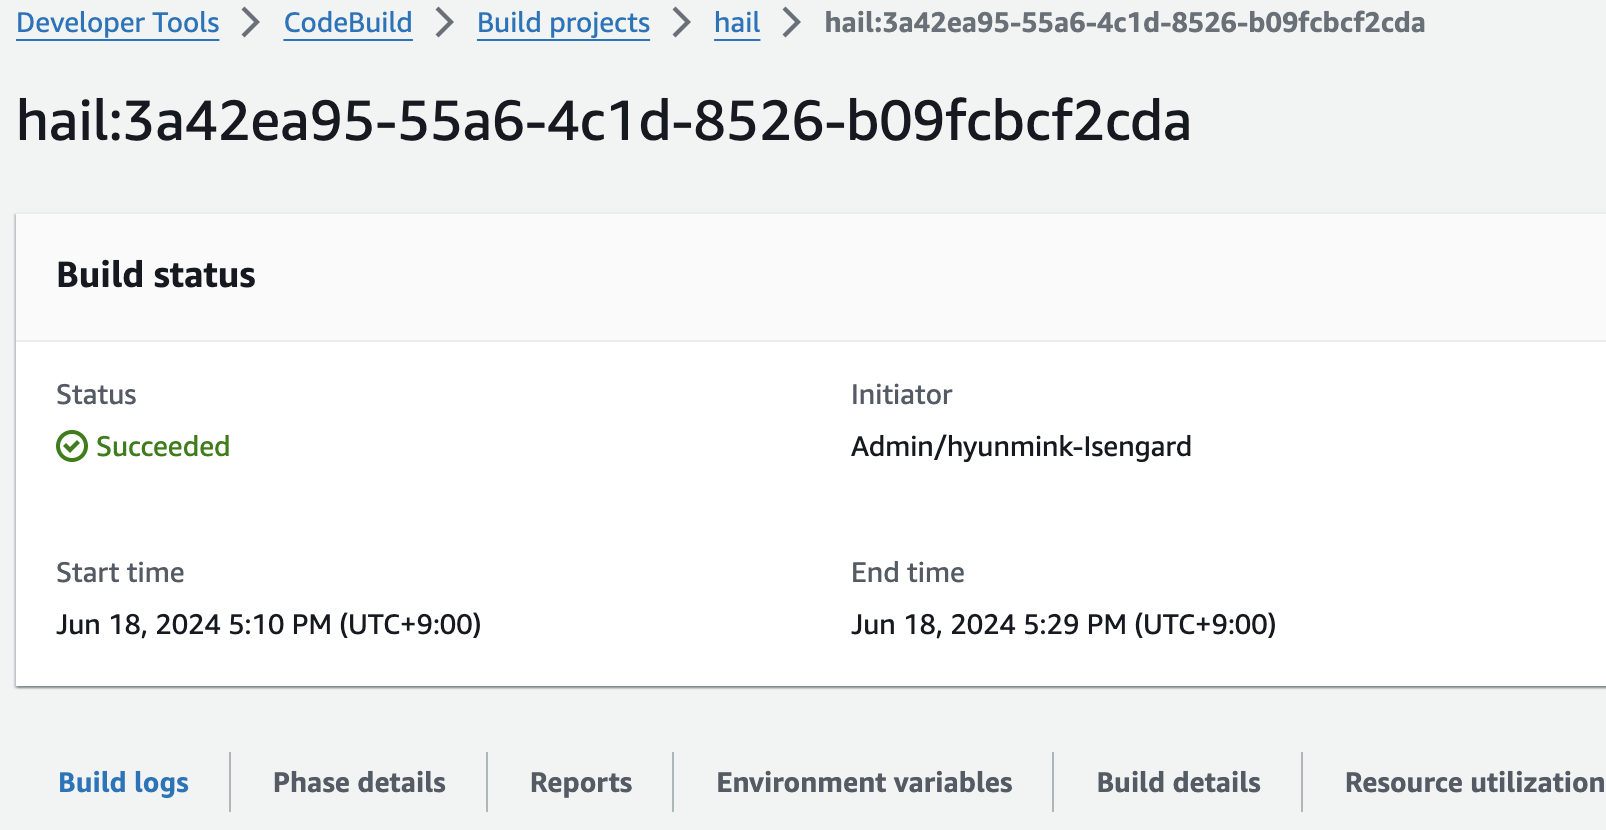
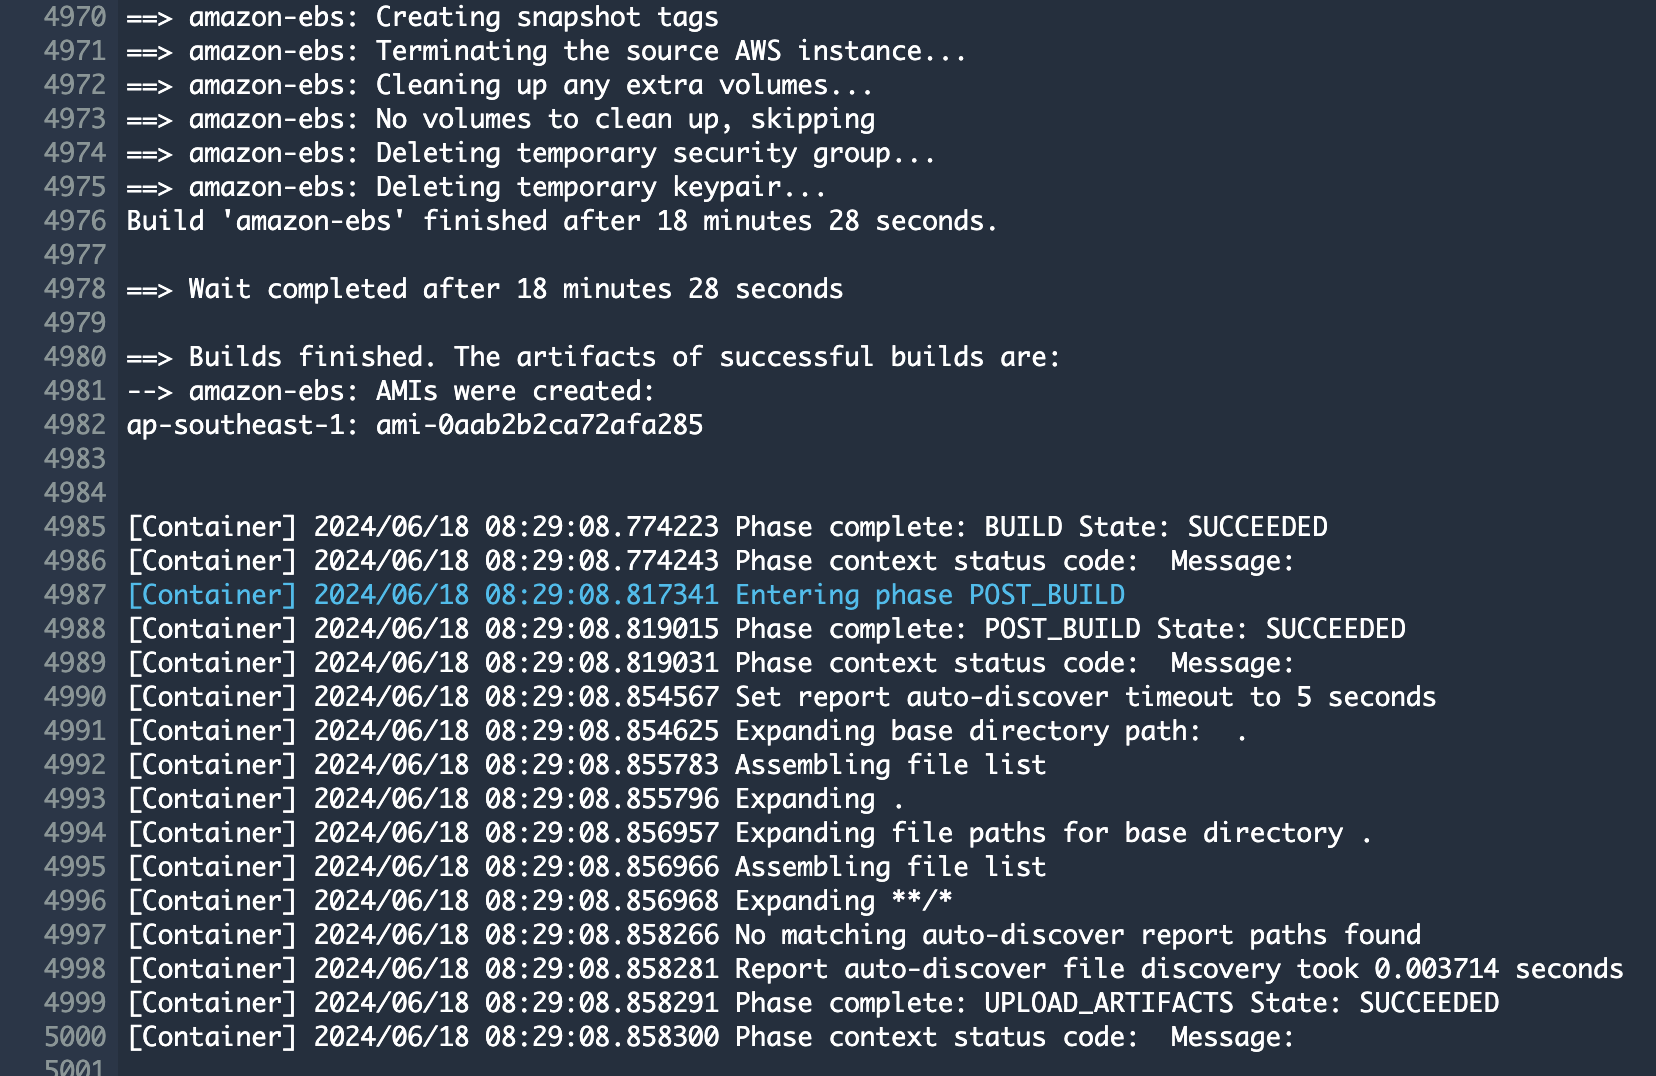
VEP 버전의 hail빌드시 약 1시간 38분 소요
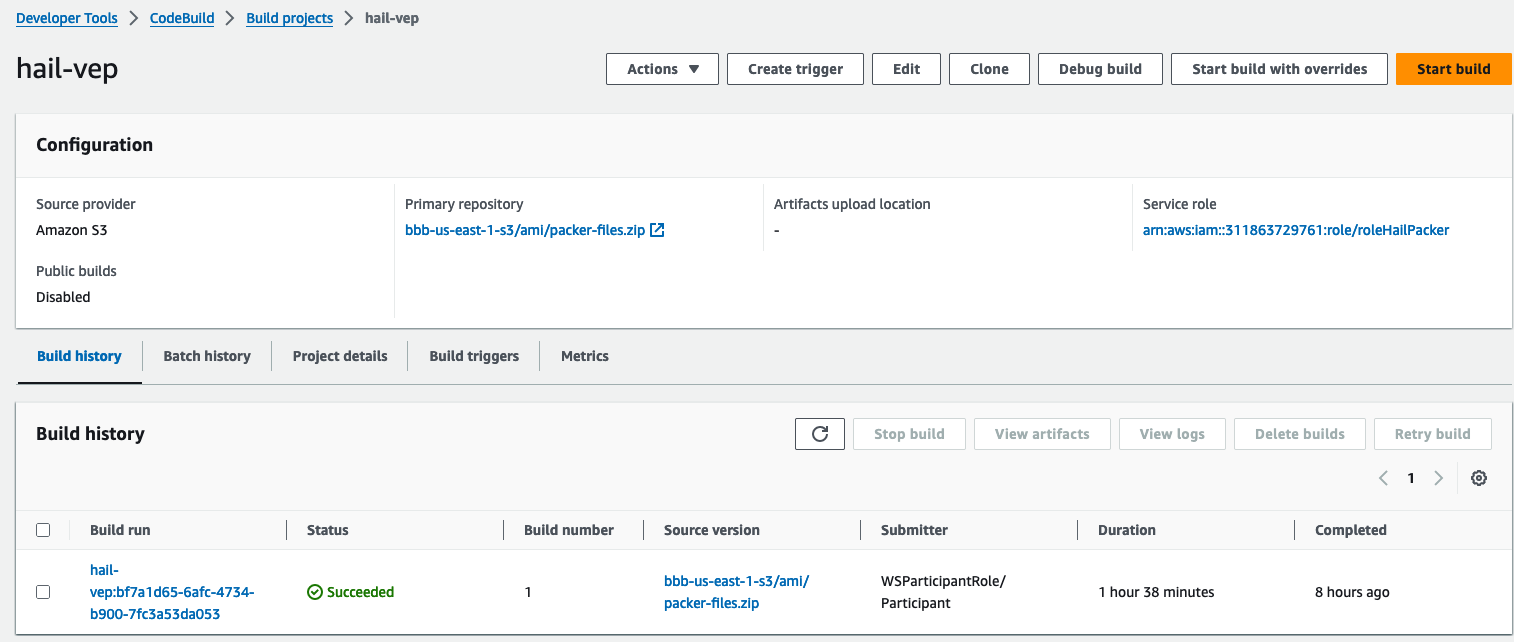
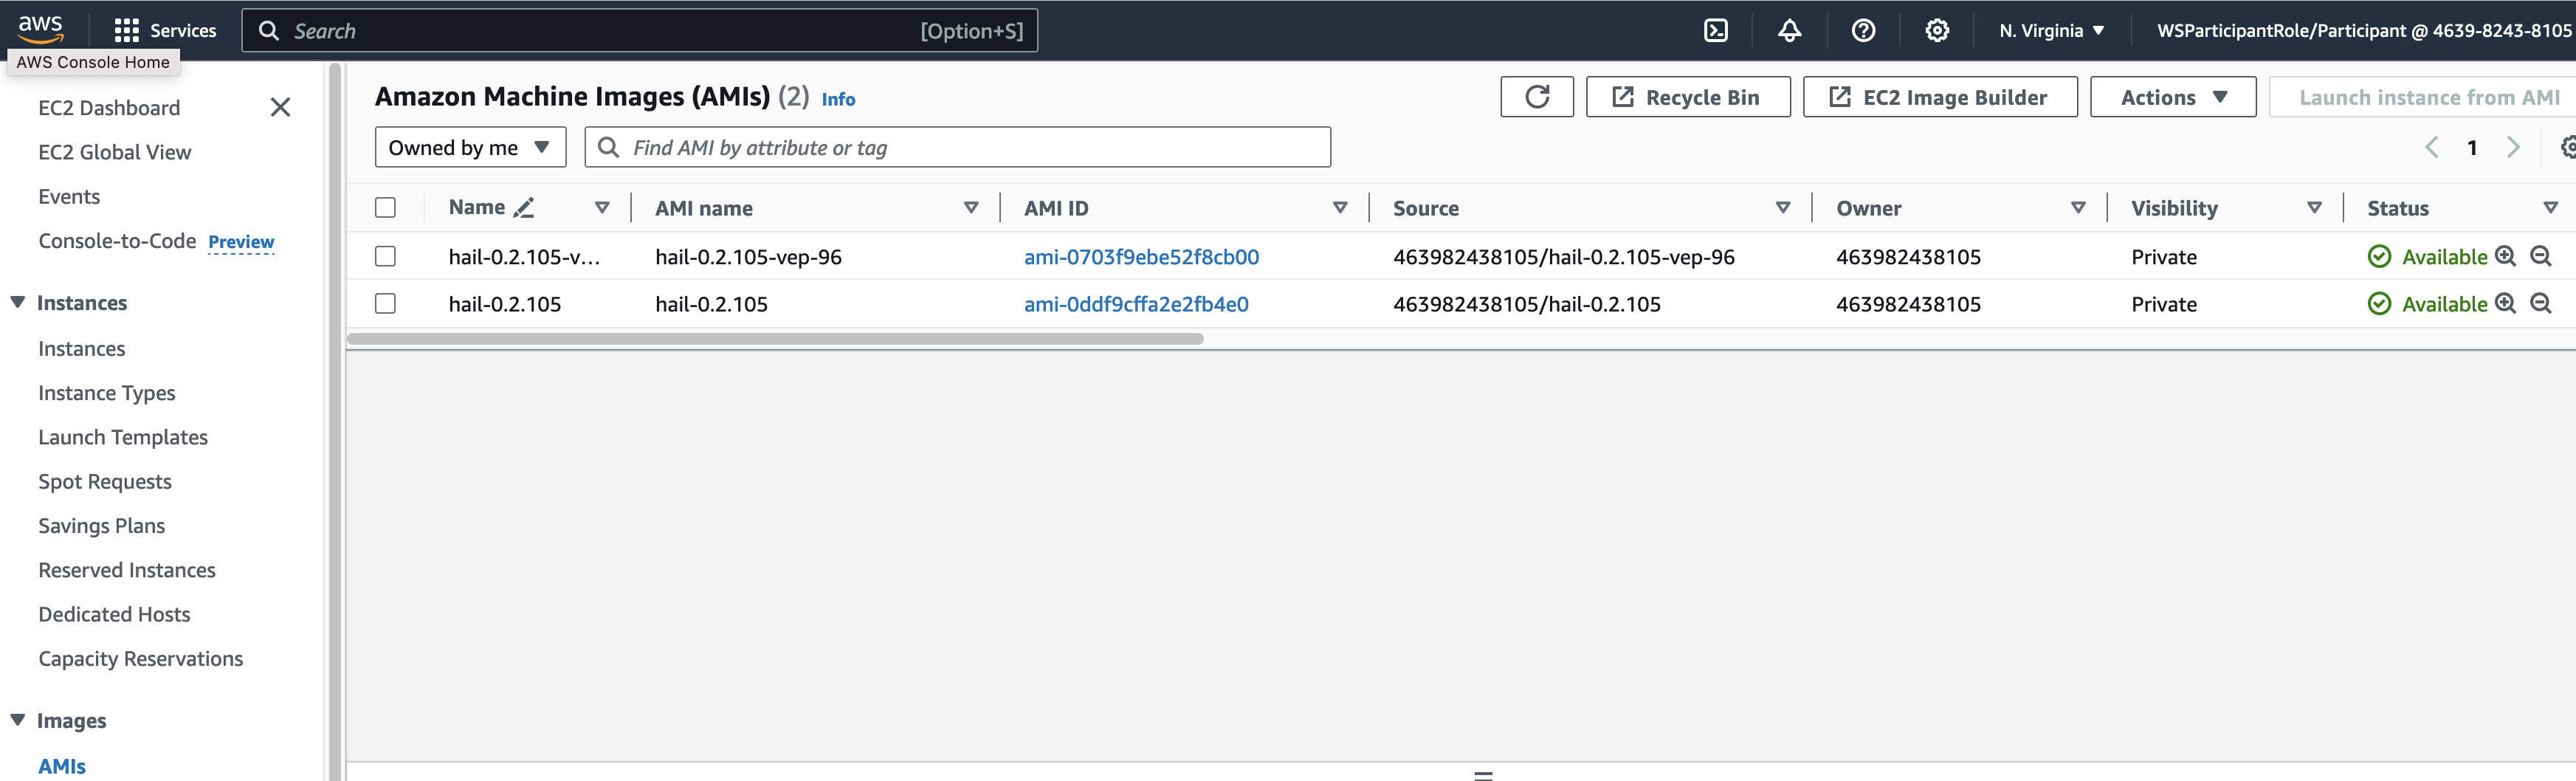
빌드 후 약 20분이 지나면 hail 이미지 빌드가 완료된 것을 확인할 수 있었습니다.
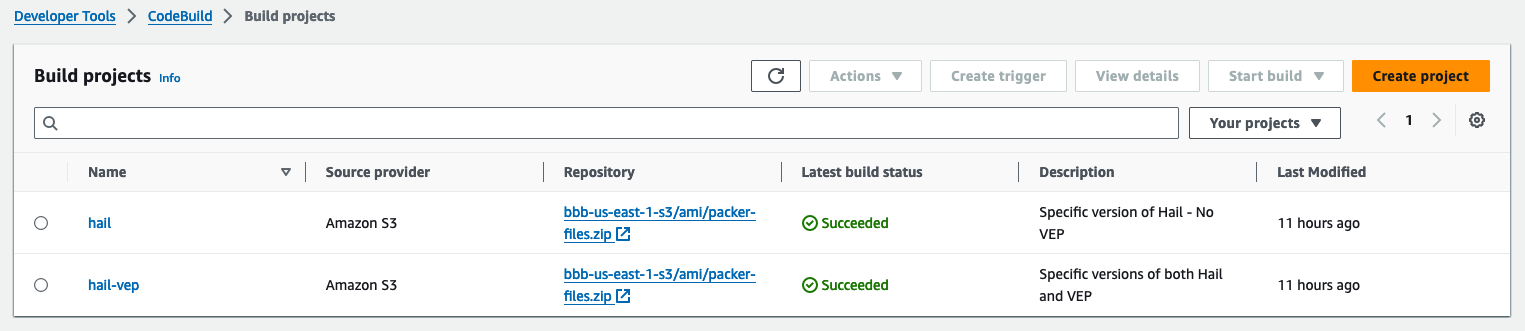
또한 AMI 결과는 AMI 메뉴 또는 CodeBuild 로그에서 확인 가능합니다.
또는
EMR 클러스터 실행 및 Jupyter 환경 세팅
EMR 클러스터 실행
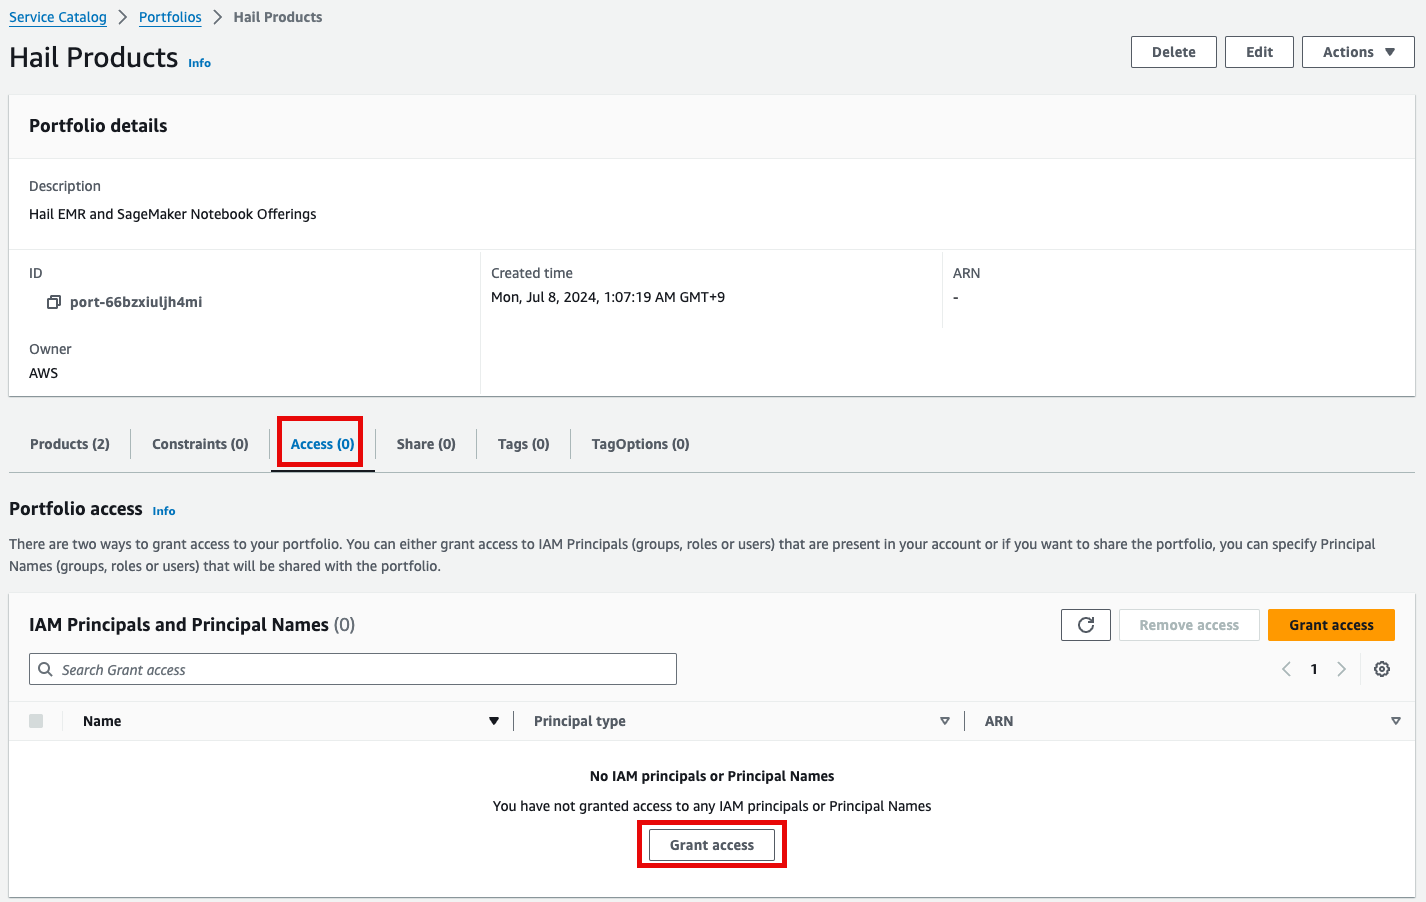
- CloudFormation 서비스 콘솔에서 스택 Outputs 탭의 portfolio 에 있는 링크를 클릭합니다.

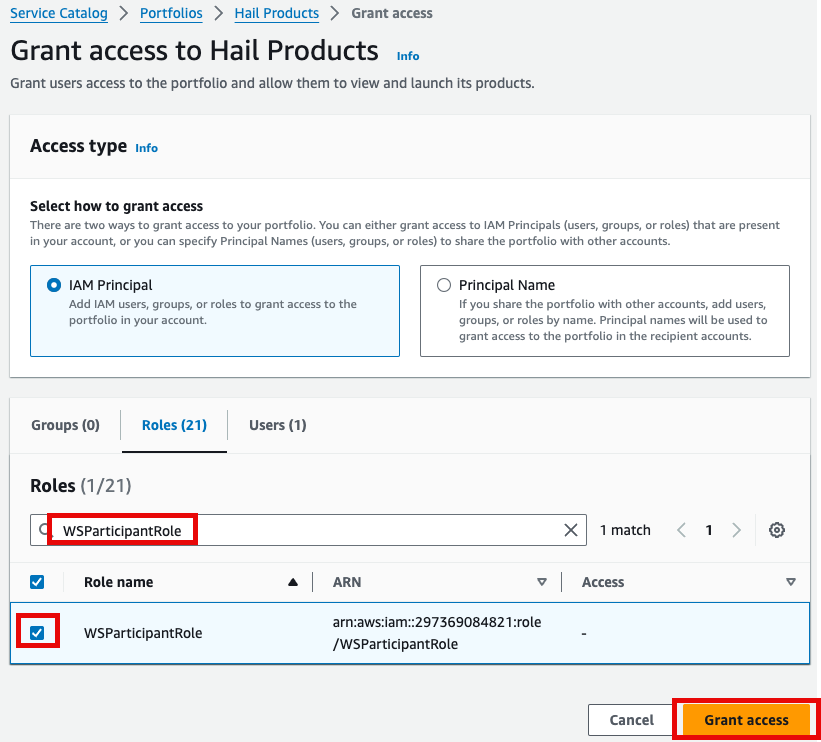
- 포트폴리오내 해당 Product에 대한 Access 탭을 클릭한 뒤 Grant access 를 클릭합니다.
- 권한 추가를 합니다. 여기서는 실습 계정 역할 이름이
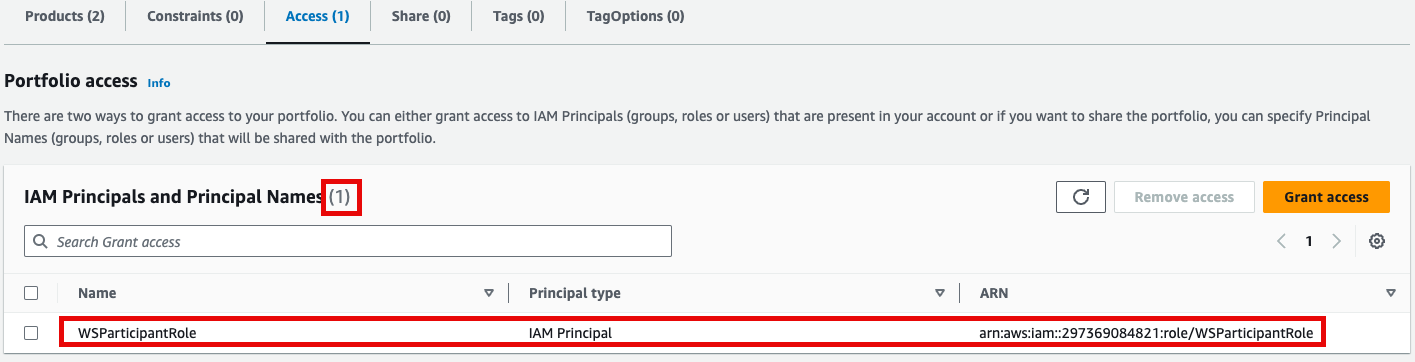
WSParticipantRole입니다. 검색후 체크하고 Grant access를 클릭합니다.
- Access 권한이 있음을 확인한 뒤 Provisioning 메뉴의 Product를 클릭하여 진입합니다.
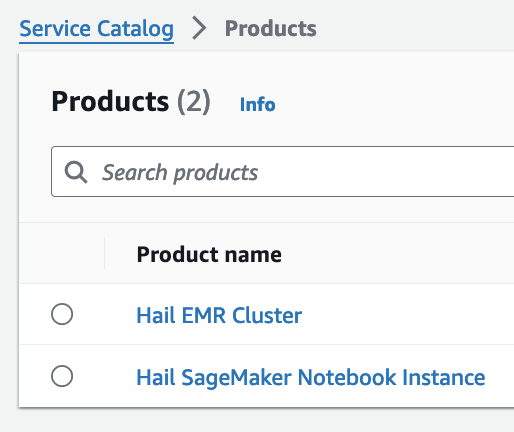
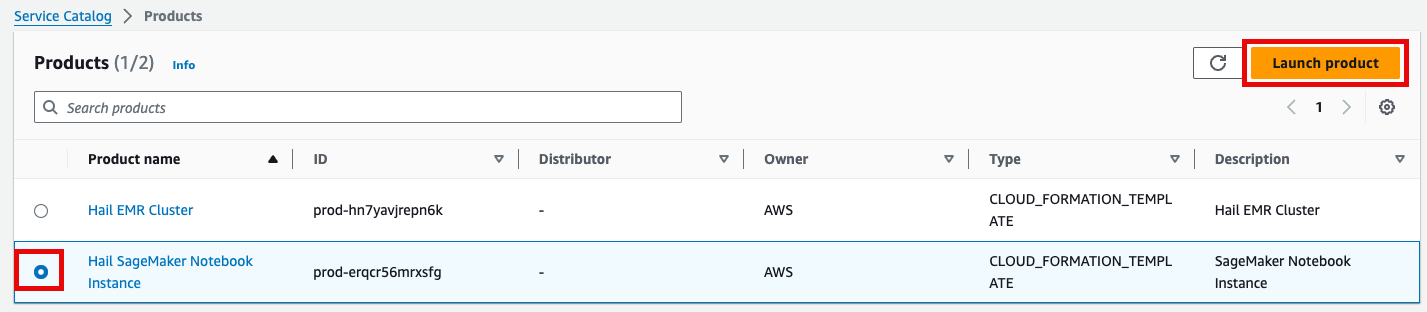
- 이제 권한이 있으므로 Products 항목에서 2개의 Product들을 볼 수 있게 되었습니다.
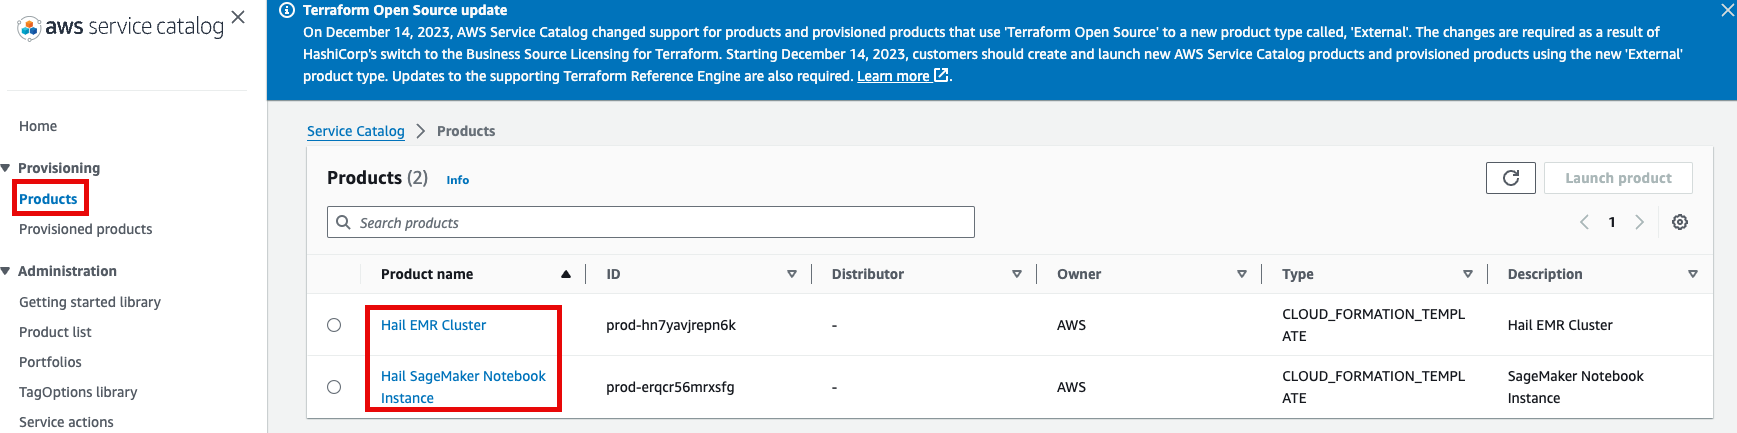
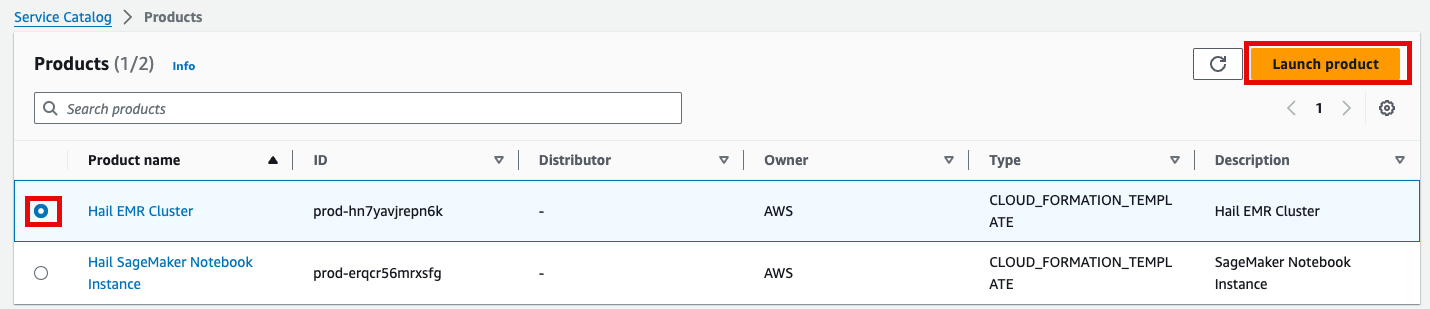
- Product에 있는 Hail EMR Cluster메뉴로 진입하여 원하는 product를 선택하고 Launch product를 클릭합니다.
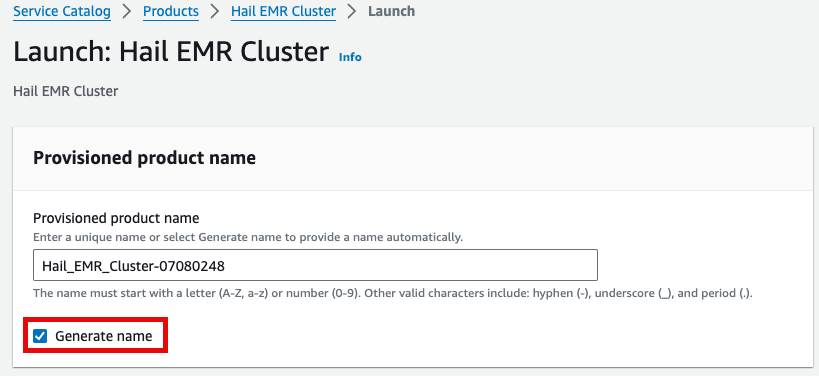
- Launch에 필요한 정보들을 기입합니다.
이름을 직접 입력하거나 Generate name을 클릭합니다.
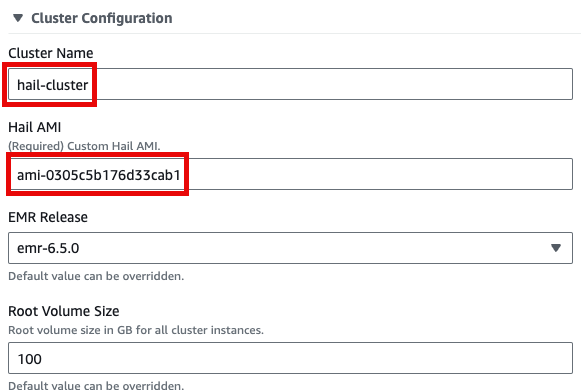
앞에서 만든 Hail AMI를 입력합니다. 이때 AMI ID는 AMI 메뉴에서 EC2 서비스 하위의 AMIs 항목에서 찾을 수 있습니다. (앞에서도 설명했던)
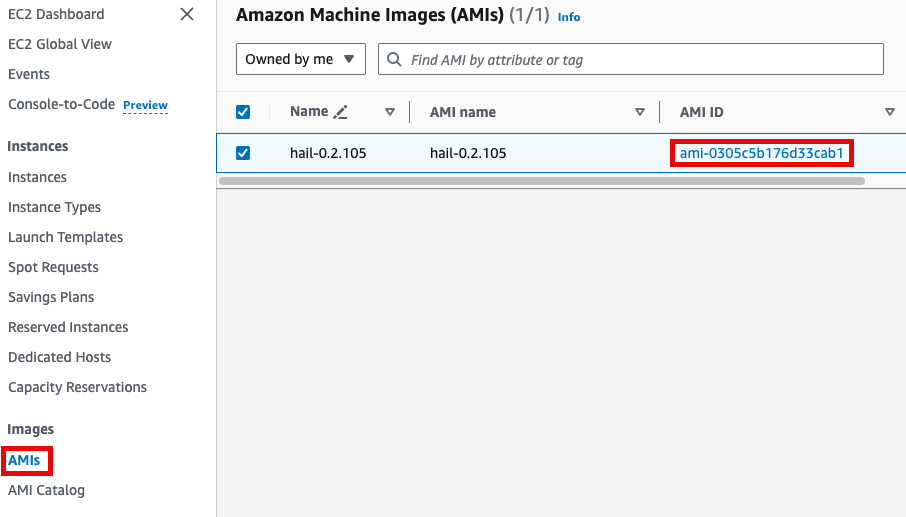
Cluster name을 입력하고 Hail AMI에 AMI ID를 입력한 뒤 다른 것은 모두 기본값을 사용할 수 있습니다.
- 맨 아래의 Launch product를 클릭합니다.

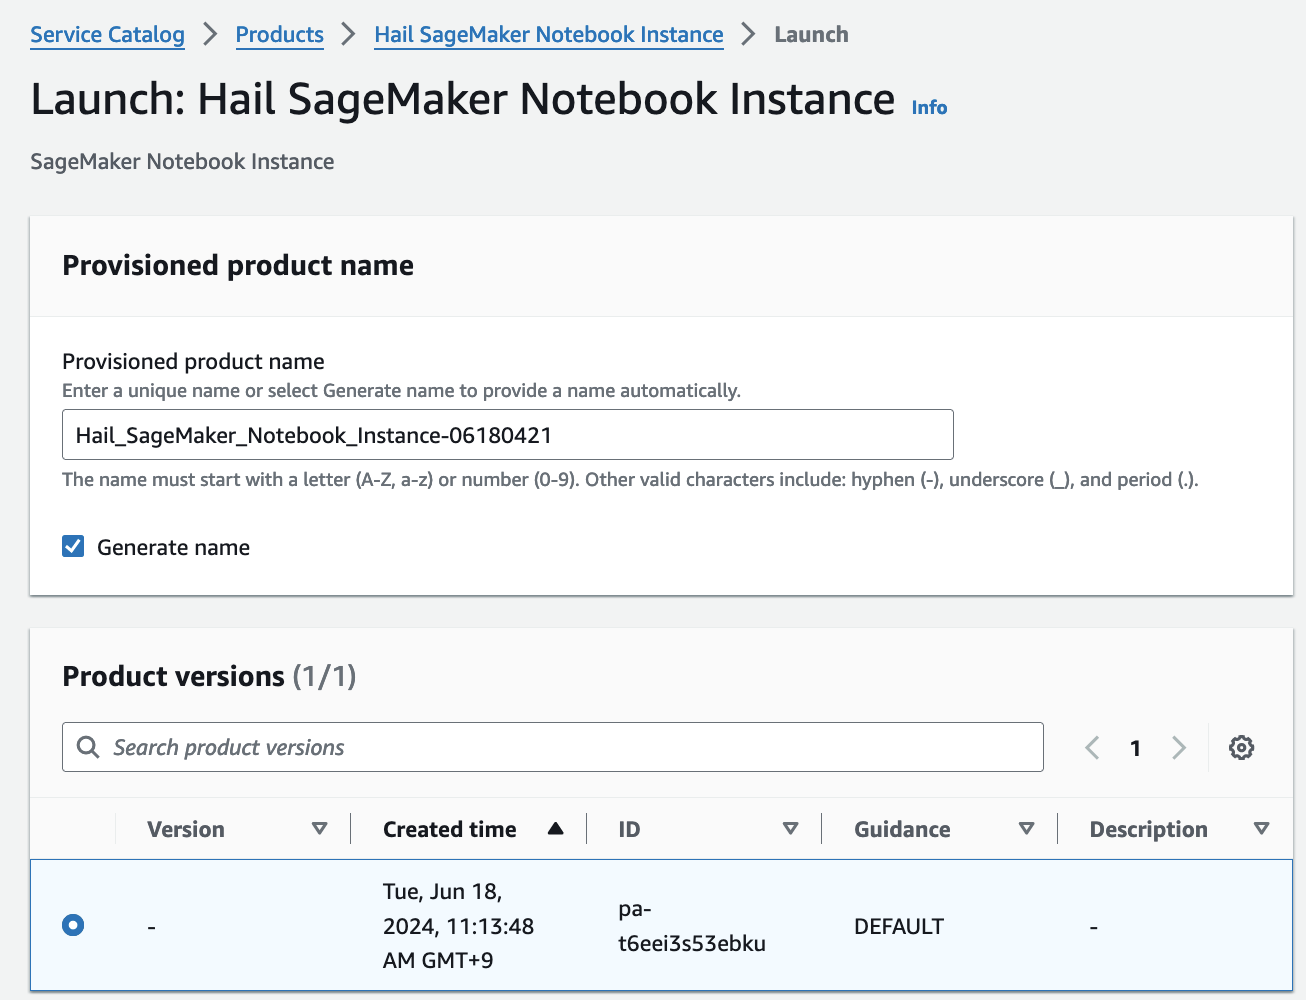
SageMaker Notebook 실행
- Product 메뉴에서 마찬가지로 Launch product를 클릭합니다.
- Hail notebook을 위한 인스턴스의 이름을 입력하고 나머지는 모두 기본값입니다.
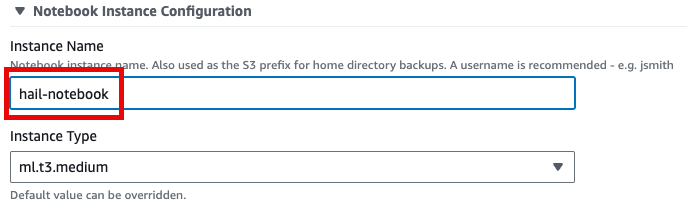
- 맨 아래의 Launch product를 클릭합니다.

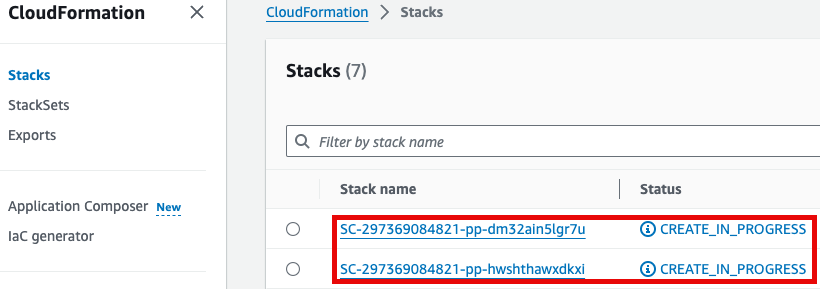
참고로 제품(Product)의 실행 과정은 CloudFormation을 통해서도 확인할 수 있습니다.
GWAS 실습 (Hail)
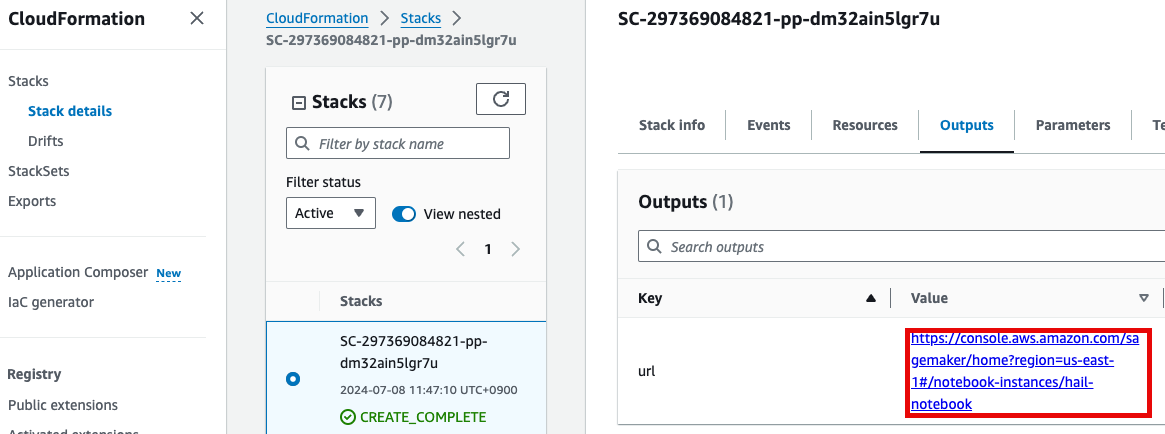
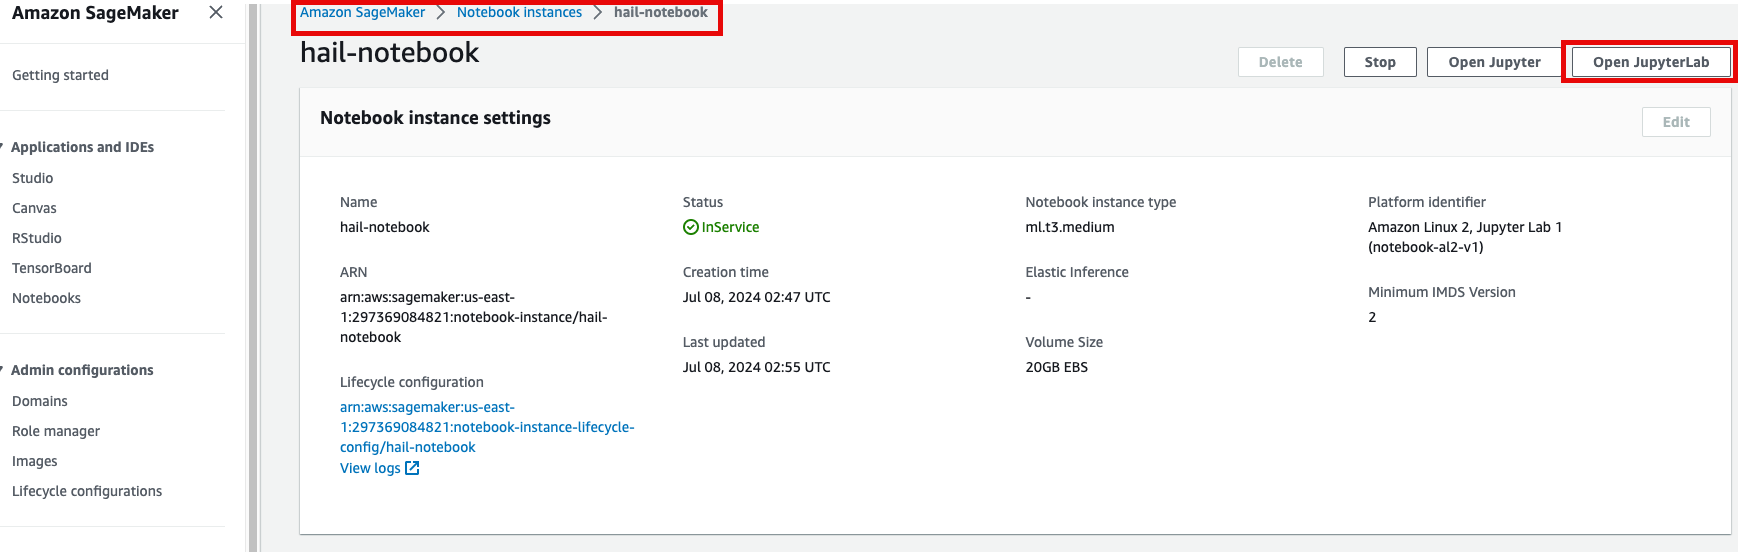
- 노트북을 실행합니다. 이 때 CloudFormation의 Outputs탭에서 url을 확인할 수 있습니다. 클릭하면 Amazon SageMaker의 해당 노트북 인스턴스로 자동 연결됩니다.
- Open JupyterLab을 클릭하여 노트북을 실행합니다.
- 이제 노트북에서 각각 2개의 노트북을 가지고 실습해봅니다.
- common-notebooks/plotting-tutorail.ipynb
- common-notebooks/GWAS-tutorial.ipynb
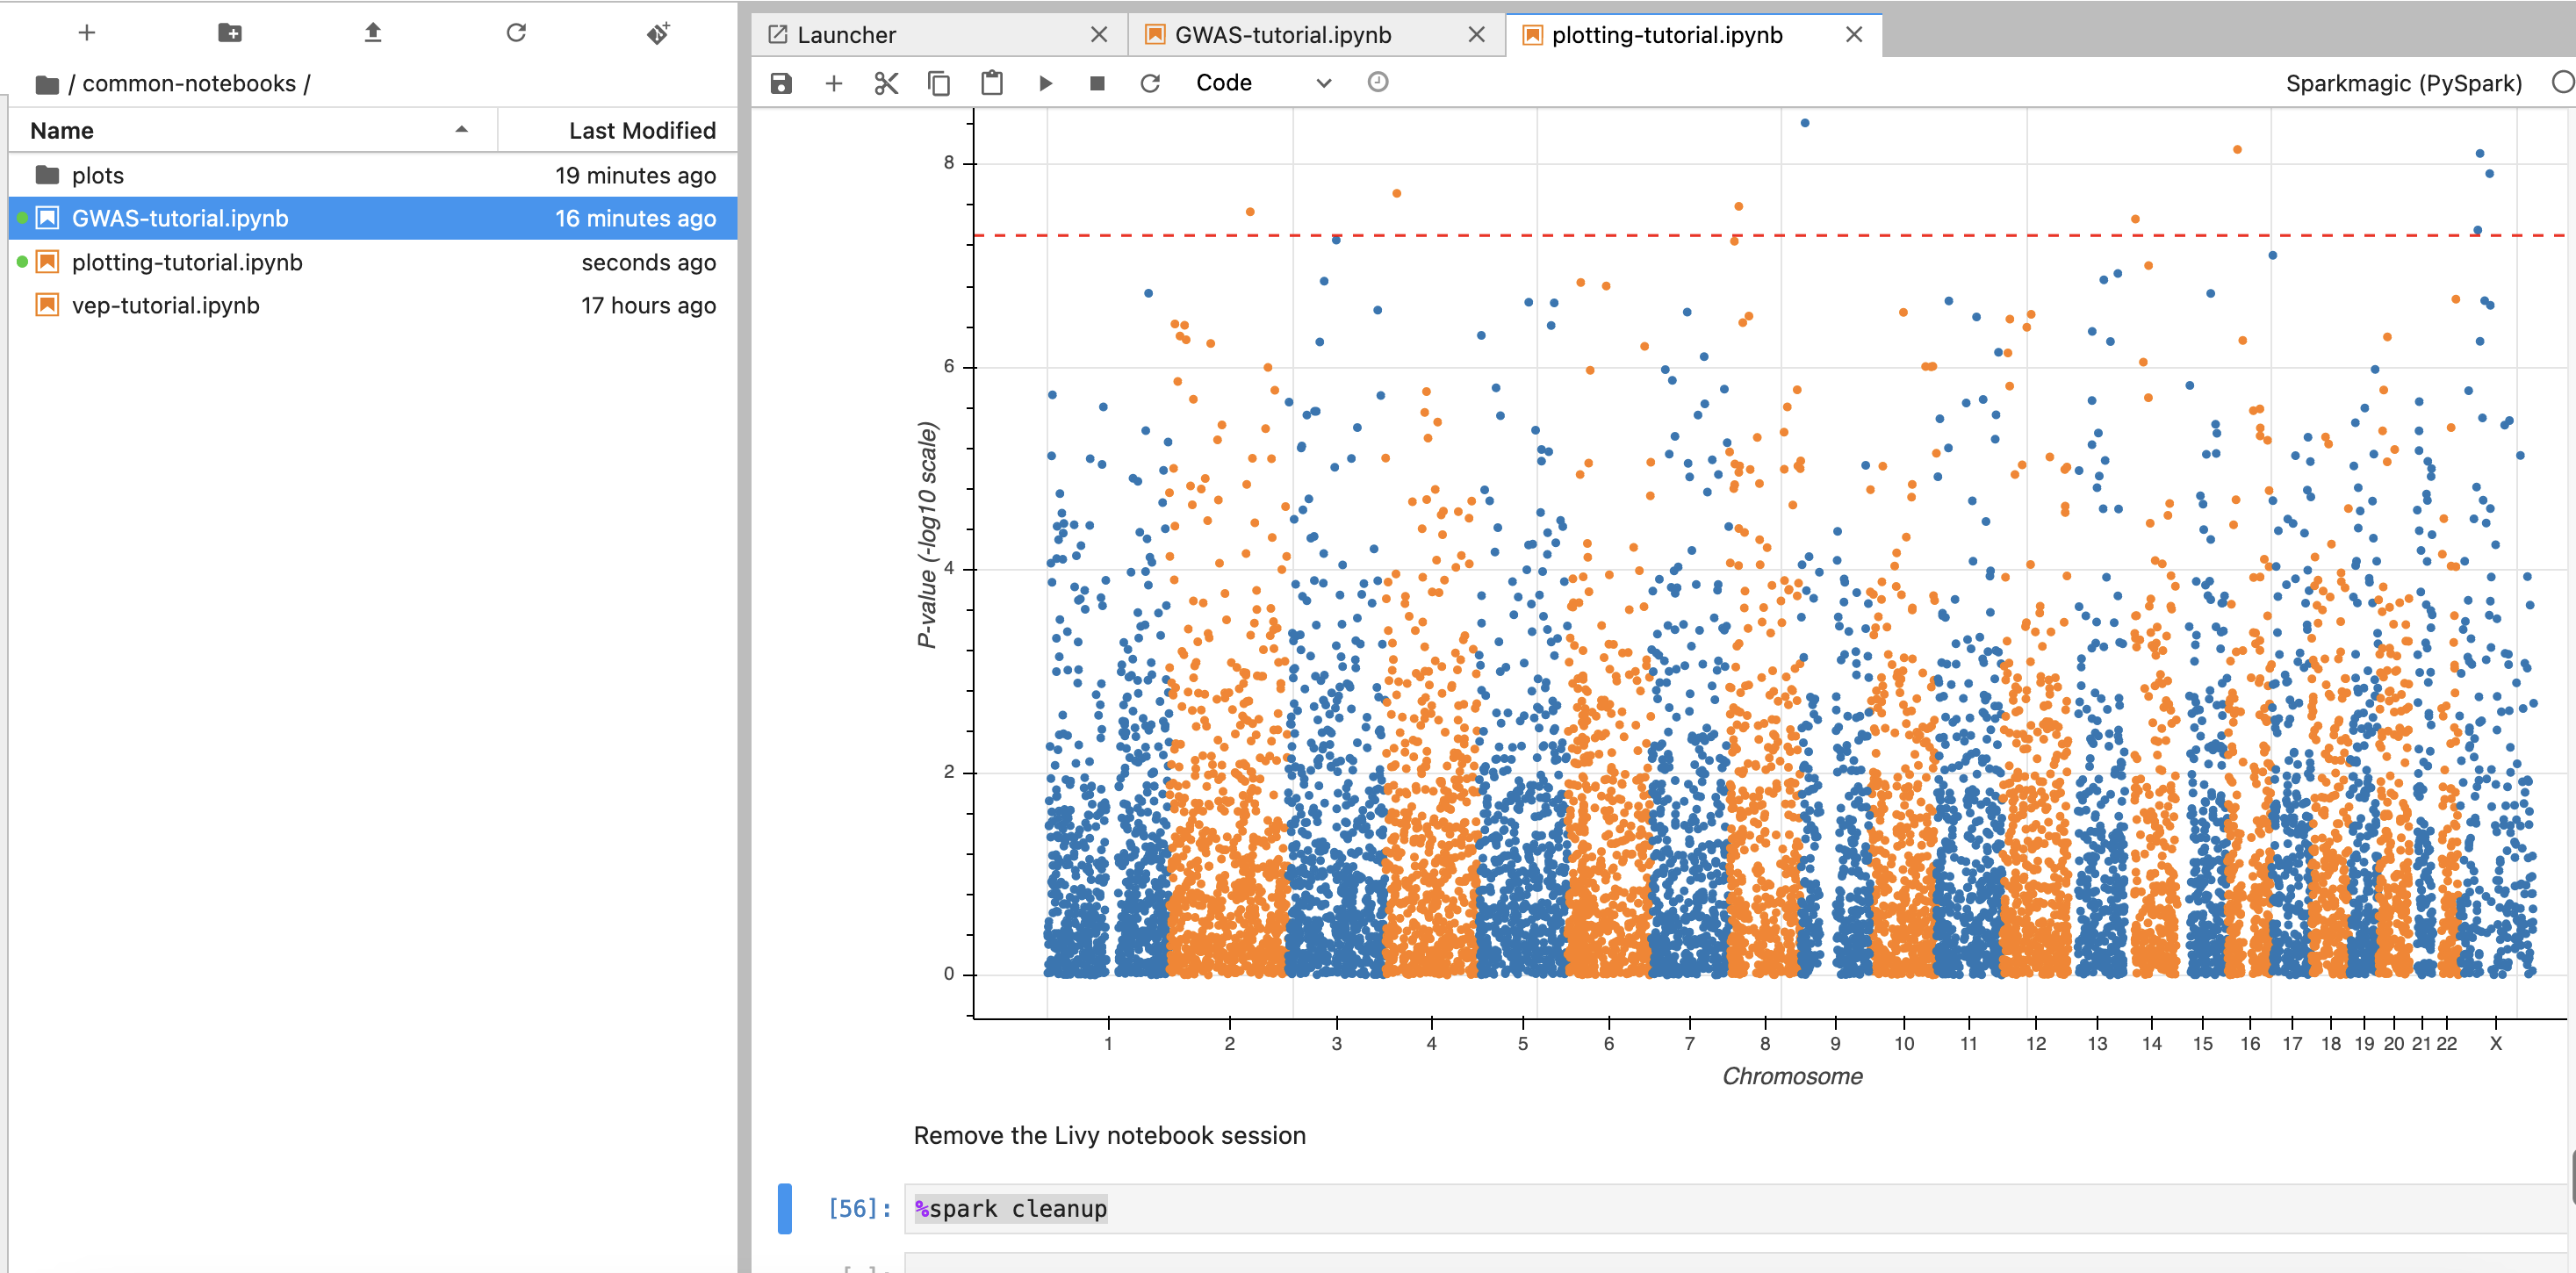
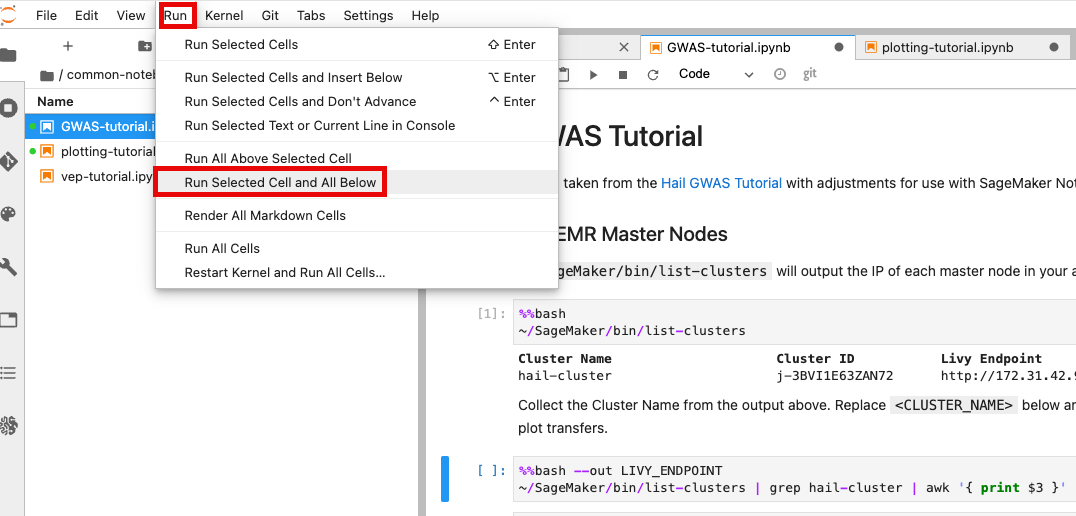
앞에서 만든 EMR 클러스터를 조회한 뒤 Cluster Name을 2번째 셀에서 수정해줍니다.
노트북 셀을 한번에 실행하기 위해서 시작하고자 하는 셀에 커서를 놓은 뒤 일괄 실행할 수 있습니다.
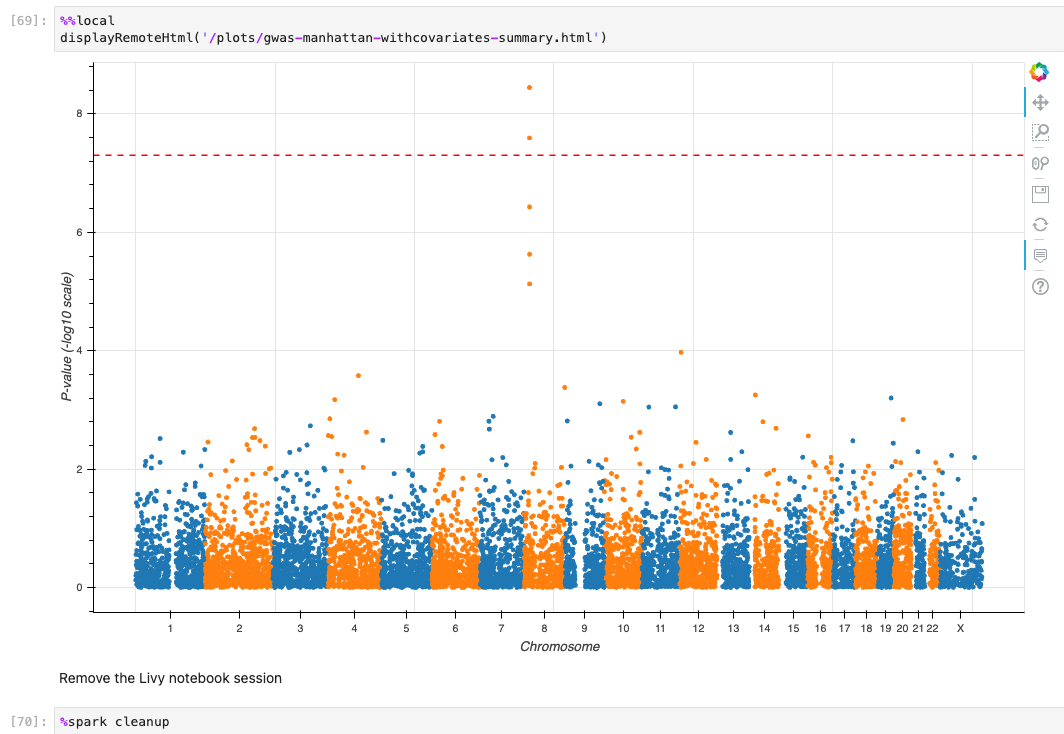
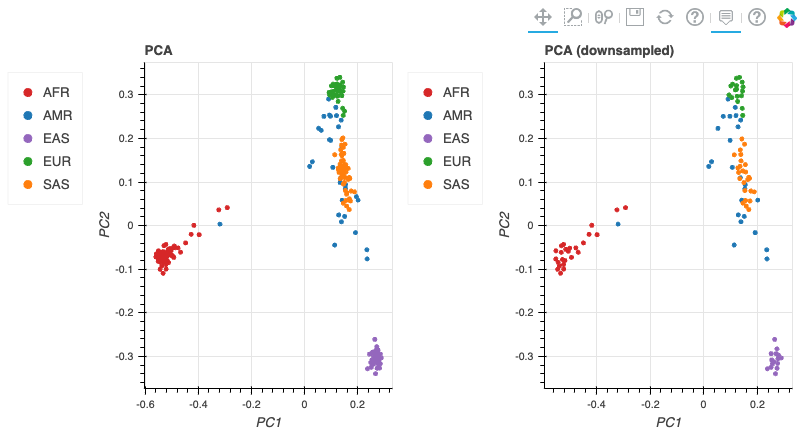
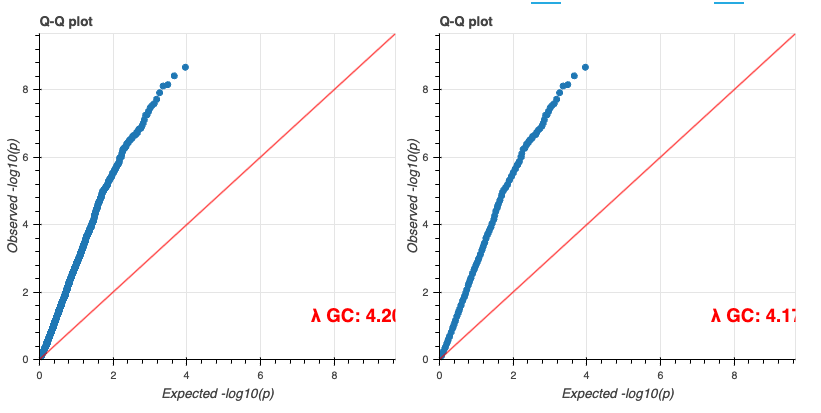
최종적으로 튜토리얼로 주어진 코드가 정상적으로 실행할 수 있었다면 아래와 같은 결과들을 확인할 수 있습니다.
기타
VEP configuration
S3 버킷에서 해당 json파일 객체를 선택하고 Copy S3 URI를 클릭합니다.
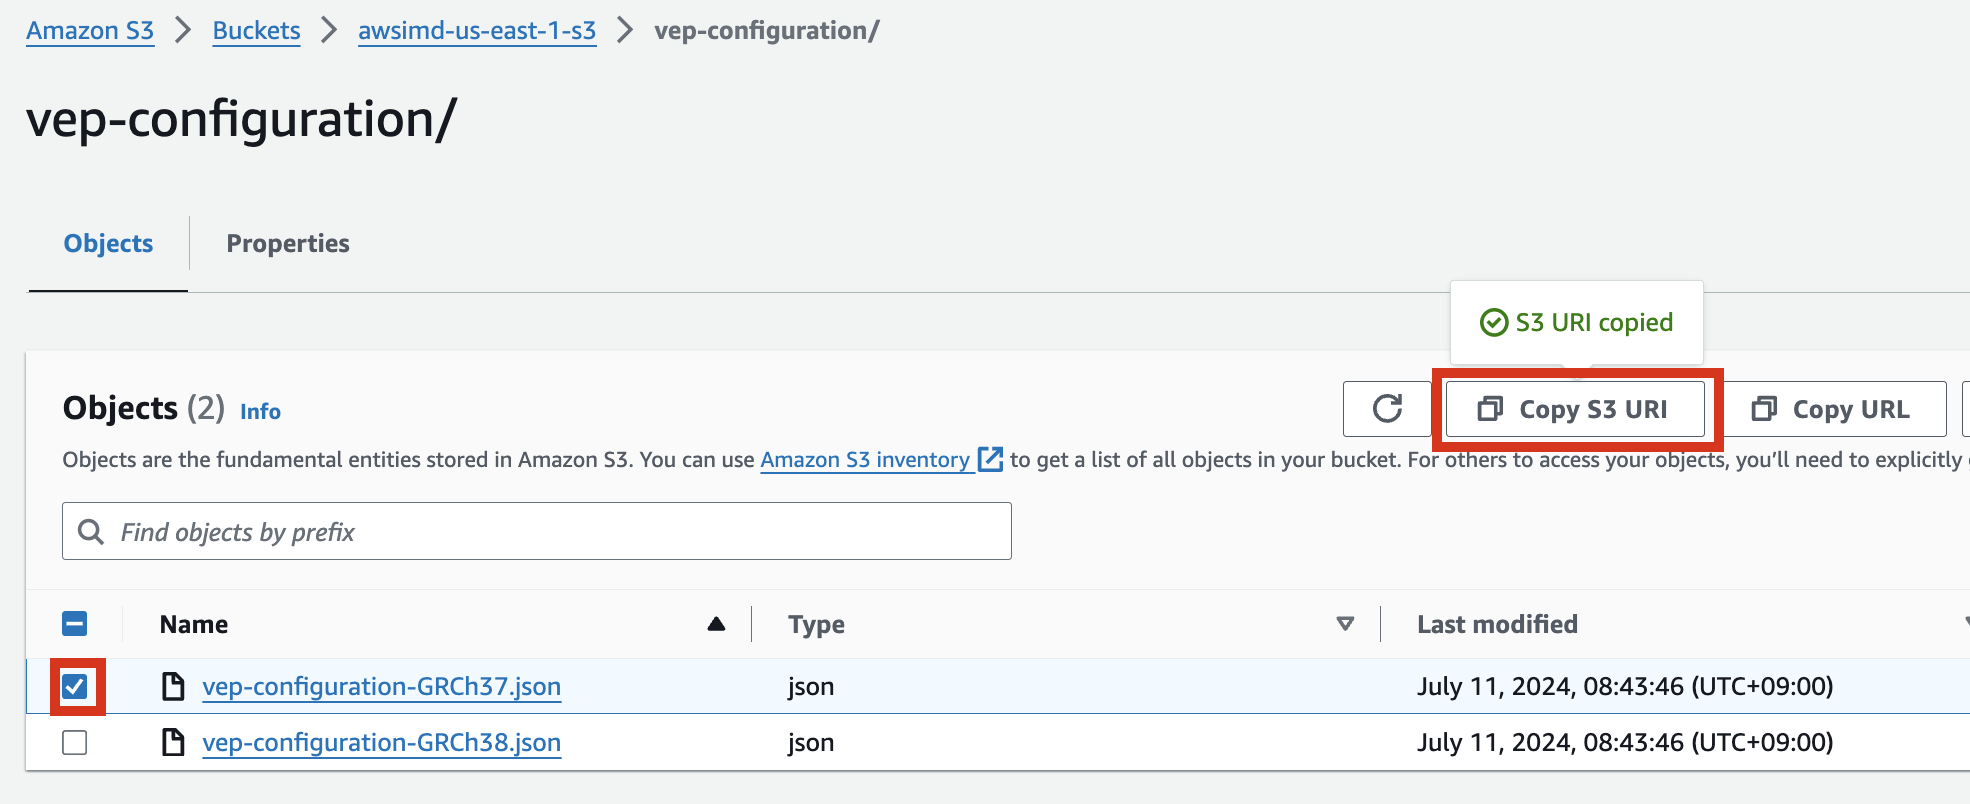
예시) vep-configuration-GRCh37.json
{
        "command": [
                "/opt/ensembl-vep/vep",
                "--format", "vcf",
                "--dir_plugins", "/opt/vep/plugins",
                "--dir_cache", "/opt/vep/cache",
                "--json",
                "--everything",
                "--allele_number",
                "--no_stats",
                "--cache", "--offline",
                "--minimal",
                "--assembly", "GRCh37",
                "--plugin", "LoF,human_ancestor_fa:/opt/vep/loftee_data/human_ancestor.fa.gz,filter_position:0.05,min_intron_size:15,conservation_file:/opt/vep/loftee_data/phylocsf_gerp.sql,gerp_file:/opt/vep/loftee_data/GERP_scores.final.sorted.txt.gz",
                "-o", "STDOUT"
        ],
        "env": {
                "PERL5LIB": "/opt/vep"
        },
    "vep_json_schema": "Struct{assembly_name:String,allele_string:String,ancestral:String,colocated_variants:Array[Struct{aa_allele:String,aa_maf:Float64,afr_allele:String,afr_maf:Float64,allele_string:String,amr_allele:String,amr_maf:Float64,clin_sig:Array[String],end:Int32,eas_allele:String,eas_maf:Float64,ea_allele:String,ea_maf:Float64,eur_allele:String,eur_maf:Float64,exac_adj_allele:String,exac_adj_maf:Float64,exac_allele:String,exac_afr_allele:String,exac_afr_maf:Float64,exac_amr_allele:String,exac_amr_maf:Float64,exac_eas_allele:String,exac_eas_maf:Float64,exac_fin_allele:String,exac_fin_maf:Float64,exac_maf:Float64,exac_nfe_allele:String,exac_nfe_maf:Float64,exac_oth_allele:String,exac_oth_maf:Float64,exac_sas_allele:String,exac_sas_maf:Float64,id:String,minor_allele:String,minor_allele_freq:Float64,phenotype_or_disease:Int32,pubmed:Array[Int32],sas_allele:String,sas_maf:Float64,somatic:Int32,start:Int32,strand:Int32}],context:String,end:Int32,id:String,input:String,intergenic_consequences:Array[Struct{allele_num:Int32,consequence_terms:Array[String],impact:String,minimised:Int32,variant_allele:String}],most_severe_consequence:String,motif_feature_consequences:Array[Struct{allele_num:Int32,consequence_terms:Array[String],high_inf_pos:String,impact:String,minimised:Int32,motif_feature_id:String,motif_name:String,motif_pos:Int32,motif_score_change:Float64,strand:Int32,variant_allele:String}],regulatory_feature_consequences:Array[Struct{allele_num:Int32,biotype:String,consequence_terms:Array[String],impact:String,minimised:Int32,regulatory_feature_id:String,variant_allele:String}],seq_region_name:String,start:Int32,strand:Int32,transcript_consequences:Array[Struct{allele_num:Int32,amino_acids:String,appris:String,biotype:String,canonical:Int32,ccds:String,cdna_start:Int32,cdna_end:Int32,cds_end:Int32,cds_start:Int32,codons:String,consequence_terms:Array[String],distance:Int32,domains:Array[Struct{db:String,name:String}],exon:String,gene_id:String,gene_pheno:Int32,gene_symbol:String,gene_symbol_source:String,hgnc_id:String,hgvsc:String,hgvsp:String,hgvs_offset:Int32,impact:String,intron:String,lof:String,lof_flags:String,lof_filter:String,lof_info:String,minimised:Int32,polyphen_prediction:String,polyphen_score:Float64,protein_end:Int32,protein_start:Int32,protein_id:String,sift_prediction:String,sift_score:Float64,strand:Int32,swissprot:String,transcript_id:String,trembl:String,tsl:Int32,uniparc:String,variant_allele:String}],variant_class:String}"
}
vep-tutorial 코드에서 아래 내용에서 위에서 복사한 S3 객체 URI로 수정하여 사용할 수 있습니다.

VEP 플러그인 설치
만일 VEP의 플러그인 설치에 변경사항 (추가 등)이 있다면 AMI를 다시 만들어야 합니다. 이 때 AMI를 만들 데 사용되는 VEP 설치에 관한 코드는 vep_install.sh 입니다. 해당 코드를 수정 후 다시 AMI를 빌드합니다.
다음을 참고하여 커스텀하게 Hail, VEP 툴을 설치 및 AMI를 빌드할 수 있습니다.
EMR 클러스터 EBS (HDFS) 동적 볼륨 늘리기
- 데이터가 클 경우 사전에 클러스터상에 구성된 볼륨의 용량이 부족할 수 있습니다. 아래 블로그 내용을 참고하여, EBS 볼륨의 부족분을 동적으로 늘릴 수 있습니다.
https://aws.amazon.com/ko/blogs/big-data/dynamically-scale-up-storage-on-amazon-emr-clusters/